A blog about my wargaming projects, armies and battles. The ups and downs of my imagi-nation, Medetia, is one focus, but like most gamers my interests extend into lots of other areas too.
I am slowly working through the basing of a few batches of figures painted over the winter. I’ll post them as I finish them, here are the first few.
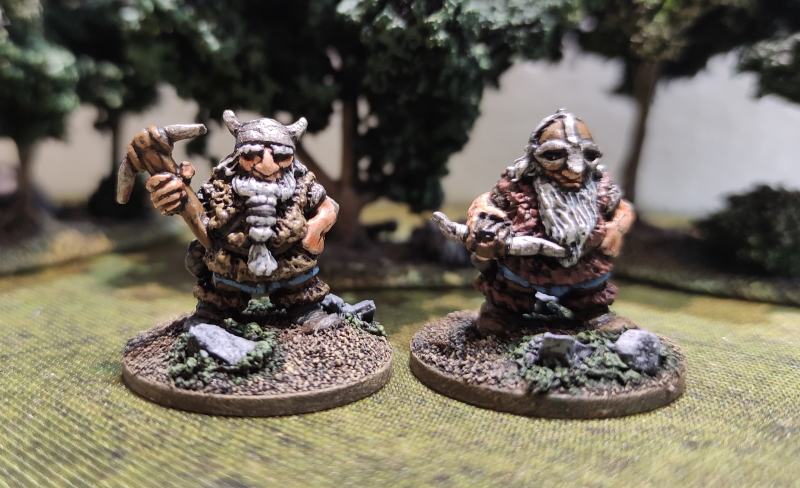
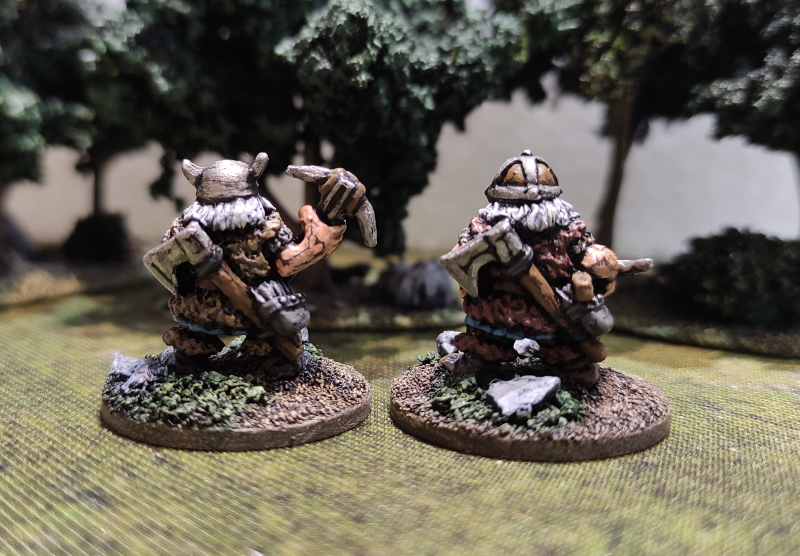
Two crossbow-armed dwarves, classic Citadel figures from the 80s that recently received a re-paint. The guy holding the crossbow up was the original figure for my first ever D&D character, Athor. He’s almost old enough to qualify for a vaccine jab! Painting them as veterans seemed appropriate.
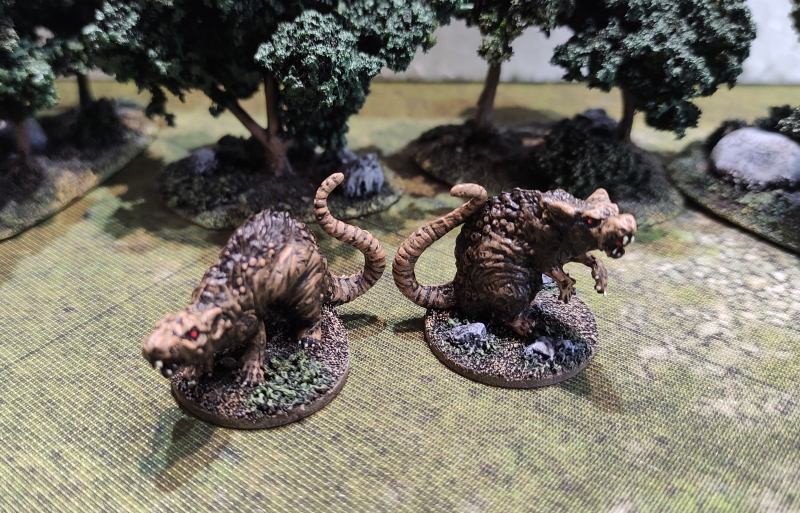
Next, a couple of very large rats from the Reaper Bones range. When used with 15mm figures they’ll be absolute monsters.
Another Reaper Bones figure below, this one is an Undead Dwarf.
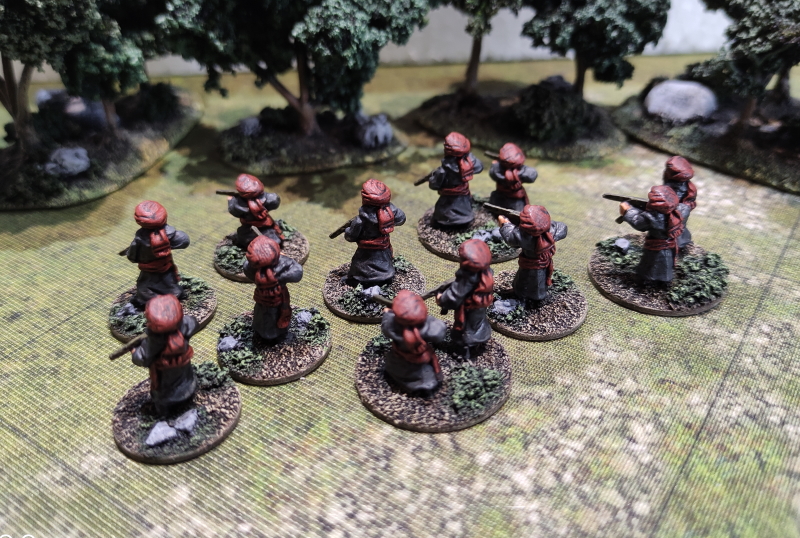
Finally, the remaining unit for my previously-posted 15mm Sci-fi Friendlies force (based on the Dorsai novels). These are militia fighters, from CP Models.
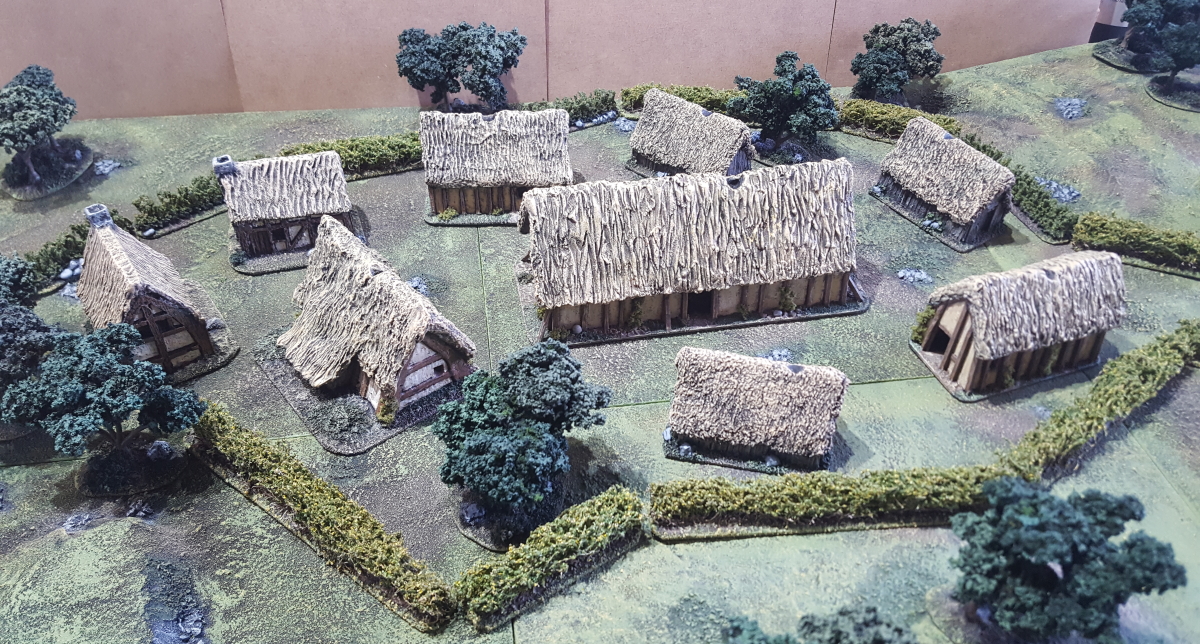
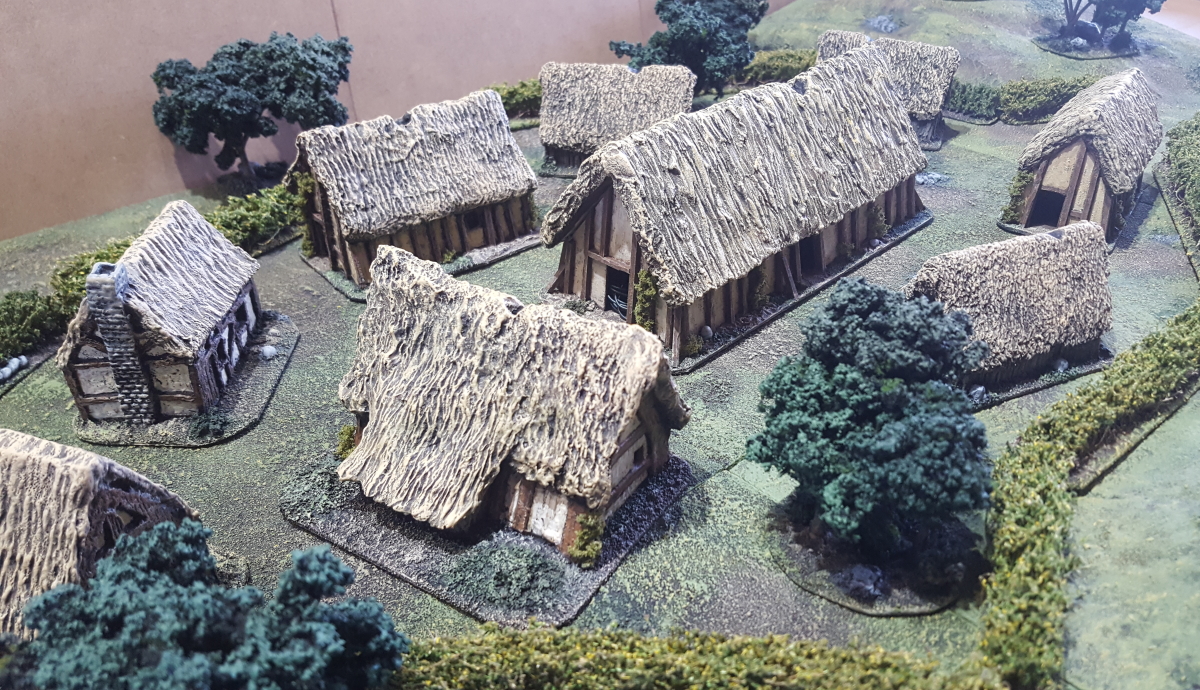
I recently bought some resin models from ebay to add to the few I already had. This prompted a long overdue re-paint of the thatch on the older buildings, which were a bit bright and yellowy for my current taste. Some bases also needed a bit of work, so getting the new ones in
Scratchbuilt longhouse, from many moons ago
Next I want to add a watchtower and some wattle fencing. Hopefully soon…
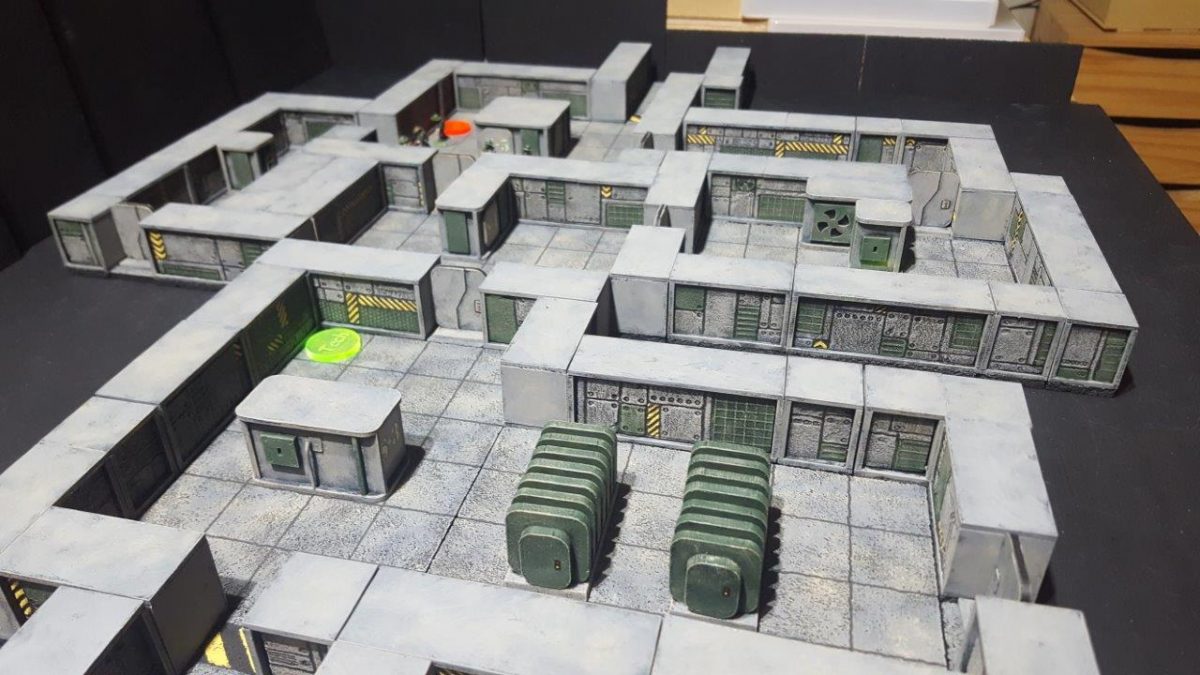
This game, a spin-off from my dungeon adventure game, was designed to be mostly 2 dimensional – by which I mean floor tiles for rooms and corridors, but with some vertical features such as doors and internal machinery.
Naturally, expansionist ideas got the better of me and I started picturing walls enclosing the spaces, to help develop the atmosphere and claustrophobic feel.
Not fancying the huge task of modelling the detail on 12 feet of 1 inch high walls, I was saved by the loan of a Green Stuff World roller, designed to press suitable generic sci-fi detail into soft material. It worked a treat on styrofoam.
After a false start, when I realised I didn’t have the means or talent to accurately and consistently cut perfect styrofoam strips, I decided to upgrade the design to include MDF frames. These would allow me to insert 2 pieces of indifferently cut 10mm rollered styrofoam. The frames would provide structure and allow everything to be lined up neatly in the game. I made a decent number each of 1, 2, 3 and 4 inch long sections, each 1 in deep and a total of 33mm tall when based on cork tile (matching the room tiles).
The timber yard: mdf components from Warbases ready for assemblyAssembly done. Looks like a model of a TV warehouseRollered sytofoam pieces cut to (approximate) size to fit into frames
Lots of gluing then ensued.
Then lots of undercoating everything black, with 2 coats. This was definitely the most tedious stage and nearly defeated me!
Finally, the quick bit always seems to be the actual painting. I stuck with the pallet I’d used for the existing features, grey, green and a bit of ‘warning’ yellow here and there. Finally a sandy dry-brush and picking out the rollered panel edges with a fine tipped maker pen.
After some months of start-stop effort, they’re finally done. There’s enough for a typical game, with half a dozen or so rooms and corridor sections. When lockdown ends, it’ll get a proper run out.
My painting over the November/December period wasn’t hugely productive, but I did manage to finish a Sci-fi force. Like most of my other projects, these guys have been languishing for a good few years, and it was good to finally get them done.
They are a force for Sci-fi Rampant (which is basically Dragon Rampant with carefully allocated unit types and upgrades, as referred to in previous posts).
The inspiration comes from Gordon R. Dickson’s Dorsai novels, specifically the mercenaries hired out from the Friendlies, a pair of planets populated by an intensely religious sect. They’re mediocre troops, but well disciplined. To make them more interesting I have sort of blended this background with the attack-minded doctrine and unit types of the Soviets in WWII.
The core is therefore made up of large squads of close assault troops (12 figures per squad compared to the usual 6 for better quality units), backed up by heavy weapons, mortar/artillery spotters, snipers and a bit of assault armour. There are 60 figures, all from GZG (the tank is from Brigade Models). The one addition I’m making is a further squad of 12, using CP Models figures in turbans. These are painted but not yet based.
I’m looking forward to trying this lot on the table. They’re going to take a lot of casualties going in but with their sheer numbers, and black uniforms, they should be a daunting sight for the enemy!
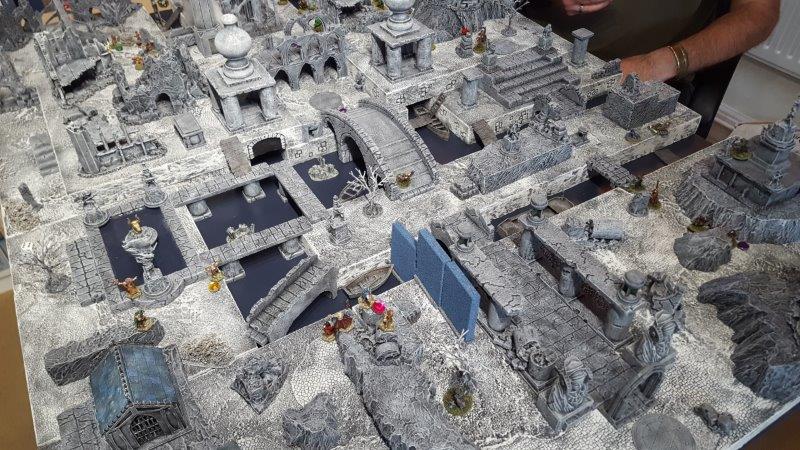
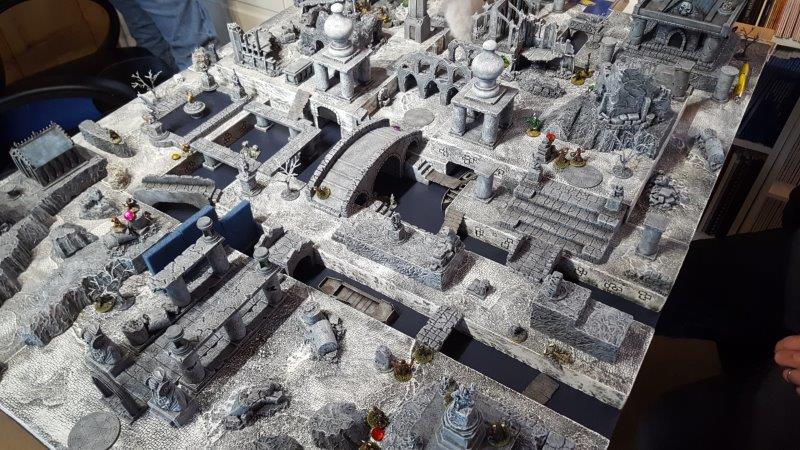
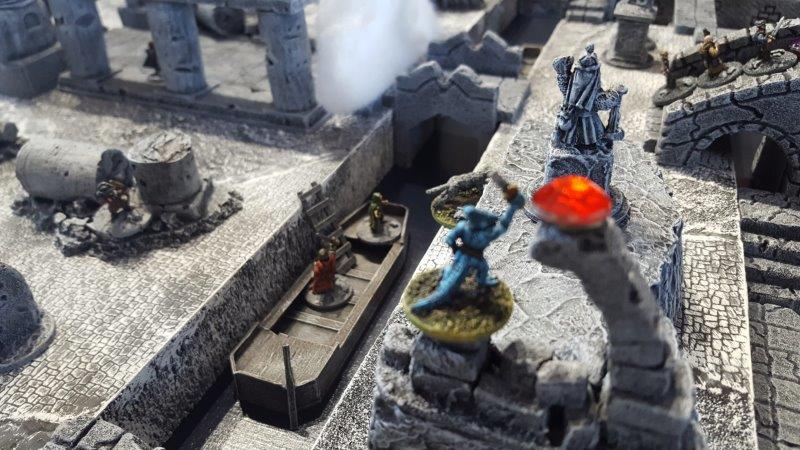
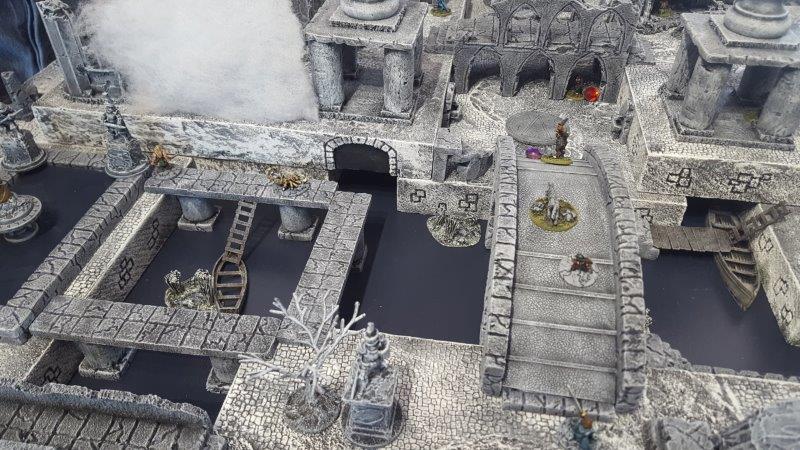
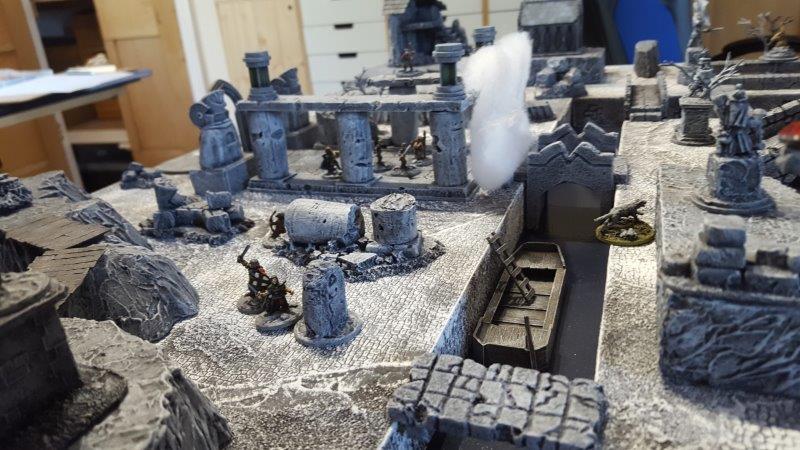
I just came across these pictures from a 4-player game played back in July 2019, which I don’t appear to have posted. I thought it would be a good way to get going with the blog again this year.
This was a basic free-for-all style scenario with treasure to grab and opponents to back-stab. Lots of fun was had and hopefully we can get this group back together again sometime for a re-match. Each visiting player painted and brought their own warband, which was a very good effort considering no-one really had any 15mm fantasy figures beforehand.
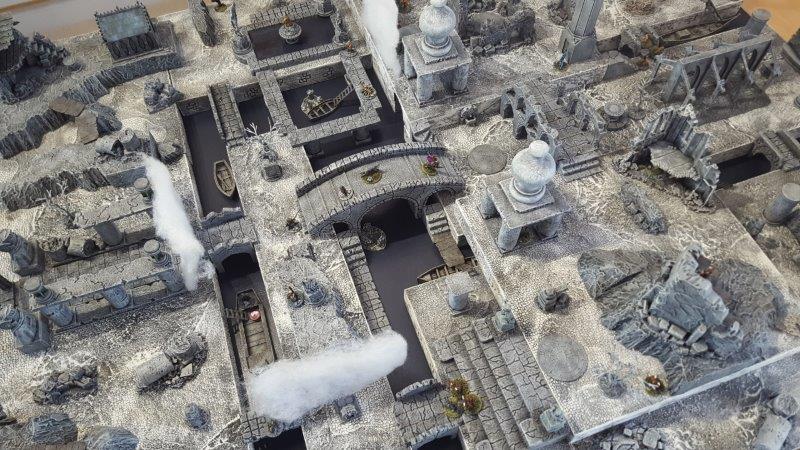
The game was played on a 4’x3′ table, using my water base and canal features for the first time. Some of the pictures show fog and wall spell effects in use, and gems for treasure.
I’ll try to get back to more regular posts in 2021. It’s not a new year’s resolution, just an general intention!
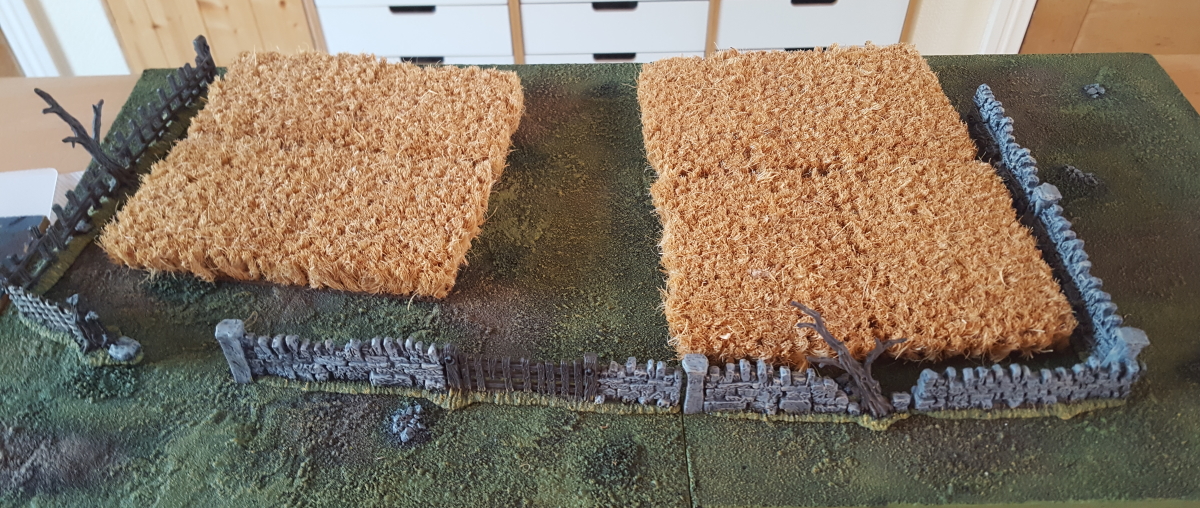
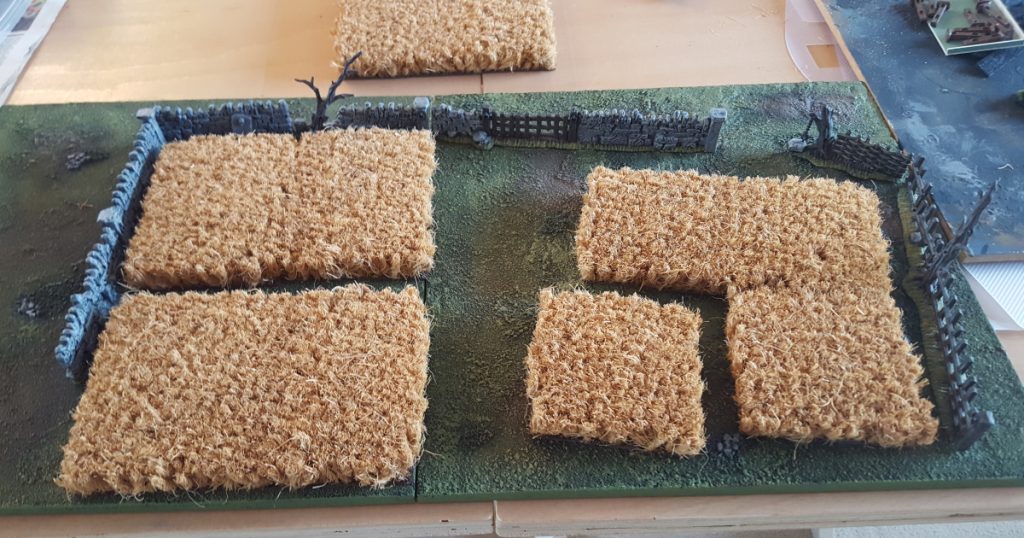
Following on from my 6mm fields, I’ve upscaled and added some for 28mm. These take the standard wargamer route; chopped up doormat material. I found a helpful ebay shop that sells it by length (50cm wide), so I simply ordered 1 metre, dontated 80cms of it for a new front door mat and used the rest for these fields.
Very little of the rubber bases show, so I just painted them brown to blend in with the terrain boards. I cut the pieces into smaller sections for flexibility and for removal of part of a larger combined field when figures need to be placed inside. I only needed a small amount, so all in all, not bad for a couple of quid (the rest of the mat was about £10).
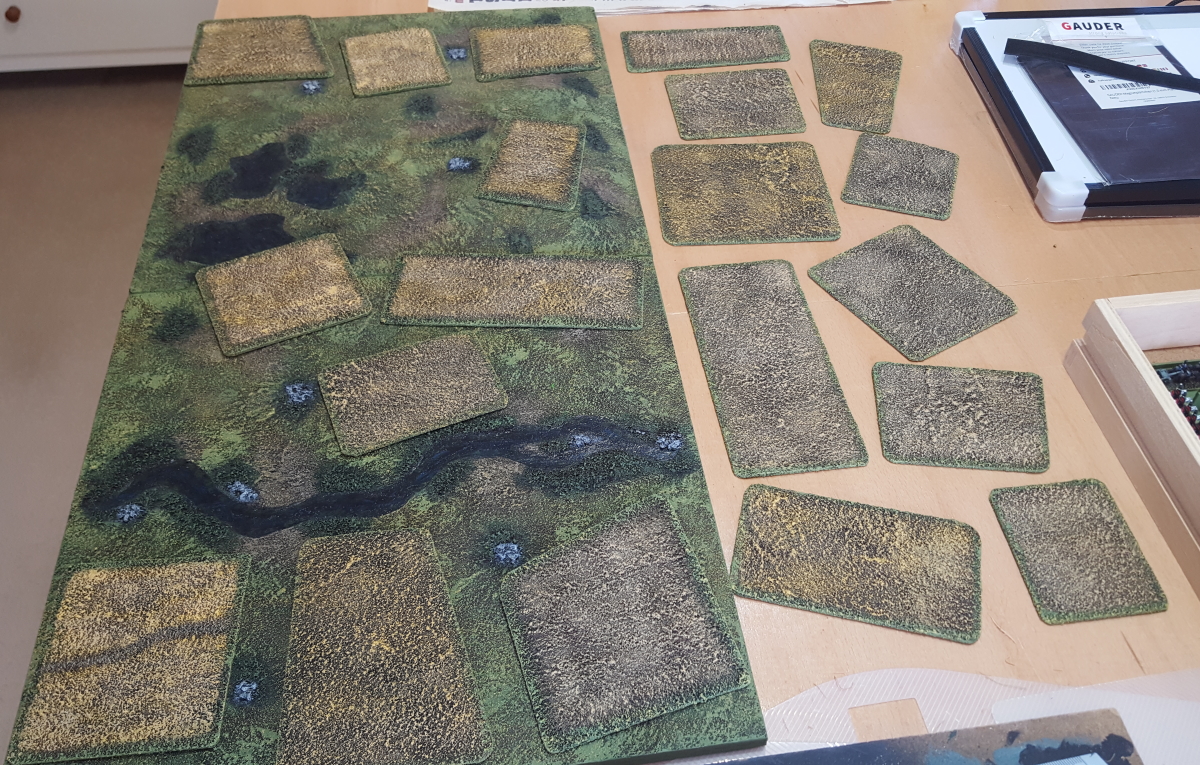
There’s something nice about making wargame terrain and scenery that isn’t going to warp in the future – so working with neoprene sheet has been a revelation for me. My first efforts focused on some islands for naval games (more on that soon) but recently I decided it would be good to make some textured fields for 6mm games.
My test pieces were cut out of 1.5mm thick neoprene (a few quid for a square metre off ebay) and textured with my usual combination of Sandtex masonry paint and builders’ sand. I then reduced the production time for the second batch by texturing and painting a larger sheet (about a foot square) and then cutting it up and texturing the edges.
As long as I don’t try too hard to crack the textured surface, the end result is robust and flexible. I know some people have had great success with caulk as the coating layer, which I think provides a greater level of flex, but as I’m not intending to roll these pieces up the paint is proving sufficient.
I used a relatively limited pallet for the field colours, focusing on a wheatfield or recently-cropped look. I decided to edge the fields in green to match and blend in better with the terrain boards.
I am also making some field edges – mostly strips and corners of rough hedges and trees – to put around some of the fields. Keeping them separate makes for easier storage, as the fields can simply be stacked together.
I had been considering making some terrain boards with 6mm fields painted on, but these place-down fields have given me a more flexible (haha) solution. I aim to get these on the table for the next Rhine War battle in the coming weeks.
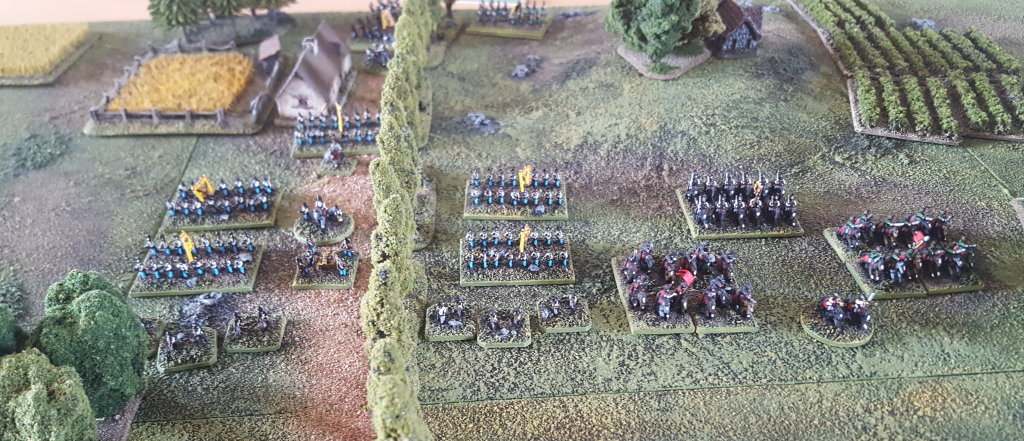
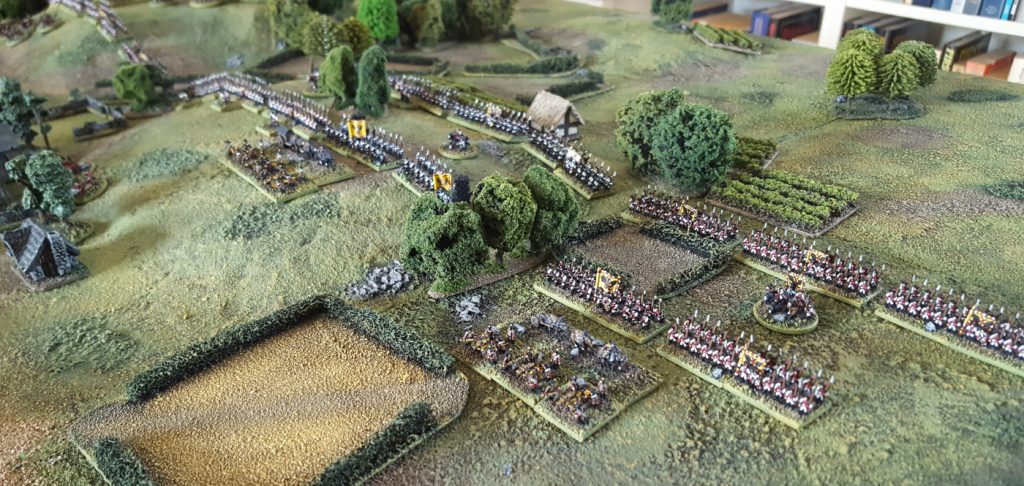
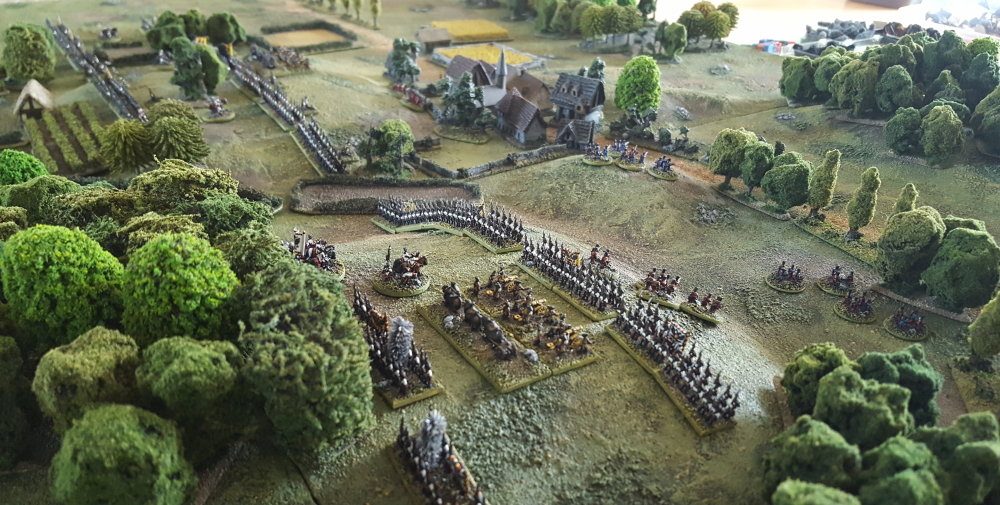
Without the customary Austrian dithering, General von Blomberg went straight into the attack, ordering his lead battalions to form up for an immediate assault on the French position.
Formed up for the attack, with cavalry support on the flank
With only a shallow stream to cross, the cavalry peeled off to the left to find a way to outflank the French.
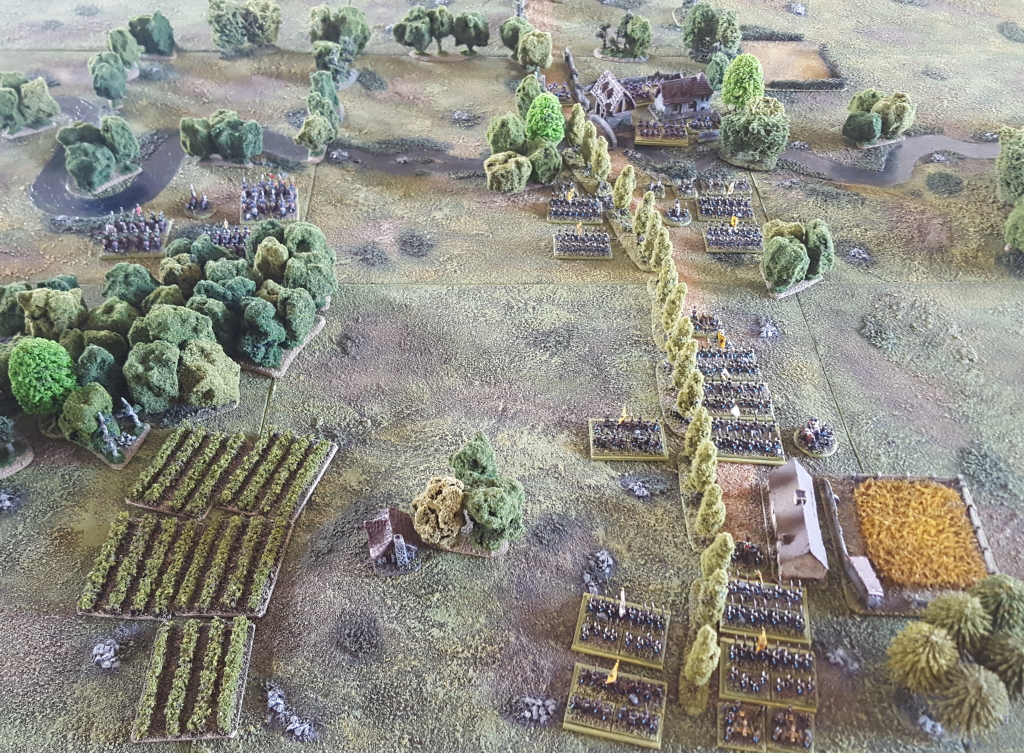
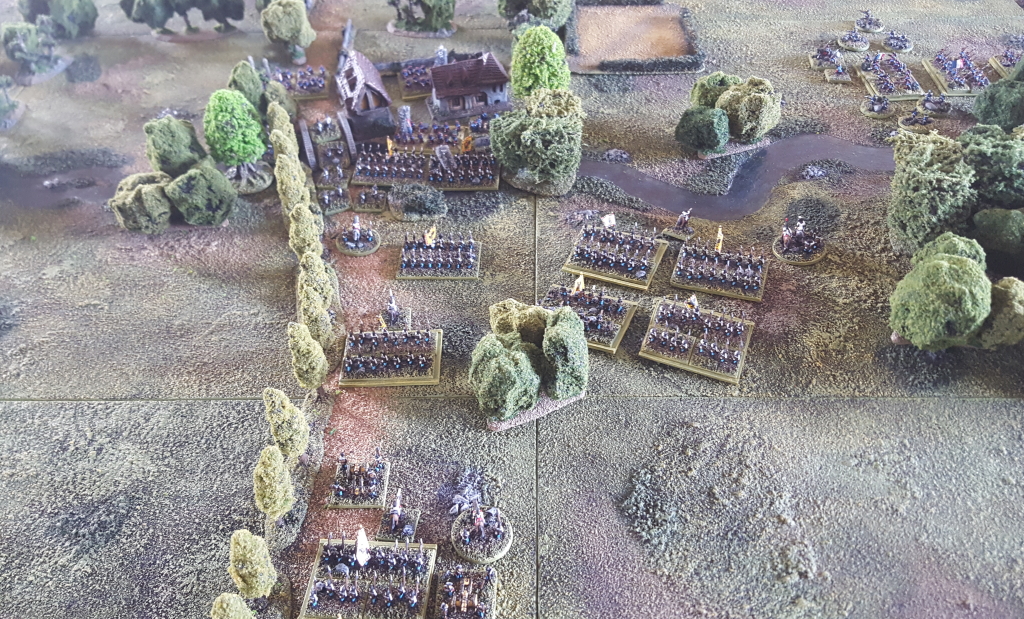
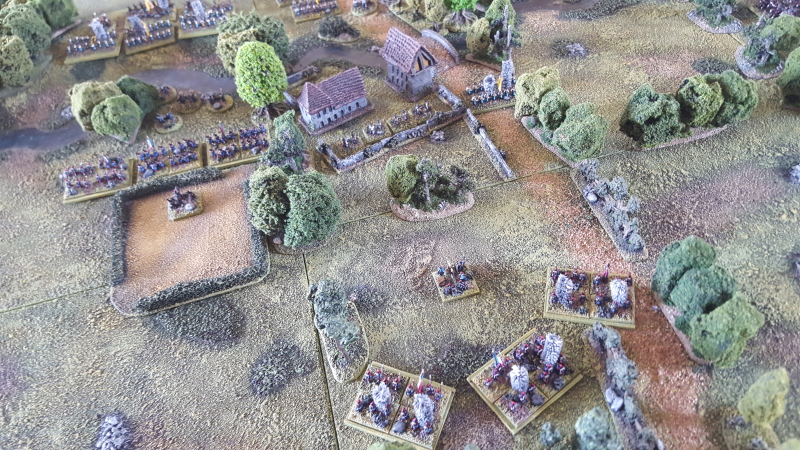
Confident his initial attack would clear the way, the Austrian General was happy to allow a bit of a traffic jam to build up.The French Colonel’s call for help elicited a surprisingly quick response from the rest of the Brigade, which came at the double along the waterway
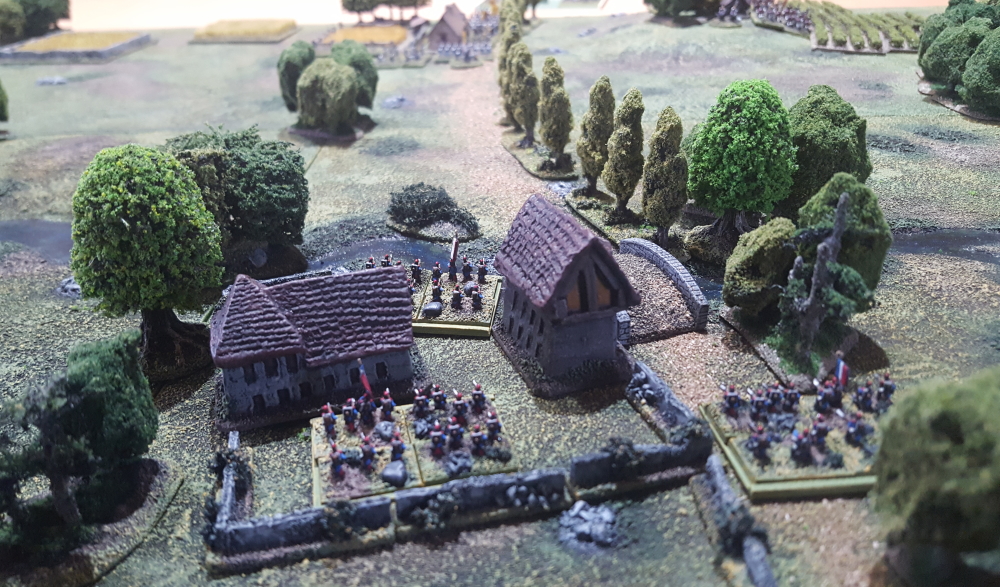
As their attack on the inn was about to start, the Austrians were alarmed to see a French regiment approaching at speed along the other side of the stream. Fortunately the reserve battalions were still in column and were able to be quickly diverted onto the high ground overlooking the waterway, and the newly arrived enemy.
Austrian units are sent to the right to counter the new French arrivalsThe Austrians storm the inn and the bridge, but the outnumbered French refuse to budgeThe French reinforcements deploy and exchange fire with the Austrians on the other side of the stream, causing early casualtiesGeneral view, with the Austrian cavalry over over to the right having crossed downstream
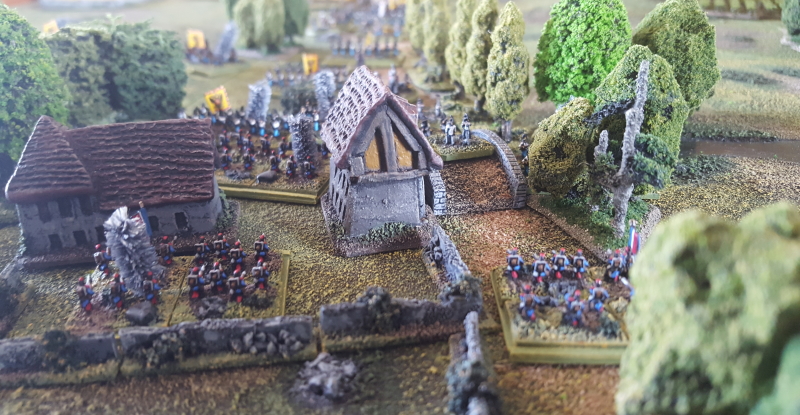
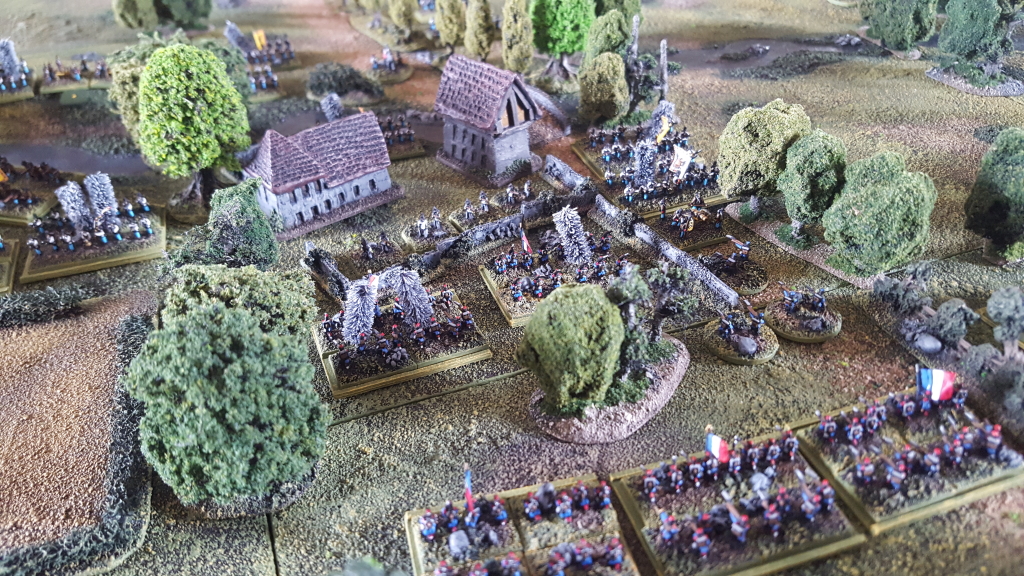
The Austrian attackers stubbornly ground forward, and after half an hour of fierce fighting they ejected the French from their original position.
The French are thrown out of the inn in disarray
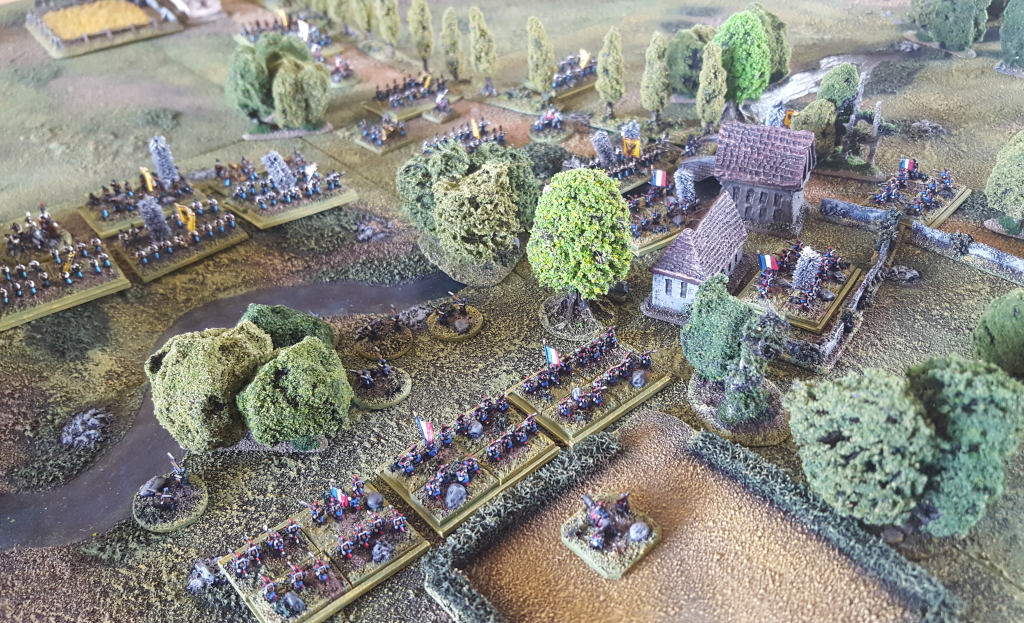
The 2nd French regiment pulled back to maintain contact with the retreating units and, believing this was their moment, the Austrians pursued off the hill and across the stream. It was a rash move, and brought them under intense fire from two sides. Having suffered heavy losses, they were ordered to withdraw and were a sorry looking lot when they finally made it back to the high ground.
Riddled by musketry and artillery fire, the Austrian right flank is about to withdraw
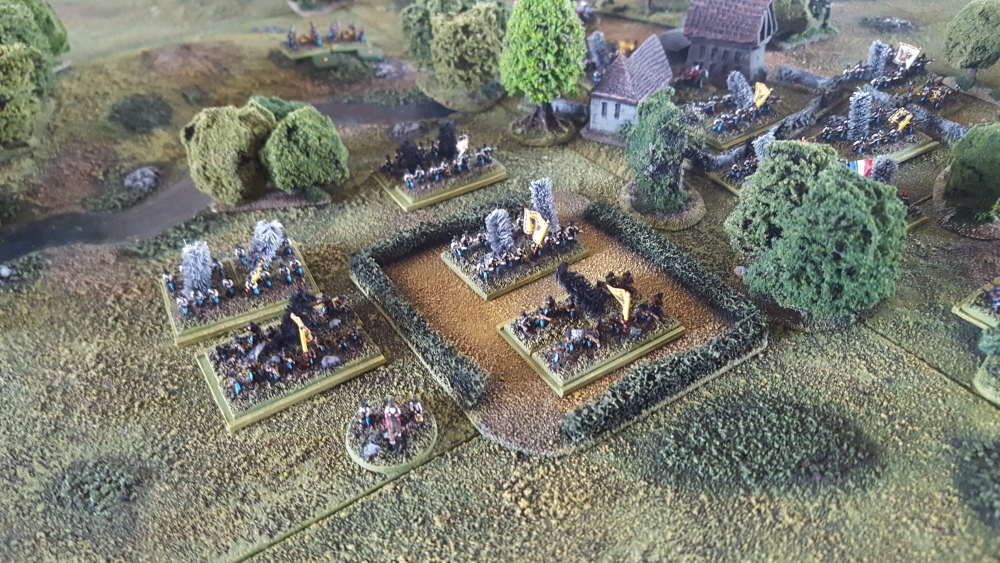
Elsewhere the French had received further reinforcements in the form of another brigade of infantry, and one of cavalry. The infantry shored up the line and counter-attacked at the inn, only to be eventually repulsed. The cavalry were charged by their Austrian counterparts and honours were largely even in this melee – until the French brigadier was killed, causing disruption and a command vacuum on this flank.
The French counter-attack with fresh troops, but make little headwayLosses mount as the cavalry come to blows. The French commander is about to be cut down
From his vantage point, Von Blomberg took stock of the situation. Although victory appeared close, with the sudden the loss of one of his brigadiers, heavy casualties to his infantry, and his cavalry out of position, he realised that he could not risk prolonging the battle. The bridgehead across the stream was isolated, so he reluctantly he gave the order to withdraw. The relieved French gladly let them go. Both sides would need time to recover and their commanders were soon to be writing hasty dispatches to headquarters asking for orders and reinforcements.
The Austrian invasion in the south was halted, for now.
Final view, with the Austrians about to give up their hard-won ground
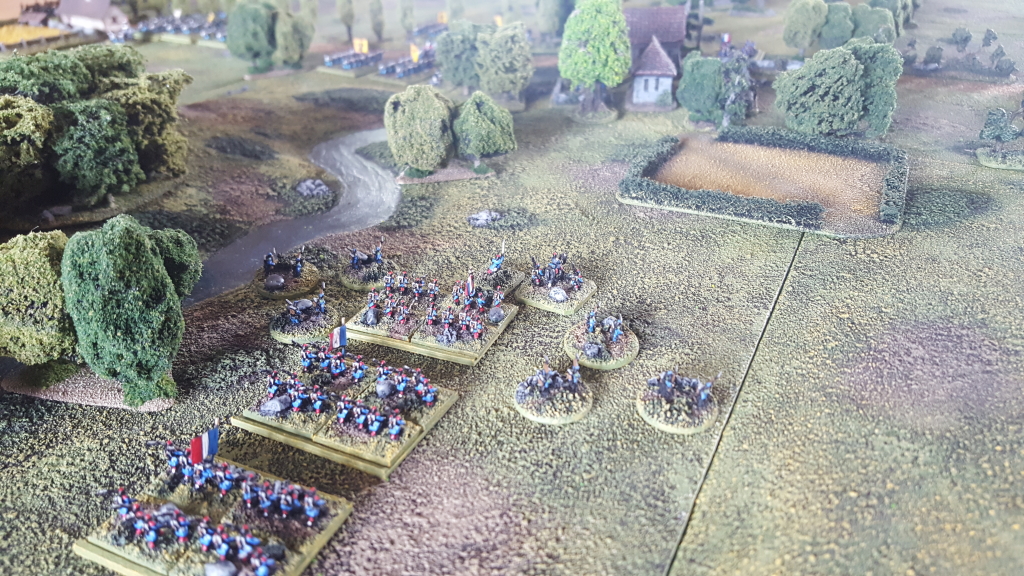
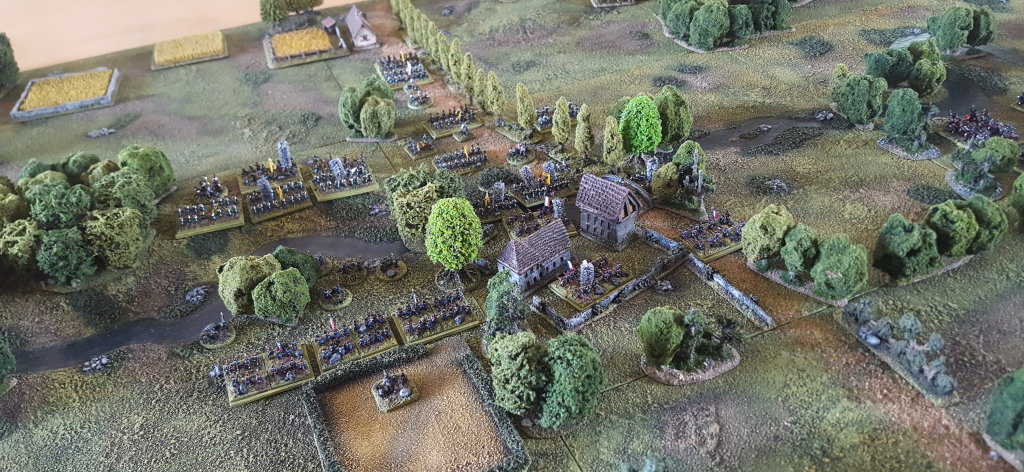
With drums beating and much fanfare the Austrians finally marched into the war. Baron von Blomberg’s Division had set off from Ravensburg 2 days earlier and, after crossing the Danube at Blochingen, his cavalry patrols reported French troops covering a river crossing just short of Sigmaringen.
Stand to!
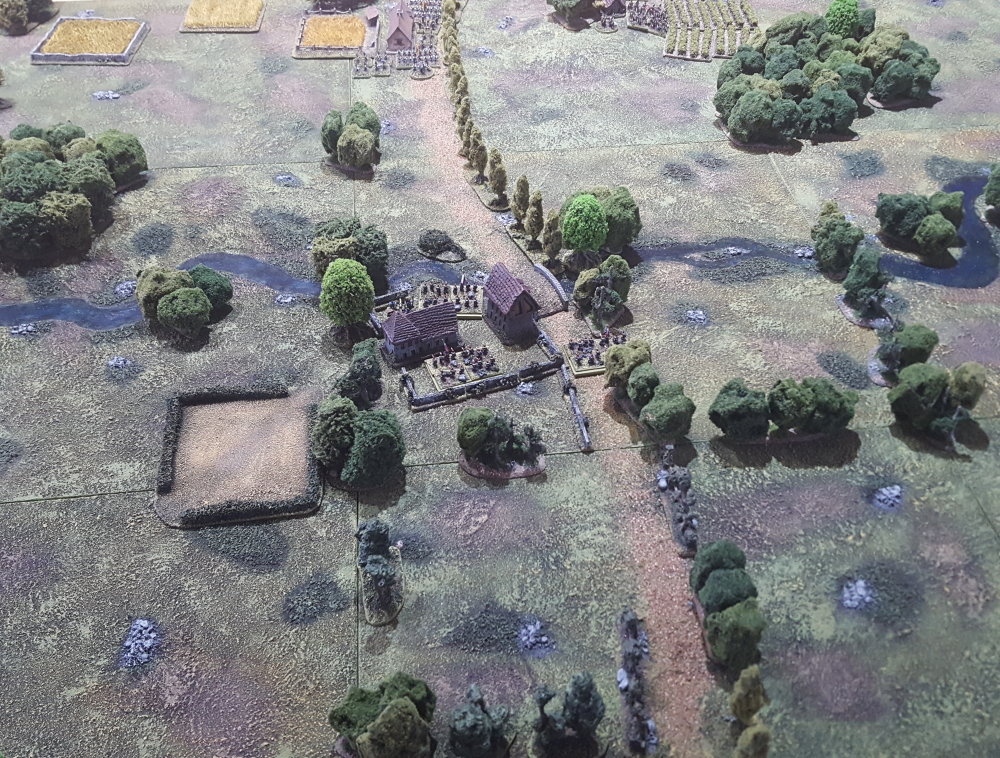
The French were a regiment and one battery from General Epinasse’s 1st Division of I Corps, which had been ordered to guard a bridge on one of the Danube’s tributaries. Sensibly, the French were bivouacked around the inn conveniently situated beside the bridge, and their officers had been enjoying a most comfortable stay while their men camped outside.
The French at the Inn see the Austrian column bearing down on them
Alerted by the sighting of the Austrian scouts the Colonel assembled his men and messengers were sent to the rear and along the river in both directions, calling for reinforcements. Before any help arrived, the first Austrian infantry could be seen marching down the road towards the bridge…
The view from the other side – just a few French to brush past
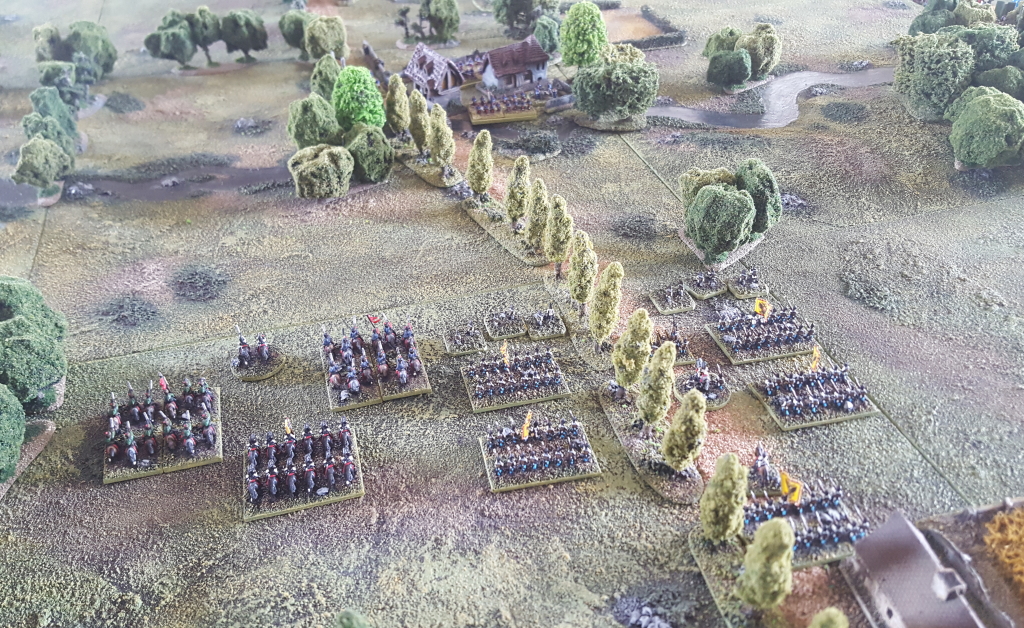
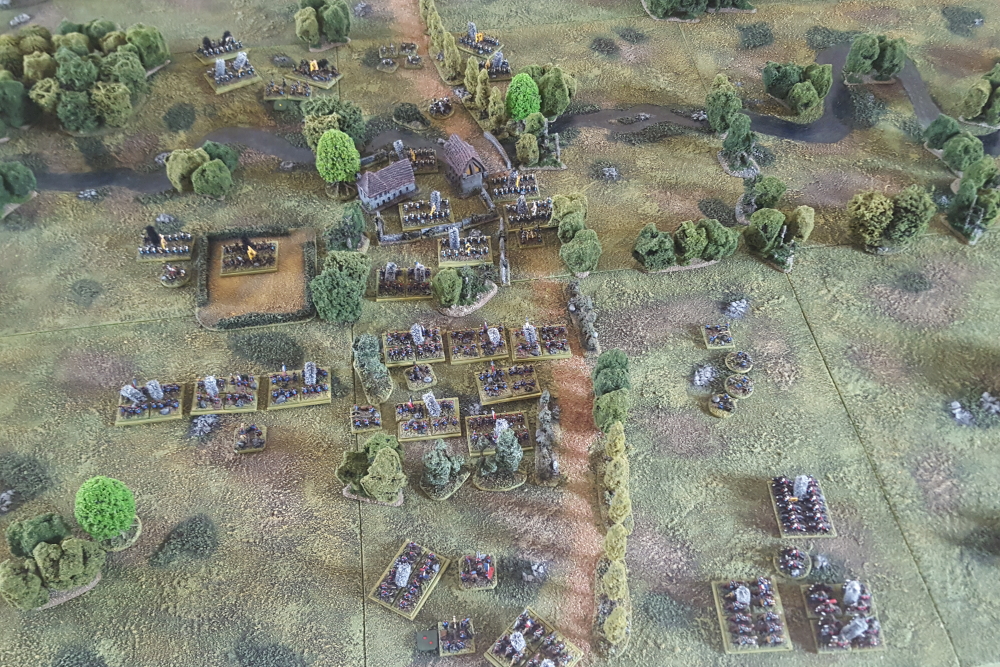
I’ve had a short break from the War of 1855 campaign – it’s been a bit hot and I’ve been a bit busy. However, the terrain from the last game was still on the table and I thought it might look good for some pics of another army.
These are some of my Austrian SYW (and WAS of course) 6mm army. I’ve deployed 20 battalions of regulars and 4 of Grenzers, plus 3 batteries of artillery and commanders. This represents half the target size for the army, which is about 70% done. There’s also the cavalry, which I didn’t set out, of which I’ve done 20 of the intended 32 units.
It’s been a few years in the making, but it’s getting there. The Prussians have recently overtaken them in terms of completed numbers, so I’ll aim to post some pics of them sometime.