Messing about on the water

Seeing as my order to Ainsty Castings finally arrived last week, I decided to get stuck in and paint everything rather than have it sit around for a few weeks before being filed away under the heading ‘stuff I bought but now I’m not sure why’.

So, 2 boats from Games of War (as posted about previously) were now joined by a rowing boat and jetty set from Ainsty. The latter are traditional resin, nice and heavy and with lots of good wood grain effect. They took a black undercoat very easily and I was good to go. The same can’t be said for the more plastic-based Games of War boats which, although very nice models, utterly rejected any water-based paint despite me giving them a wash beforehand. After my third effort with a different paint I was tempted to look over my shoulder to see if there was a Candid Camera crew filming me. In the end I resorted to a solid blast with some matt black spray paint, and all was well.

Although I’d considered painting one of the boats in white to look a bit smarter, in the end everything, jetties included, got a 3 tone layered drybrush of Colour Party earth brown, Crown matchpot mid-grey and Vallejo Iraqi Sand. I like the weathered wood look this combo gives, and it’s incredibly quick – even to the point of no brush cleaning between shades and no real need to wait for anything to dry fully before going in with the next colour.

After about an hour or so’s painting I now have a few modest scenery pieces for messing about on the water in 28mm. They’ll serve for river and lake-side features and give me some transport for skirmish games. Who knows, I might even get something a little bigger to go with them, there are several nice schooners and cutters out there to choose from..

Ainsty boat on the left in the first pic, the other 2 are from Games of War:


Slow progress but a few recent additions

What with a busy social schedule and a general lack of effort, I’ve not achieved much in July. Not feeling particularly big project-motivated, I’ve dabbled with a few bits and pieces instead. I’ve prepared a few items of scenery and some random figures for painting at some point in the future, and tried to press on with finishing the GW Fortified Manor, which has presented a bit of a painting desk blockage while it remains part-done.

I have managed to complete a few small items though. One 6mm cavalry unit for my 17th century Fleurians (Heroics & Ros figures as always) and a couple of 28mm figures for the same period but in skirmish size. These are a replacement for the regularly-skewered Lieutenant St Denis, one Capitan Sancerre, a Redoubt figure brandishing a sword. I’ve also painted a Warlord Games armed priest which might be useful for general use across a number of periods.

Hopefully August will be more productive!

Pics:


Once you have rivers, you need boats

I have plans for lots of Sharp Practice games set in the post-Napoleonic period, with Medetia and Fleurie again going at each other, and I fancy having the option for some riverine and amphibious actions. Now that the river bank sections are done, which can also serve as coastline or lake shores, I need a few boats for the men to use to get themselves into all sorts of trouble dealing with currents, contrary winds and the like.

I have scratch-built one in the past as a test piece, and was reasonably happy with it. However, boat building is time-consuming and I decided I’d rather see what was on offer to buy. So far I have liked the look of the Small Row Boat that Ainsty produce, and also fancy two that are available from Games of War.

I decided to order a sample of each, and the Games of War ones have arrived first (very speedy service). These are the Jolly Boat and Tender from their pirate equipment range, and lovely models they are too. They are very detailed and produced in a very light resin-type material, to a high quality. I’m very pleased with them and may order a few more. The added bonus is their price: £5 each, with free postage. The £2.80 postage the package was marked with therefore brings these excellent models down to the equivalent of £3.60 each. That’s a bargain in my book.

Each will hokd about half a dozen 28mm figures on 1 inch bases (such as those below), or a couple more of the 19mm round bases I use for my 19th century forces. That’s fine for my purposes and will pretty much allow a Sharp Practice ‘group’ of about 8-10 figures to be carried in each boat. Handy.

Once the Ainsty order arrives I’ll post a picture of their boat, and the other related item I bought..

St Angelo’s Ghosts

The last figures I painted for the May multi-player extravaganza at Ayton were a unit of Hussars. Having done exactly the same in 2013, I knew what I was letting myself in for – Hussars are not the ideal troop type to have to finish to a deadline, there’s always more detail to find just when you think you’re nearly finished! Still, despite the stress and fatigue of again finishing them on the Friday morning (the day I was travelling..) I now have another unit of Hussars in the collection.

I suspect that if I didn’t paint them to a deadline I would put off doing them indefinitely. Guess what I’ll be painting at the start of next May?!

I didn’t have an opportunity to post about the new unit at the time, but they galloped onto the table after the smoke from the recent battle at Spurlacco had cleared and posed for a few shots.

This unit is part of the Medetian army and was raised by the Cavaliere di St Angelo, a noble from the northern uplands of the country. St Angelo chose to dress his regiment in white and other pale shades and mount them all on greys (a common horse colour in the region) – hence their nickname, ‘The Ghosts’.

The figures are Perry plastic Napoleonic French Hussars, using the mirliton head option, the presence of which in the box is a real boon to people wanting to use them for the 18th century.


The flag is just a bit of clipart from the web, printed as a design onto paper and painted. As with my other Hussars, I want these to be available both for 18th century games (where standard base sizes are needed, hence the sabots) and for early 19th century games (where I need them on single bases for Sharp Practice).

This unit balances out the Fleurian Legion Hussars (Minden Miniatures) and I plan to add another similar sized unit of the same figures respectively to each side in due course (in time for the next two Ayton deadlines I guess!)

Battle honours have yet to be earned by this new regiment, although they didn’t lack for courage at Ayton. They were in the first line of cavalry that dashed itself to pieces against Iain Burt’s guns and infantry (fortunately his cavalry wasn’t on form that day or I’d have been thrashed) in front of Pescadrix. Our war correspondent’s mid-action sketch below..

Ponte di Spurlacco – Final round up

A few days after fighting the battle, I thought I’d jot down some final details and my reflections on the game while it’s still pretty fresh in my mind.

The casualty returns were as follows:

Medetian Army

Braganza Infantry Regiment          7 figures
Sebastiani’s Grenadiers                1 figure
Weissach Grenz                           2 figures
Montanelli’s Cuirassiers                9 figures (unit retired)

Total                                             19 figures (380 men, of whom about half could be expected to return to the colours during the campaign)

Fleurian Army


Bravence Infantry Regiment          18 figures (unit dispersed)
Friant’s Jagers                                2 figures (unit dispersed)
Wurttemberg Jager                        2 figures
Legion de Fleurie Hussars             1 figure

Total                                              23 figures (460 men, of whom about a third could be expected to return to the colours during the campaign)

Not too bloody, all things considered. However, with the Medetians holding the ground at the end of the battle (and therefore capturing some of the Fleurian wounded) and with two Fleurian units dispersing (with inevitable further losses to desertion), the actual result was probably more in the favour of Medetia than the close tactical victory would suggest. Certainly the Medetian main army would now be able to capitalise on its advanced guard’s hard work and gain an early advantage in the campaign.

The next clash would take place on Fleurian soil then. I need to look through other scenarios I have kept over the years (many of them Charles Grant’s Tabletop Teasers) and decide what will offer the most interest and fun next time round.

In terms of the rules, although I still have some reservations about certain bits (generally the ‘weightiness’ of them rather than the quality),  they did play well and give me believable outcomes. Where there were surprises and dramatic events they all felt plausible for the period and unit types involved, and (assuming I interpreted them correctly) coped well with the ‘tricky’ bits such as split units, fighting over bridges and in built up areas, etc. The Ayton games had given me some familiarity with Henry’s rules, although I think they work better for smaller games with fewer units, where you have more time to appreciate the details of the fighting they’re designed to evoke.

I was pleased with the look of the game itself, and although I still think the rivers are a little ‘bright blue’, the gloss paint does offer different depths of colour and levels of reflection depending on the light, which I like. I wasn’t sure about leaving so much of the table empty of scenery and had been tempted to place more trees, walls, rocks, etc, but having manoeuvered fairly large units all over the place, I’m glad I didn’t!

Ponte di Spurlacco Part 4 – The Main Action

With the Medetian heavy cavalry having shrugged off the enemy Hussars’ opportunistic attack, and their infantry driving on the village and bridge, General Amore was feeling confident that the battle was going his way. His men were doing their duty well and his artillery had the Fleurian infantry in its sights.

The action was not decided yet, however.

General Bevue watched anxiously from the other side of the river as his Jager bore the brunt of the Medetian assault. Although they blasted away at the approaching enemy, too few Grenadiers and Grenzers fell to slow the advance.

Closer to the river the Wurttemberg Jager were trying to hold their own against the serried ranks of the Braganza Regiment, who traded a powerful first volley against the constant skirmishing fire of the Jager.

A general view of the battlefield at this time, with the infantry coming to grips, the artillery in place and the cavalry yet to fully engage:

Both sides’ infantry regiments were manoeuvring for control of the bridge but neither seemed keen to storm across it until things were settled in their favour elsewhere.

With the cavalry on the other flank yet to really get stuck into each other, the Fleurian artillery decided to intervene first. With an enfilading volley of prodigious dice throwing, 7 hits were scored on the hapless Medetian Cuirassiers (only 2 were saved) as they struggled to form up on dry ground. This was to be a decisive point in the battle.

The Medetians were tough fighters though. The Grenadiers went in with bayonets fixed and the hard-hit Cuirassiers turned to face the Fleurian Dragoons as though they were unwilling to admit the presence of the guns that were busy re-loading..


The infantry fight continued meanwhile..


The reason everyone has Grenadiers in their army – one turn of fighting and the village was theirs, with the Friant Jager taking to their heels.


The Medetians were about to receive a blow to their chances however, when a second artillery hammer blow was delivered on the Cuirassiers. Reduced to half strength, they were forced to retire, leaving the entire flank open and with only the river to protect the artillery, the Medetian line of communication and, basically, their whole position.

General Amore faced a moment of truth; should he accept that his cavalry’s departure had rendered his position untenable or ignore all that and push on with his attack? From fighting stock going back generations, he wasn’t going to give up now! Over the bridge went the 1st company of the Braganzas. Nearby the opposing lines blazed away at each other, with casualties mounting on both sides.

After suffering some casualties, and being outflanked due to the loss the village, the Wurttemberg Jager splashed back over the river and took up new firing positions. Fearing a collapse, Bevue’s ADC waded into the fray and directed the Bravence regiment into positions to repel attacks from two directions.


Seeing the backs of the Cuirassiers as an opportunity, the Fleurian Hussars benefited from a very good command roll by Bevue and thundered forward at an outstanding pace. The Rutowsky Dragoons left their position on the Medina di Spurlacco and followed the Hussars to threaten the flank of the Medetian artillery..


.. which frantically turned a gun to oppose them.

The Weissach Grenz, having helped the Grenadiers take the village, quickly about-turned and dashed back to protect their precious guns. Would their effort be in vain?

Everything was about to turn on a single moment – the Medetian infantry stormed over the bridge into the Fleurian line. Who would prevail?

The dice favoured the bold – and the defenders routed. The impact of the charge, combined with the losses to musketry from across the river, was too much for them.

For General de Bevue this was the end. Although he had dominance on the left where his cavalry were unopposed, without his infantry and with the loss of the village, the Fleurians could not hold their ground against such an aggressive enemy. He ordered the cavalry to pull back to protect the rest of the force, and his artillery to retire in sections, offering covering fire as they went. There were few orders for his infantry, they weren’t stopping to listen!

A few final pictures as the game came an end and the Medetians consolidated their possession of the vital bridge.


Thank you for staying with my battle account, there were a lot of pictures in the end!

So, I’ve blooded my 18th century armies in the Medetian campaign, had a good time with the rules, and enjoyed a superbly fun wargame – hopefully in the spirit of many of those who’ve inspired me in the hobby.

A final word on the scenario: well done Phil, Spurlash Down is a brilliant introductory game and offers a fascinating tactical challenge – even if you’re controlling both sides!

Ponte di Spurlacco Part 3 – Opening Moves

There was little hesitation on either side, and the first turn saw plenty of movement.
Both armies advanced according to their orders, although the command rolls created some variety in the urgency of their marching. Good old General de Bevue was a bit slow off the mark and the more impassioned Amore got the jump on him a little.

So, to the action:

The Medetians advanced, while their Cuirassiers swung right to cross the river.


The Fleurians, being a nation with a long memory, remembered what had happened to their French allies at Blenheim and decided that the best time to attack was while the enemy’s cavalry was disordered after crossing water. With that, the Legion Hussars galloped forward and prepared to charge the first line of Medetian heavy cavalry as it emerged from the river Asta.


Pagani’s battery got into position overlooking the bridge and unlimbered swiftly, its commander seeking out the first target for its guns.


Meanwhile on the eastern flank, with lots of lighter troops involved, things were moving more quickly. Friant’s Jager company occupied Spurlacco and immediately took up defensive positions to repel the inevitable Medetian onslaught. It was certainly coming; TheWeissach Grenz soon emerge from the woods, supported by Sebastiani’s grenadier company – the perfect assault troops.


The Wurttemberg Jager moved up alongside the village, to provide its defenders with flanking support. With the enemy’s Braganza Regiment coming coming on inexorably it would be require careful decision making from the Jager commander on how long to stay and fight, and when to pull back. Shooting commenced at long range in an attempt to disrupt or at least slow the attack.

Across the River Asta, Rasalle’s battery had deployed in its central position. Although the respective batteries were within each other’s line of sight throughout the battle there was only to be a single attempt at counter-battery fire (when no other target was viable), which had no success. No, the artillery was to ply its deadly trade against horse and foot, as it was trained to do.

Skirmishing began on the edge of the village, with the safely ensconced Fleurians getting the better of their enemies in the initial exchange.

On the other side of the battlefield the lone squadron of Legion Hussars charged home into Sebastiani’s Cuirassiers as they pulled themselves up the river bank. Although outnumbered and outmatched they had momentum and elan on their side.


The clash lacked weight however, and the hussars effectively bounced off their heavier opponents, losing the fight by one.

What had been a daring move of dash and courage soon turned to disaster as the hussars, lacking support and having failed to make a dent in the Medetian regiment, suffered a moment of doubt and made for the rear!

General Amore waved his hat and shouted ‘bravo!’ as his victorious cavalry brushed themselves down and dried themselves off. Although they showed restraint and didn’t take off after the retreating enemy, the Medetians had won a foothold on the enemy side of the river, just as their infantry on the other flank was pushing forward decisively between the village and the all-important bridge…

..and that’s where we need to leave things until the next installment. Will General Amore’s bold plan continue to succeed after such a good start, or would the slow but steady (and often tipsy) General de Bevue be able to turn the tables and provide Fleurie with an early victory in this campaign?

Ponti di Spurlacco Part 2 – Deployment

Generals Amore and Bevue both looked at the ground they would fight over, and in particular the bridge which was the key. The way the land followed the river on either side of the border meant that each advanced guard would be able to easily push forward on its left, while having to cross the river to engage on their right.

General de Bevue, Fleurian aristocrat that he was, despatched the last of his chilled Sancerre and, via his ADC, ordered his forces as follows:

The Bravence infantry regiment was to march swiftly in column towards the bridge and engage any enemy it found there or on the way.
Both Jager companies were to cross the river before arriving in the area and make an immediate beeline for the village of Spurlacco, to hold it against the expected Medetian assault.
The artillery was to deploy in the centre and support everything else, while denying the opposite bank to the enemy.
The cavalry was to operate on the left flank, to prevent the enemy from crossing and threatening the army from that direction.

General Amore sent off a final love letter to his most local mistress and, from the saddle, gave orders to his Medetian units:

All the infantry was to push forward on the left, capture the village and swing right to take the bridge. The Weissach Grenz would operate on the extreme flank, using the spinney (boschetto) for cover.
The artillery would dominate the centre, while the cavalry would cross the river at the start of the action and drive the enemy’s lighter cavalry from the area around the farm, before pushing onto the high ground and making the Fleurian position untenable.

Sensible plans all round then, with more boldness from the Medetians and a bit more ‘wait and see’ from the Fleurians.

Here are some shots of the forces moving onto the battlefield.

From behind the Medetian line:

Fleurian Hussars move ahead of the rest of the army:


Medetian Cuirassiers on the right flank, with orders to wheel right and cross the river:

The Bravence Regiment massed to rush towards the bridge:

Fleurian light infantry ready to make an early descent on the Medetian border village of Spurlacco:

General view from behind the Fleurian left flank, morning sun on the water:

Everything’s set up for the battle then, so I just need to find some dice and try to remember how the rules work! Battle report next.

Ponte di Spurlacco – A Classic Wargame Scenario Re-fought in the Medetian Wars

Having recently enjoyed a re-read Phil Olley’s short-lived but excellent Classic Wargamer’s Journal, I decided to fight a solo game based on the Spurlash Down scenario devised by Phil ( link ), which was in turn based on the famous Blasthof Bridge action from the book ‘Charge!’


Background
The Grand Duke and the King were at war… A good start, and a typical one for this sun-drenched corner of southern Europe in the 1750s.

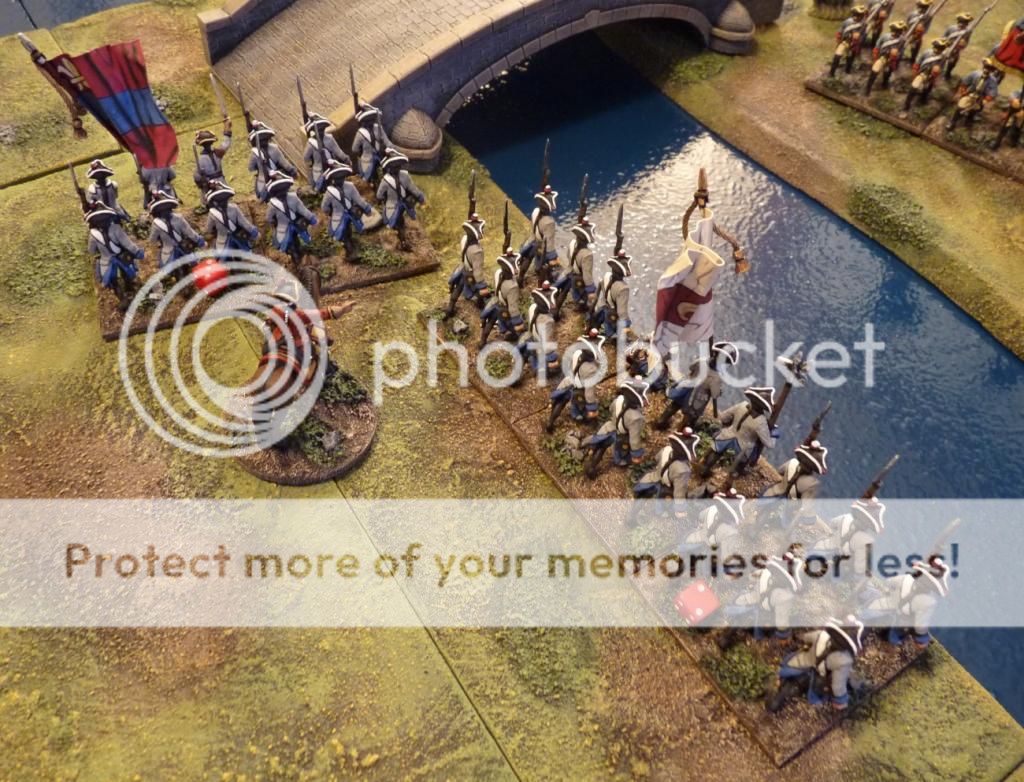
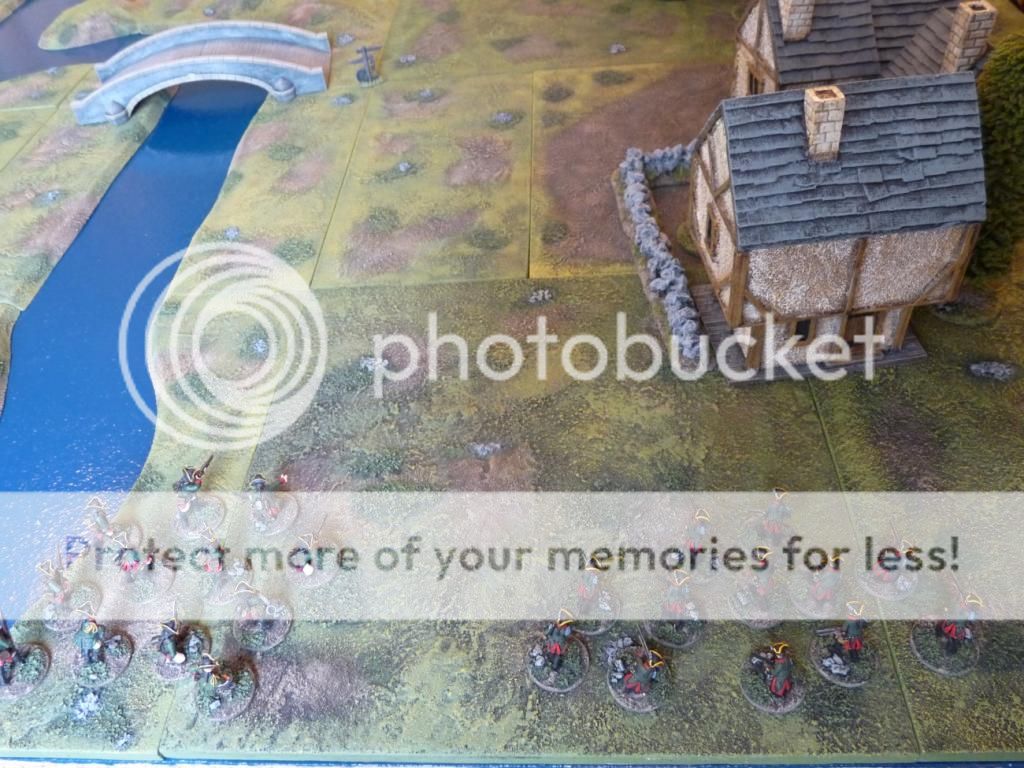
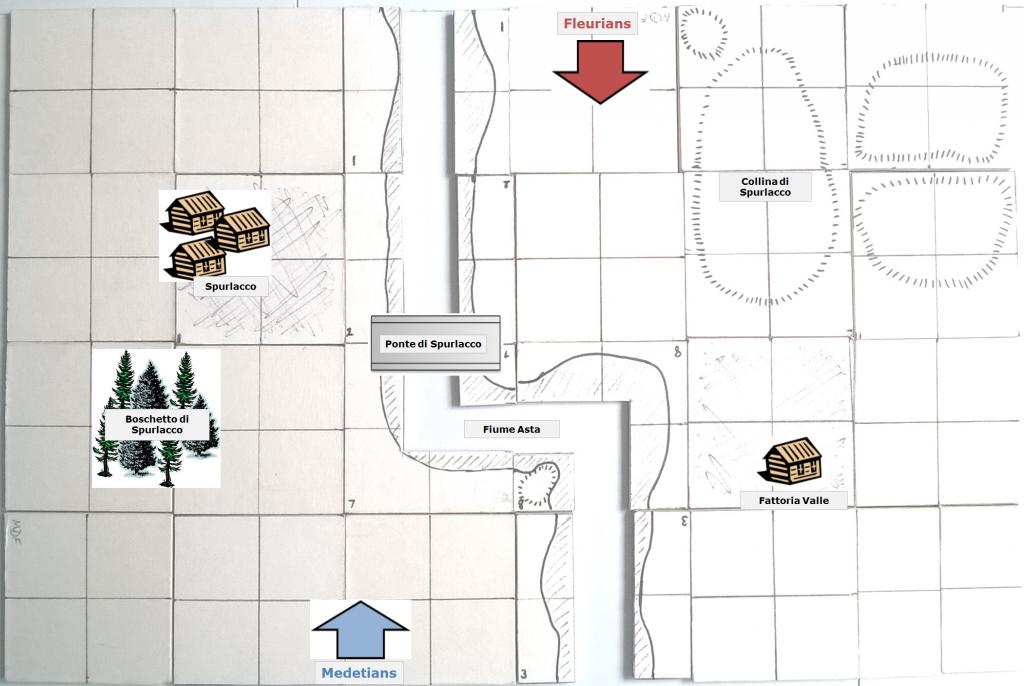
Spurlacco is a small innocuous village in the borderlands between Medetia and Fleurie, with one interesting feature – its bridge over the River Asta, the border between our two frequent combatants. On the morning of the day in question armies from both sides are approaching the scene, with their advanced guards out in front. Both are tasked with seizing the strategically important bridge so as to allow the following main force to cross into enemy territory. The high ground to the west and the village to the east are also important for covering the advance, so need to be captured too.

Phil states that “I would go as far as to say it is a perfect scenario to aim for if you are starting out building two balanced Classic armies of Horse, Foot and Guns.”

Inspired, and now with just about enough troops to give it a go, I’m hoping to prove this assertion!


The Battlefield
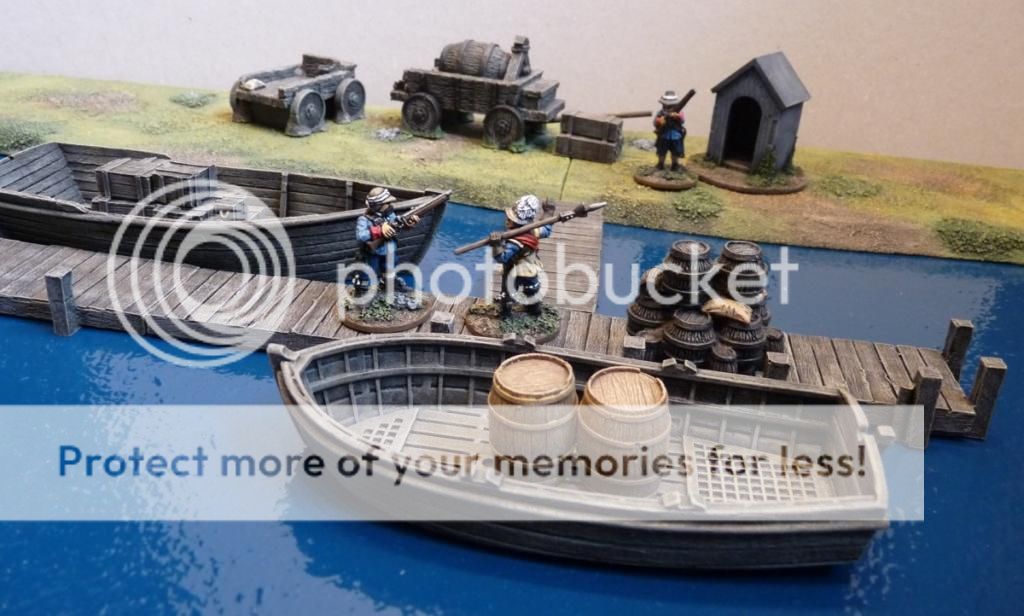
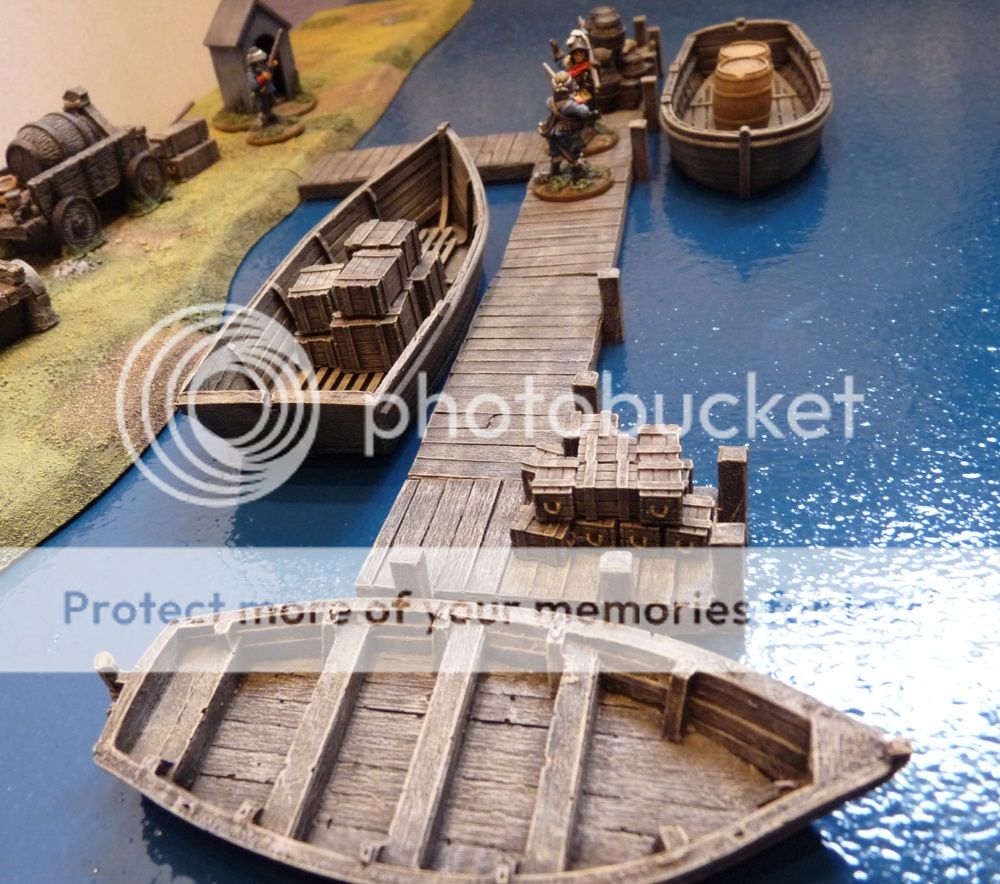
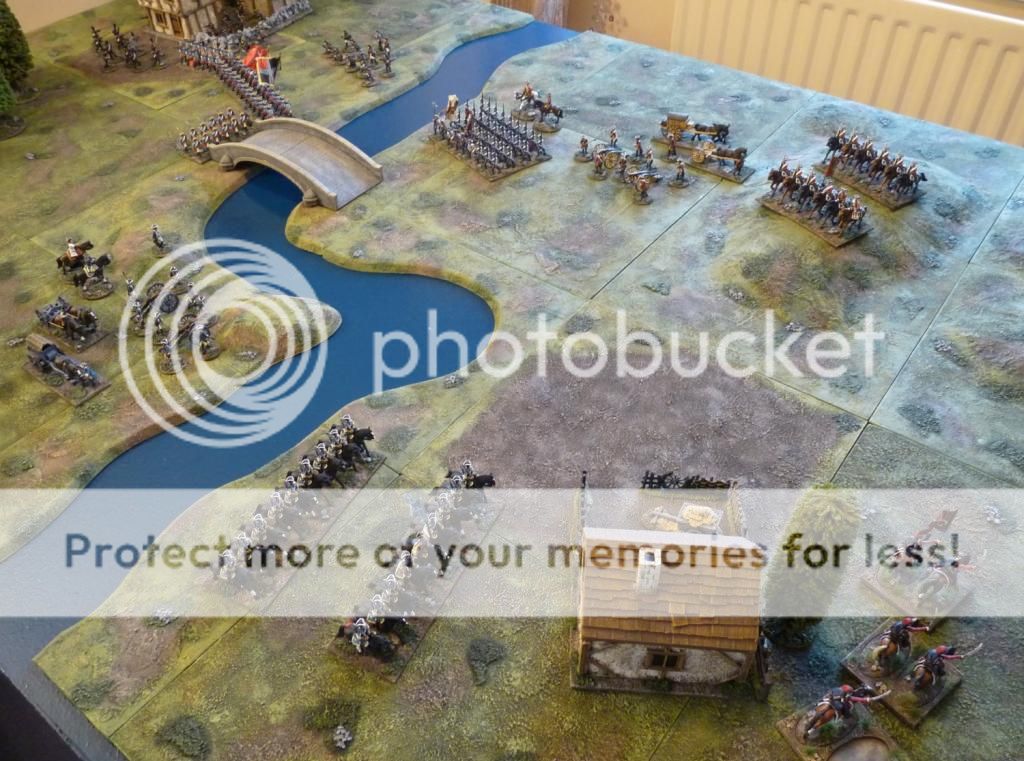
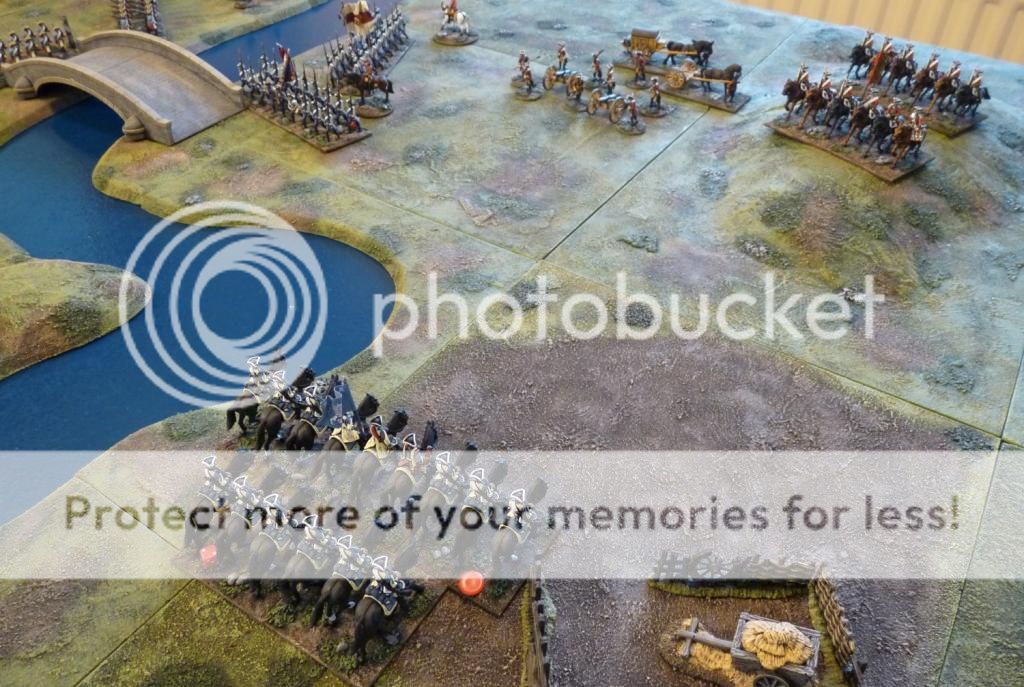
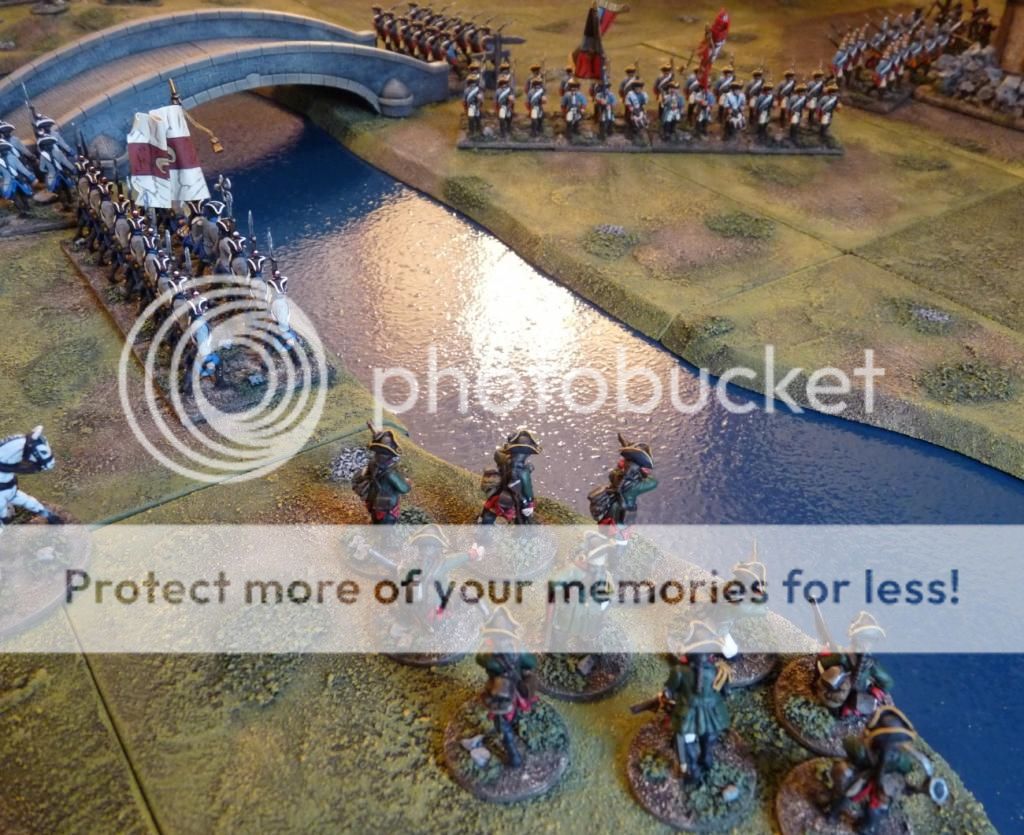
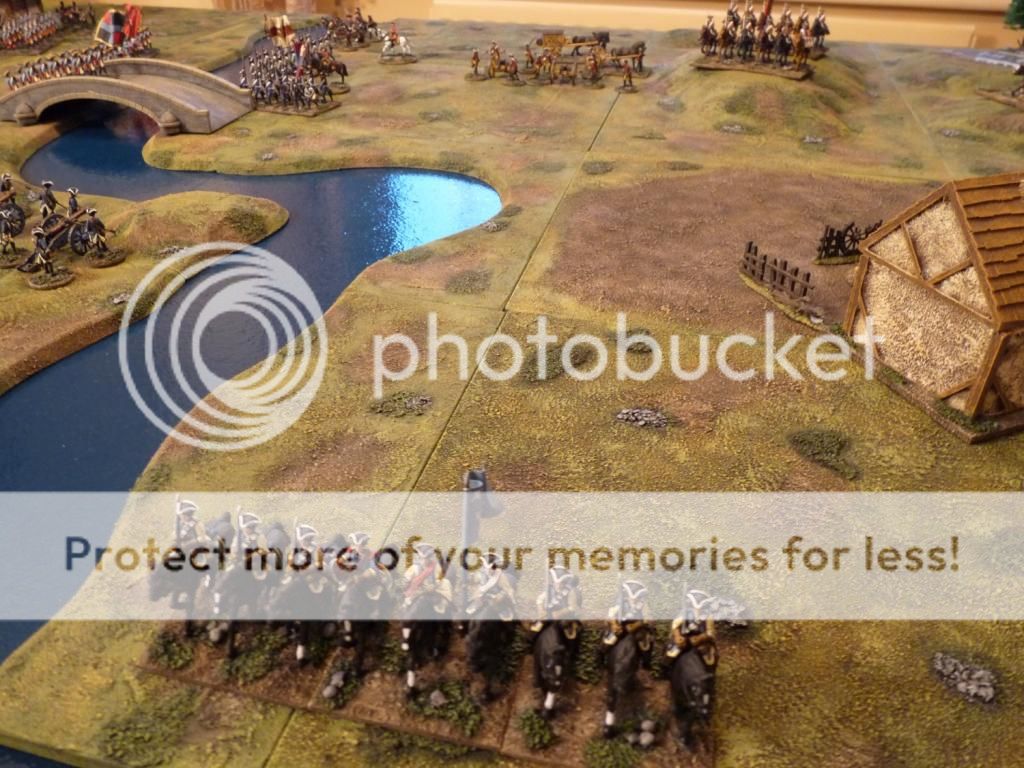
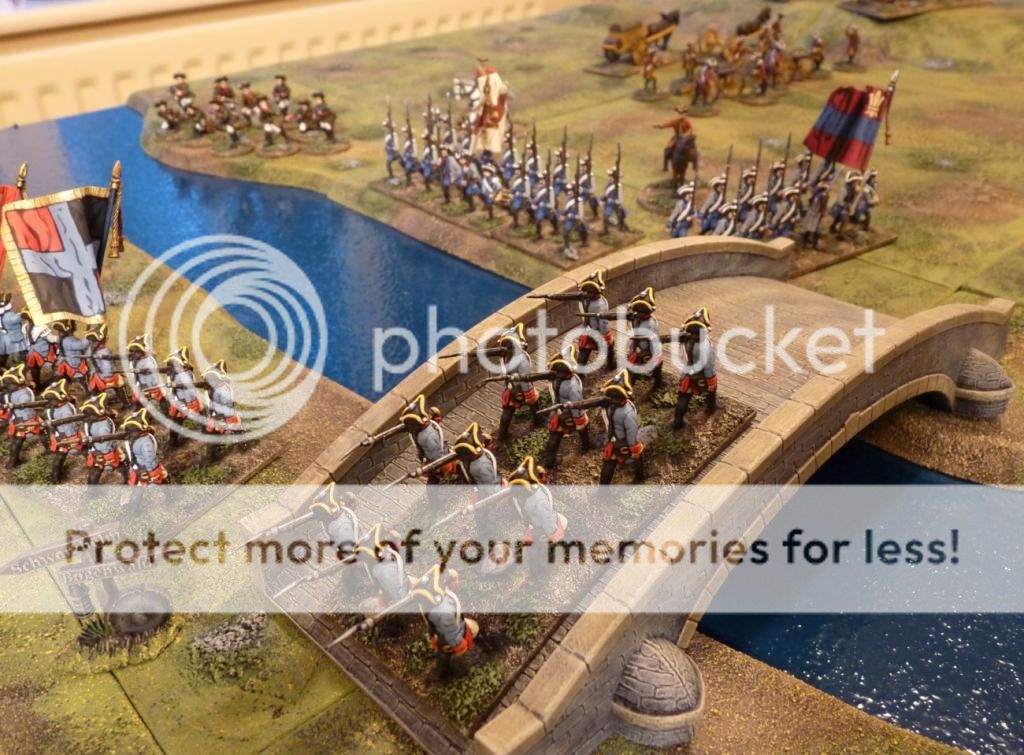
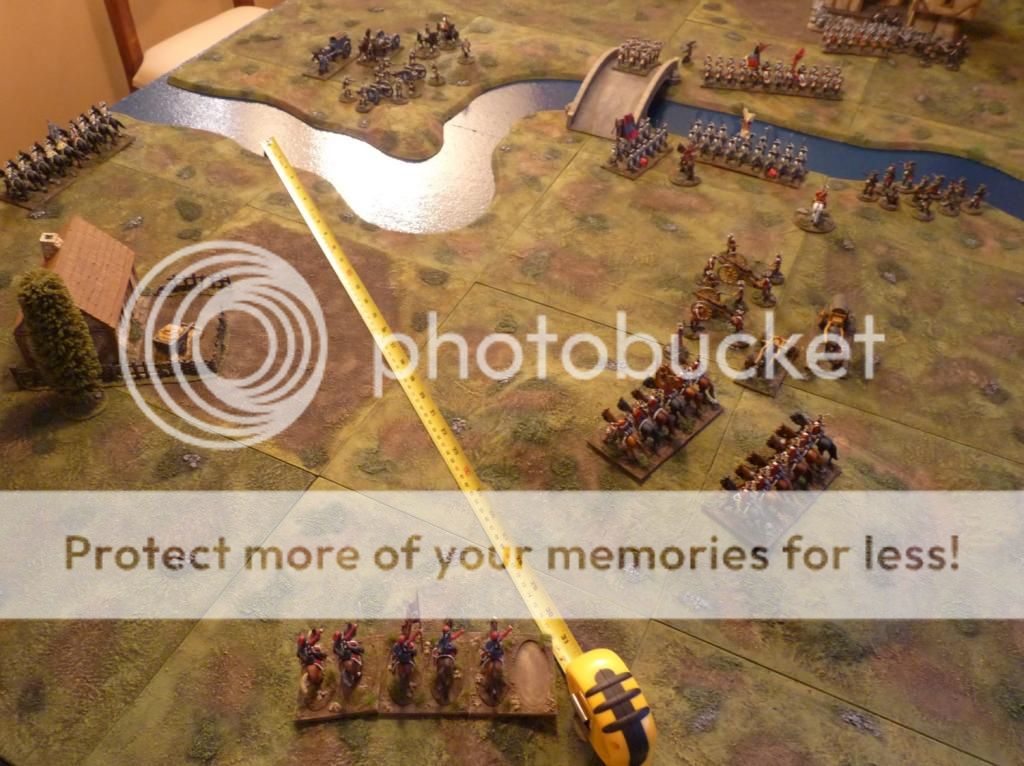
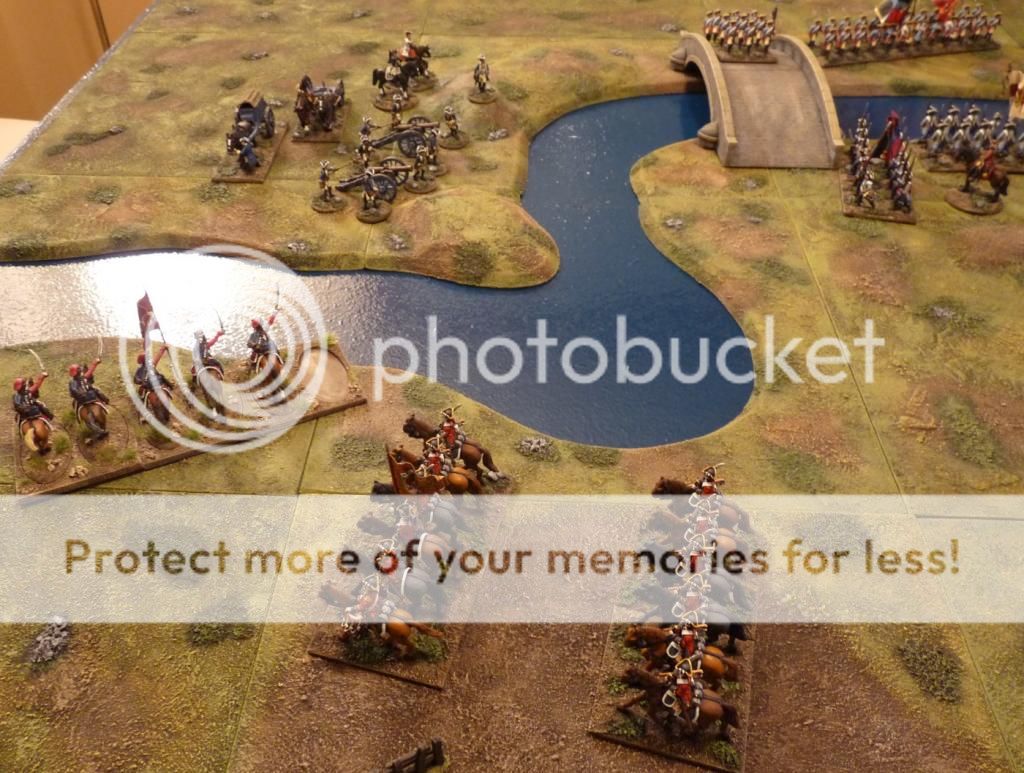
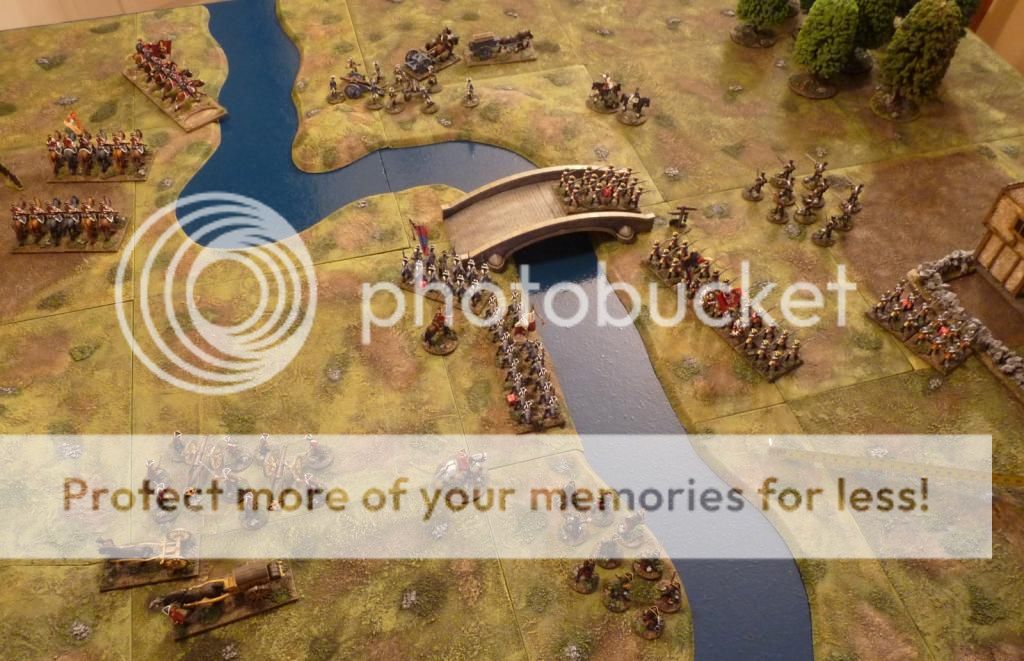
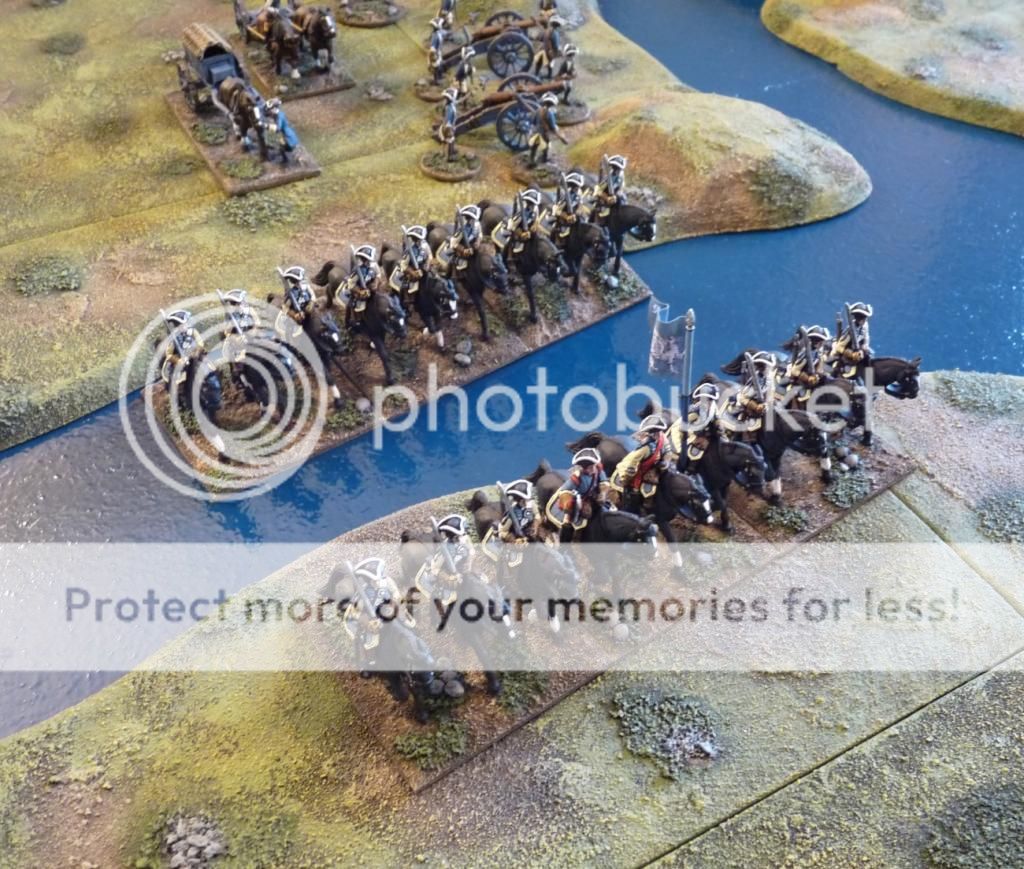
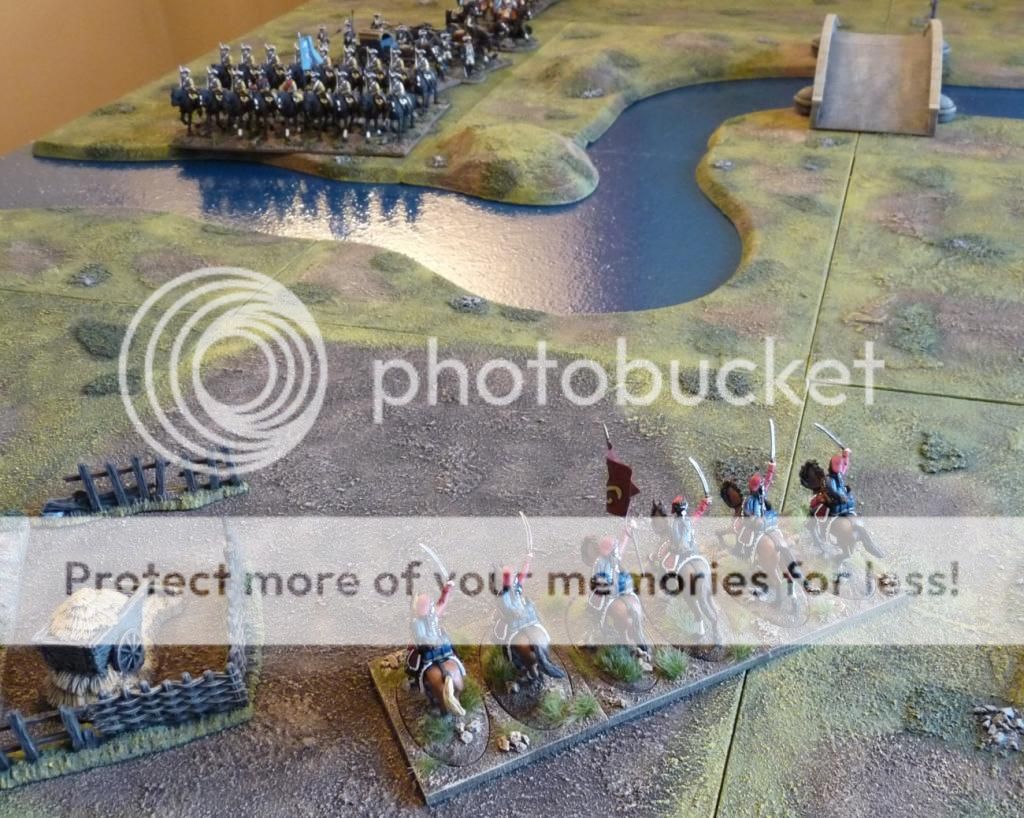
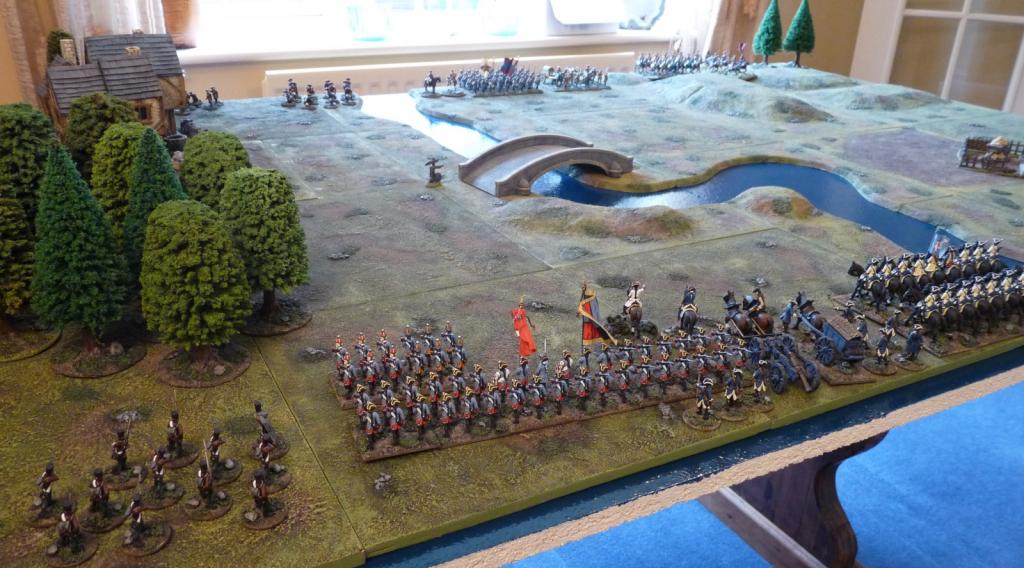
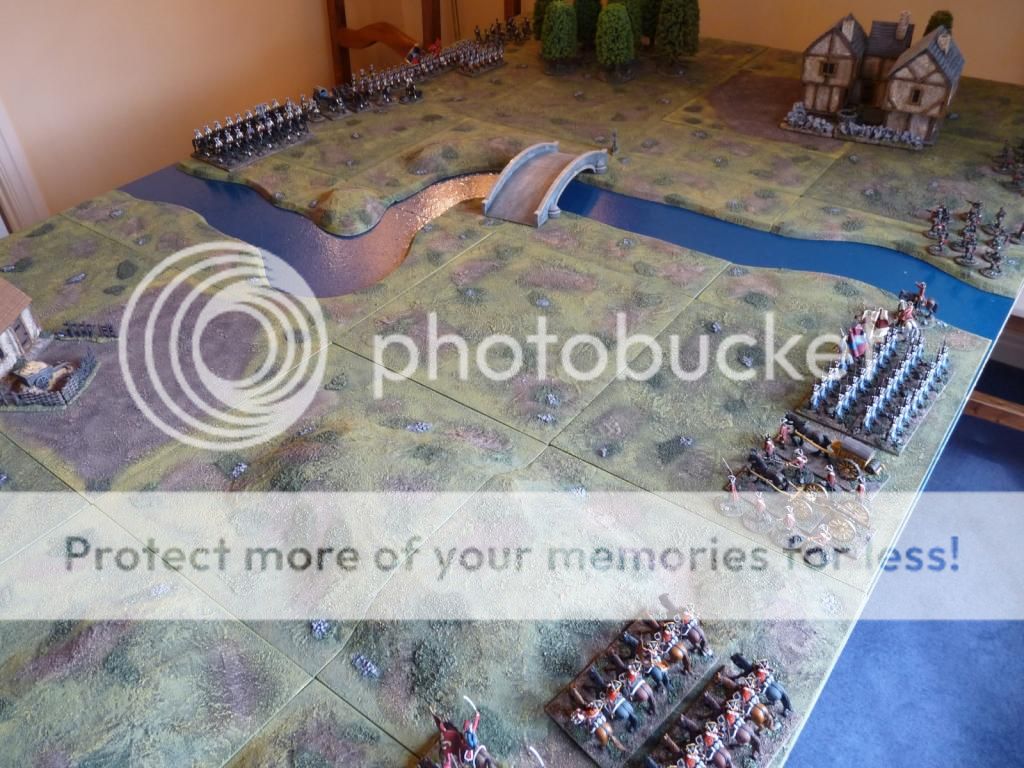
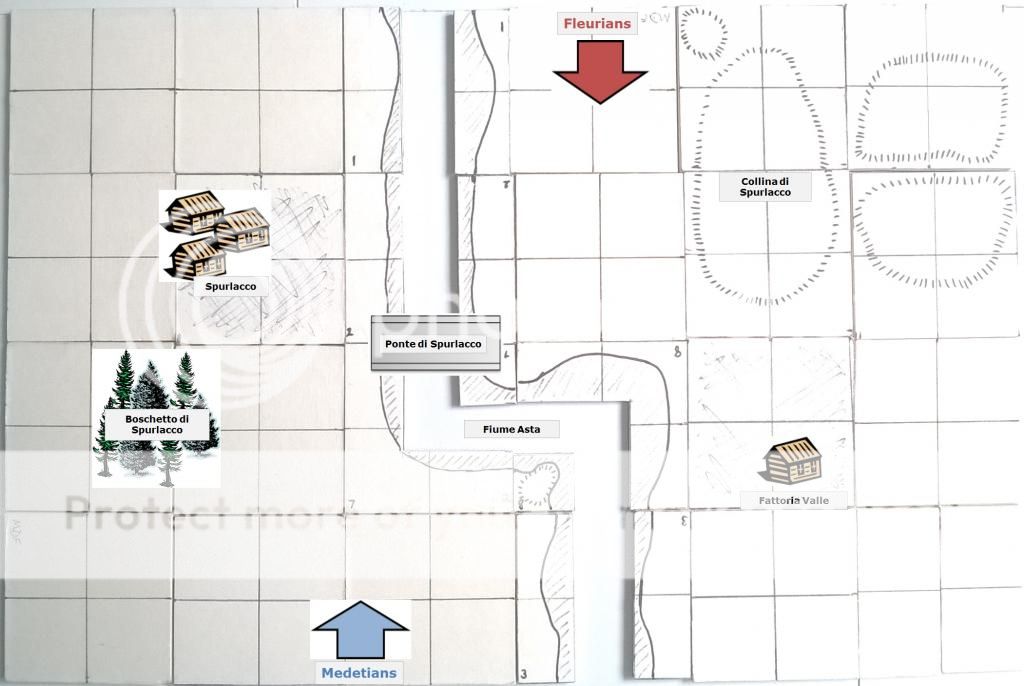
The table is 6’x4’, dominated by a central river with some key terrain features on either side. Due to the style of my river bank sections, I had to square off the river with two 90 degree turns rather than replicate Phil’s diagonal river line. Even so, it retains the effect of dividing the battlefield into 2 halves at an angle. The river itself is fordable to infantry and cavalry along its length (at half speed), except for an area stretching about 9” either side of the bridge.

The hill (the original Spurlash Down) is now the Collina di Spurlacco, and reduces movement by half. The Spinney becomes the Boschetto di Spurlacco, and reduces speed to half, visibility by 6”, counts as light cover and disorders all but light infantry.

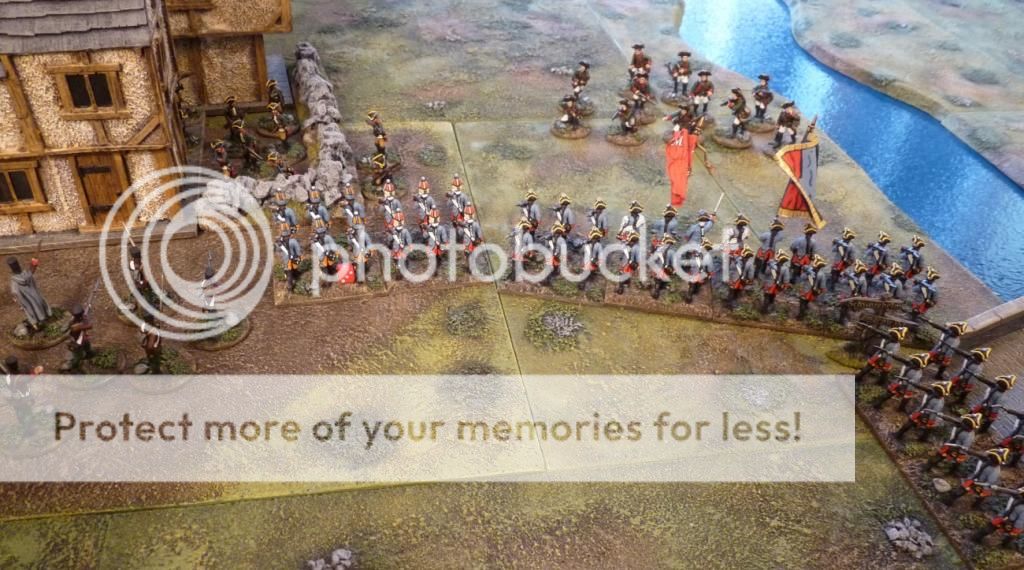
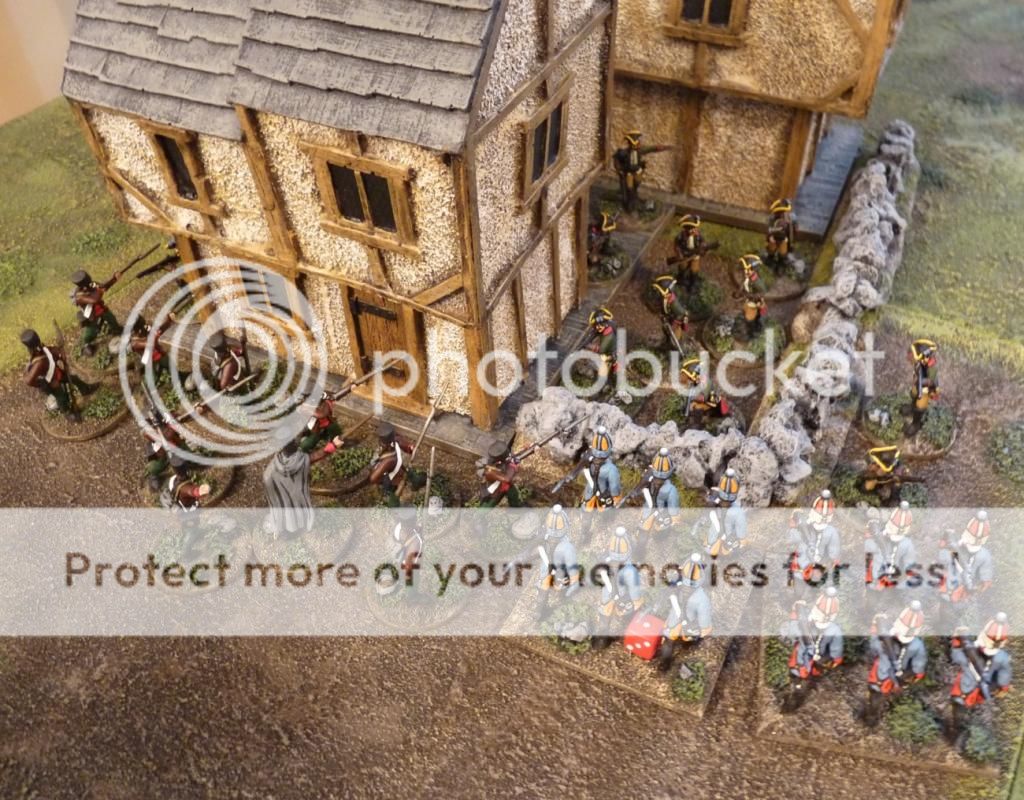
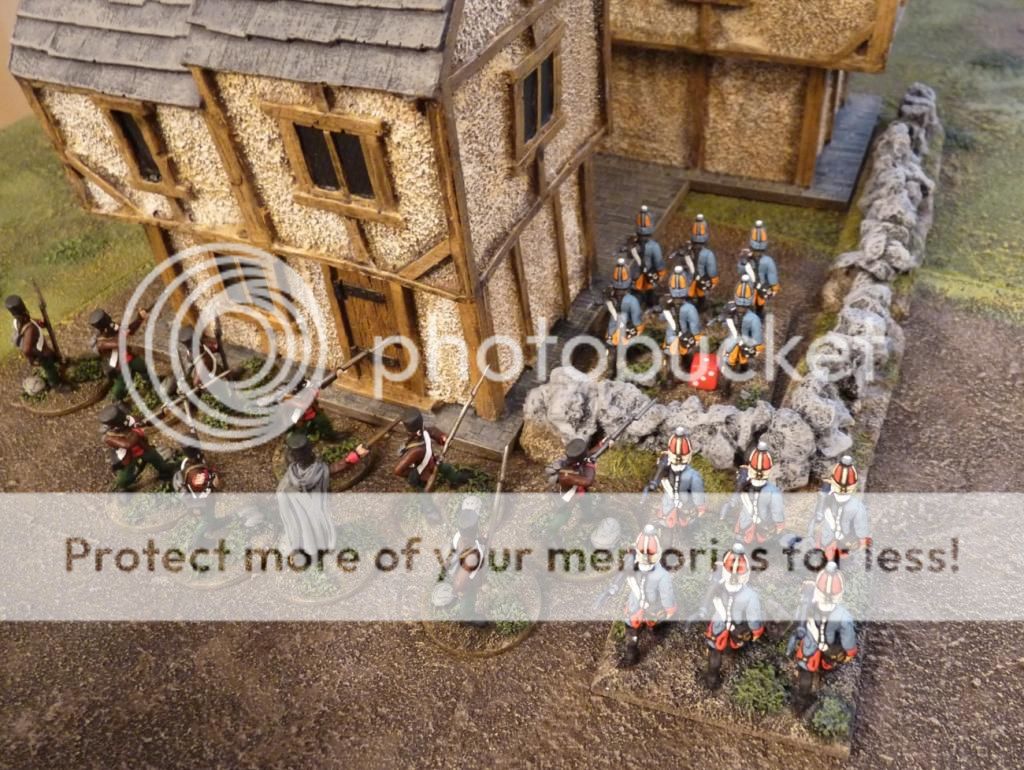
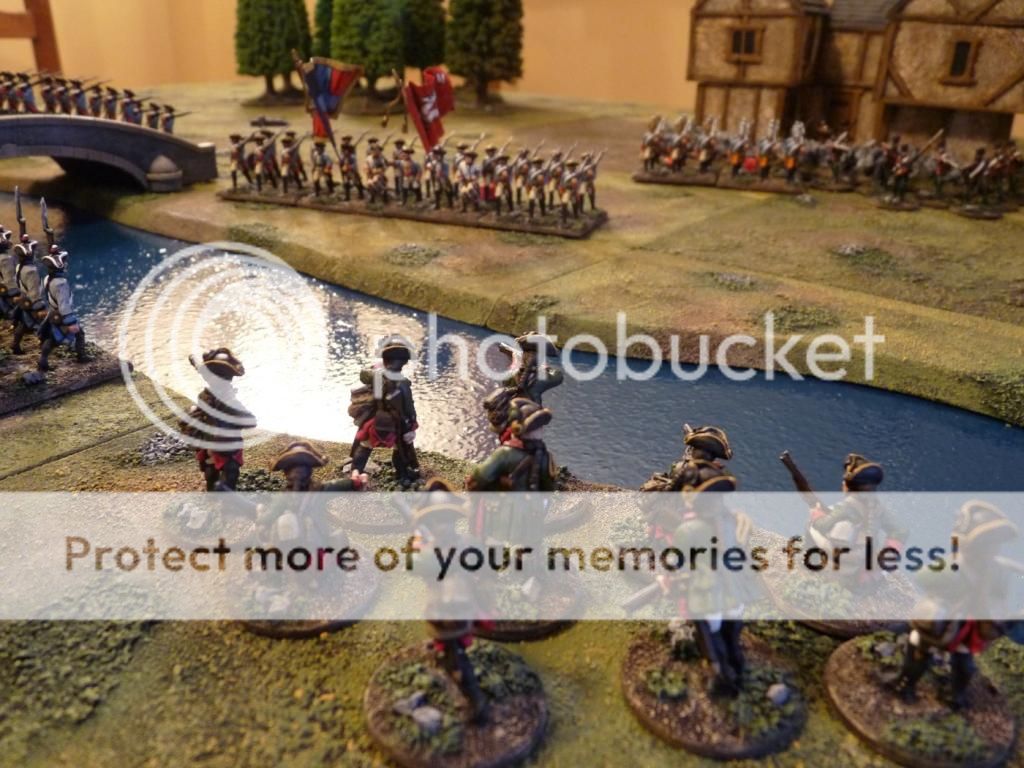
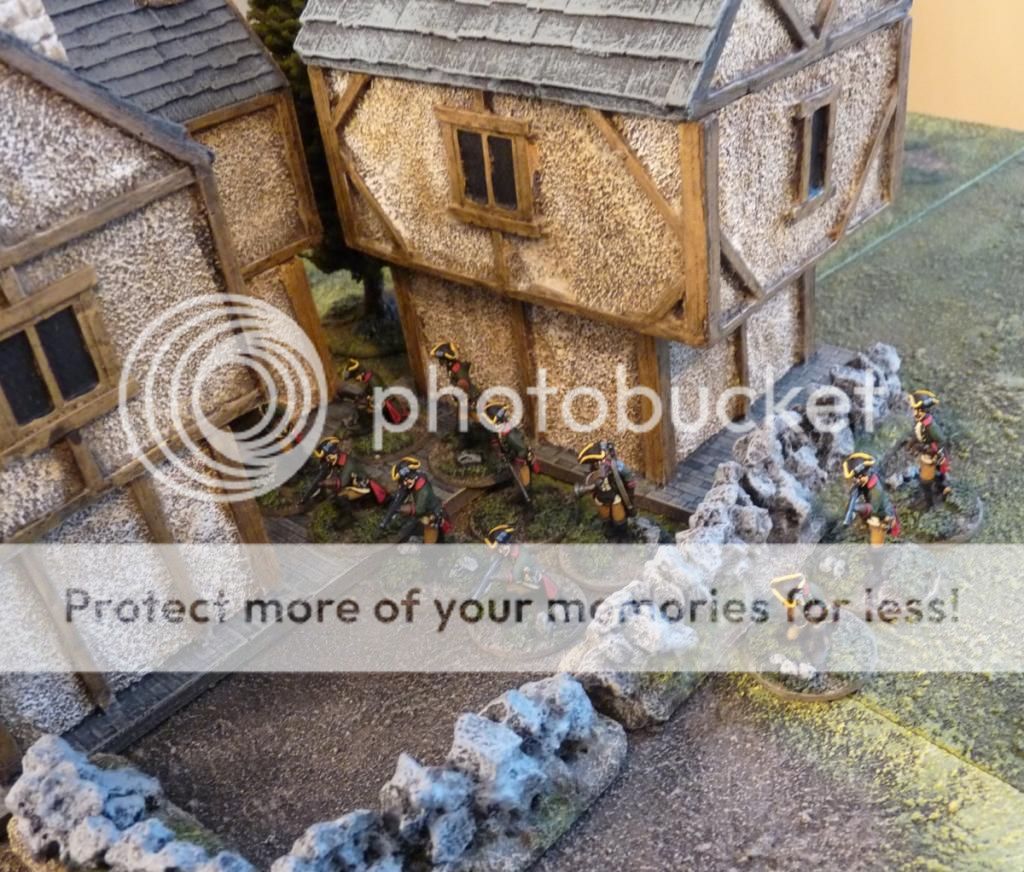
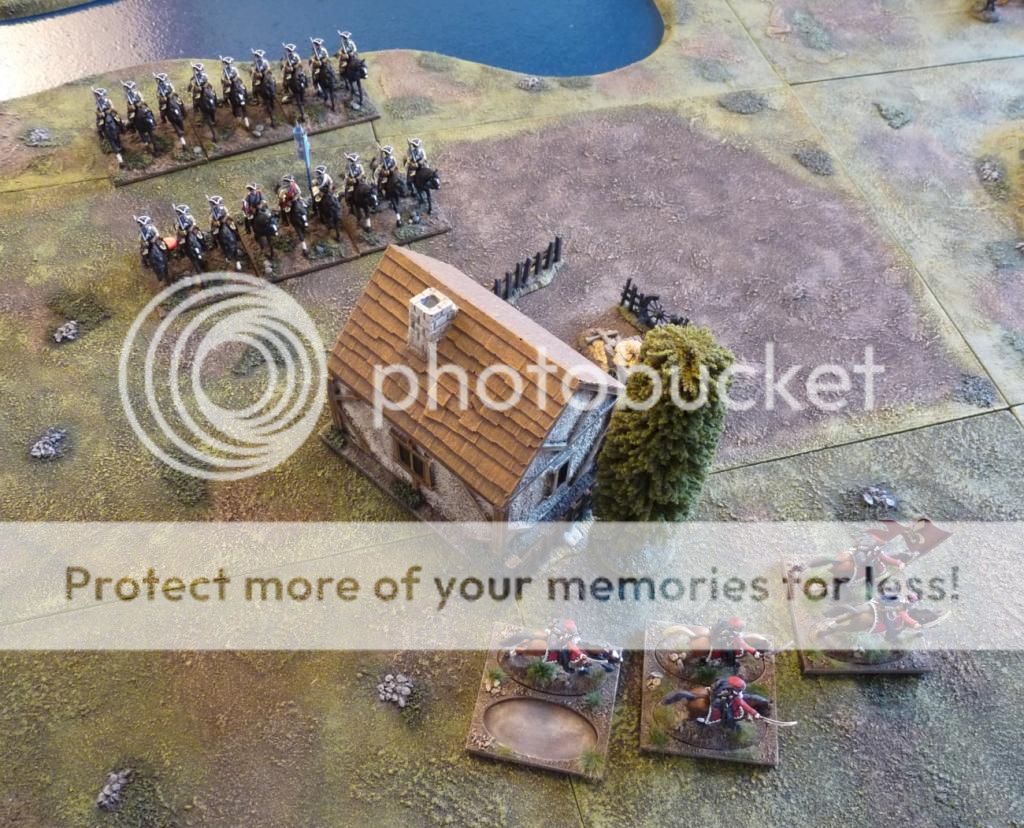
Vale Farm becomes Il Fattoria Valle and the village is of course Spurlacco. Both count as hard cover for occupants, which can be up to a full company of infantry (12 figures). As I wanted the village to be on the Medetian side of the river, (primarily so I could indulge in some Italian name changes!) I have inverted the map, so south is up and north is down.

Table plan, created while having a coffee, using my set of small card tiles that replicate my 1 foot square terrain boards. Some extra details added via Paint.net

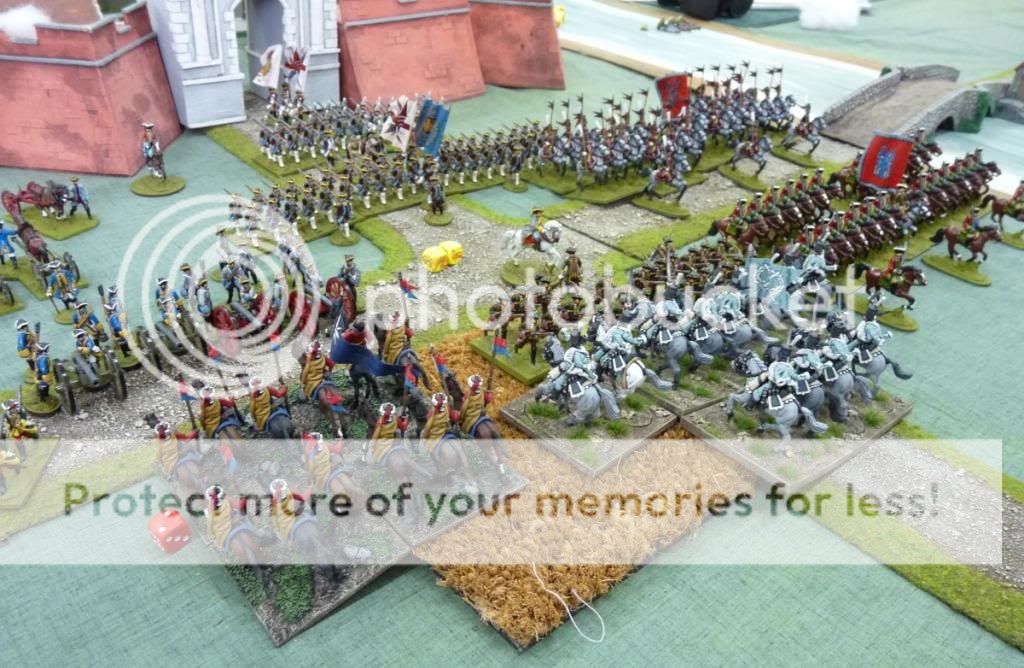
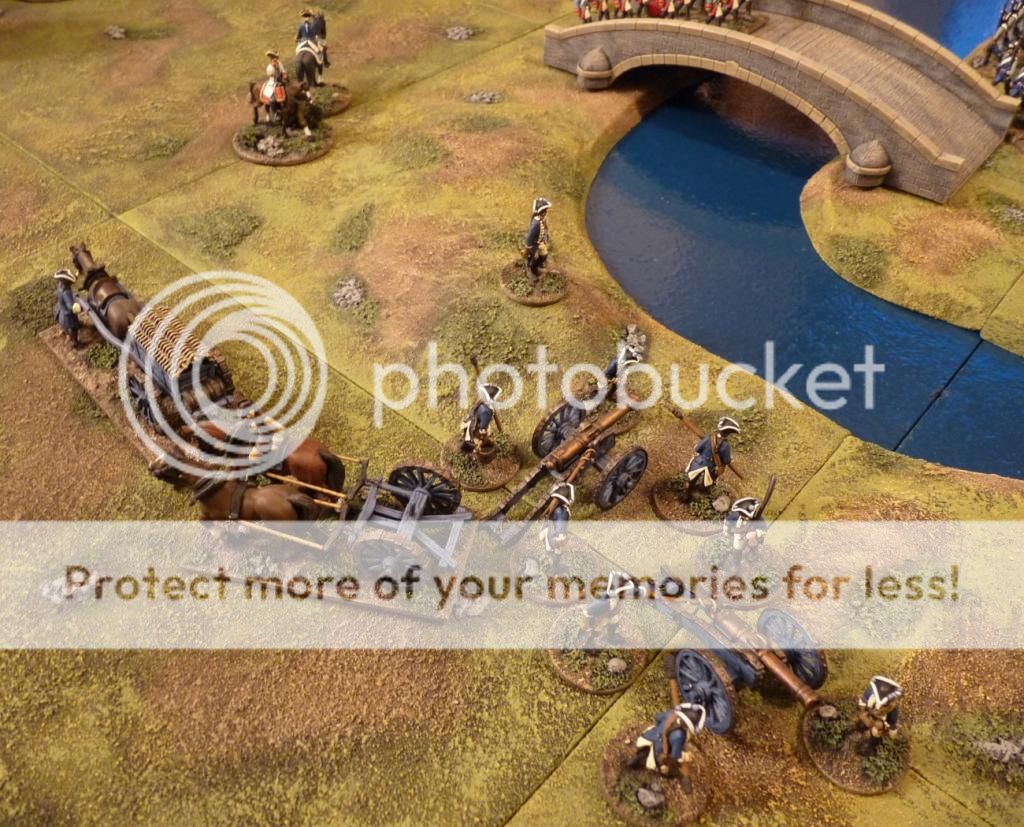
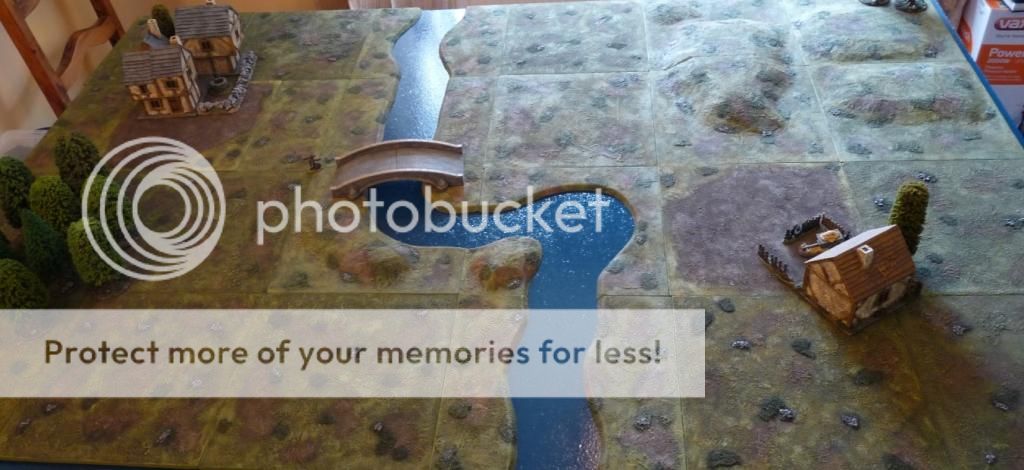
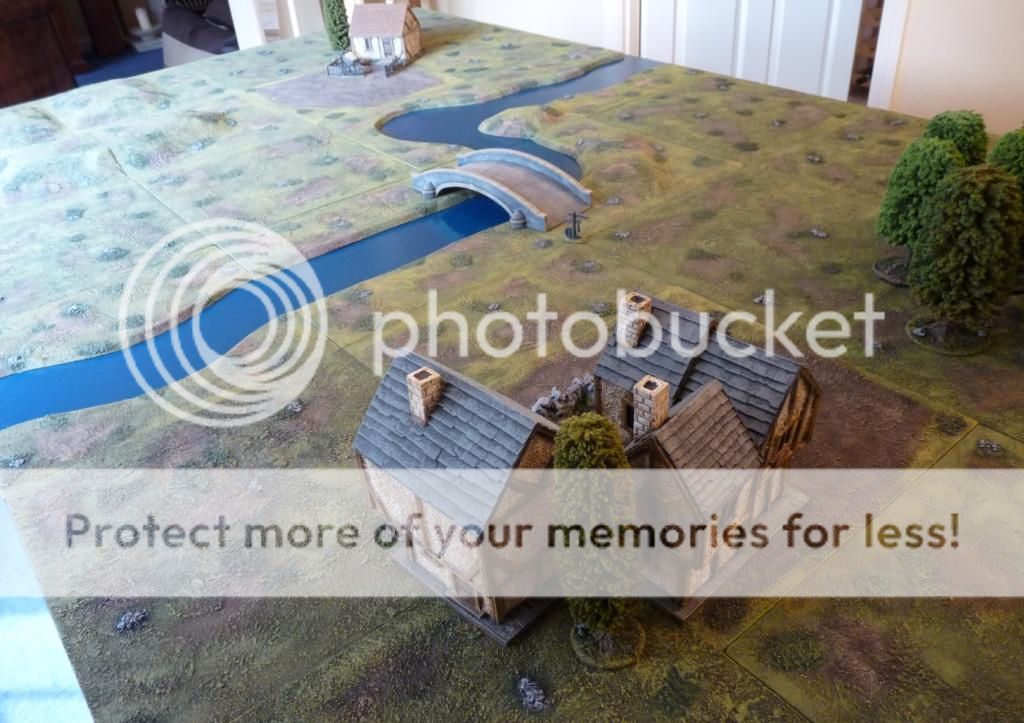
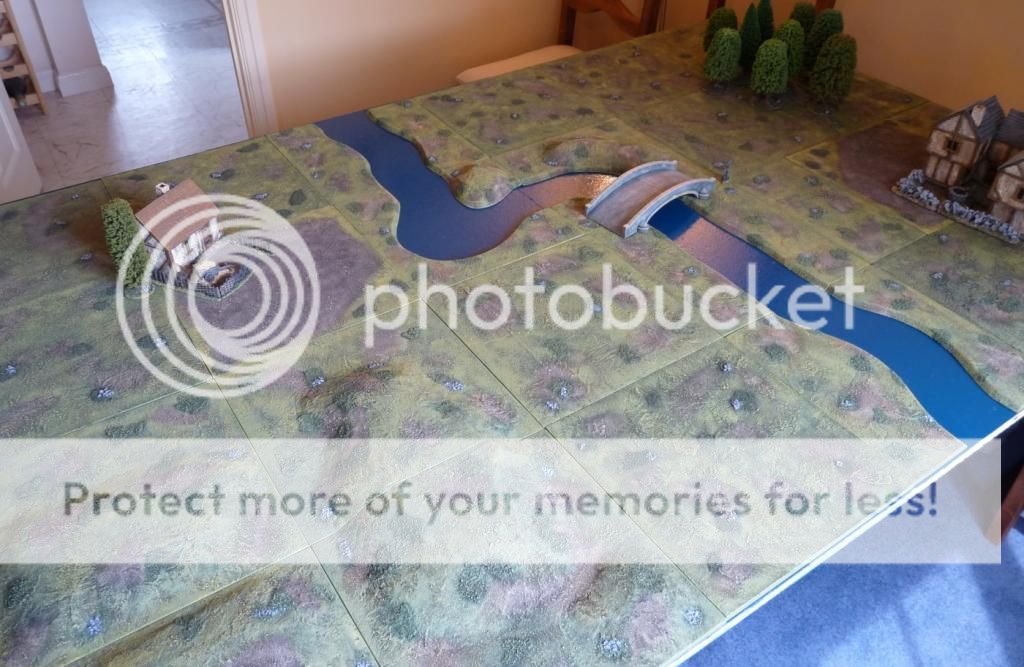
The table set up and ready for our protagonists


The Armies
 
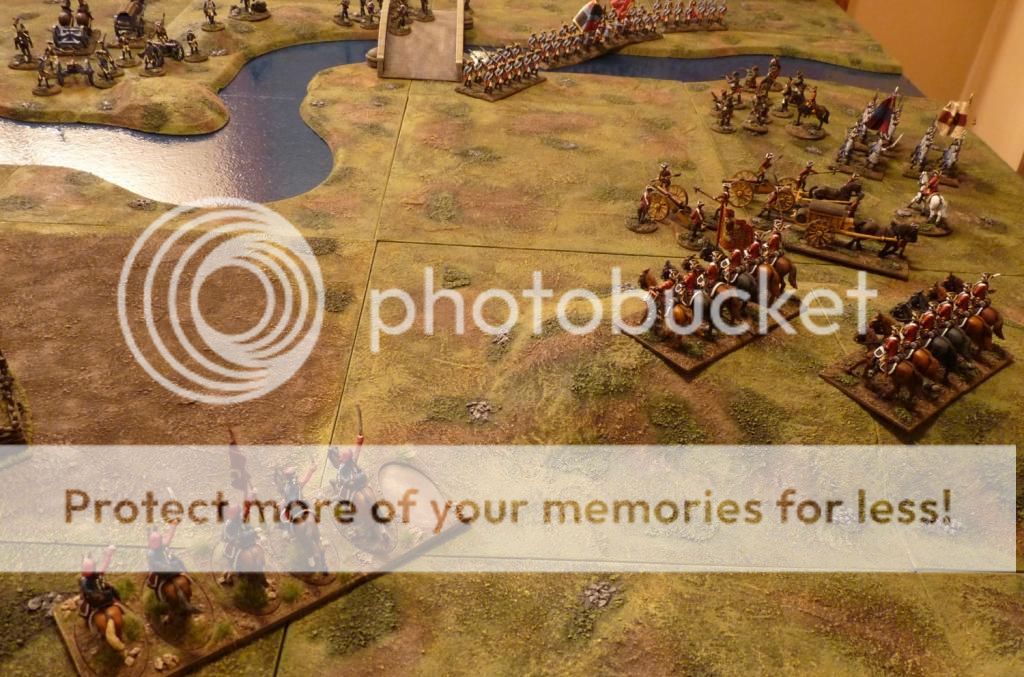
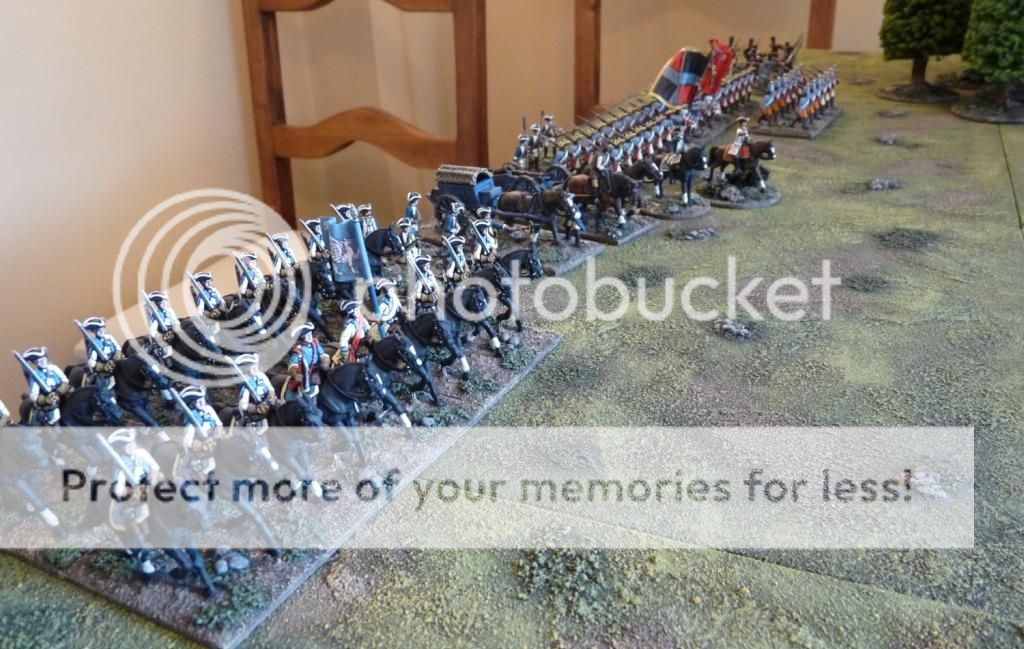
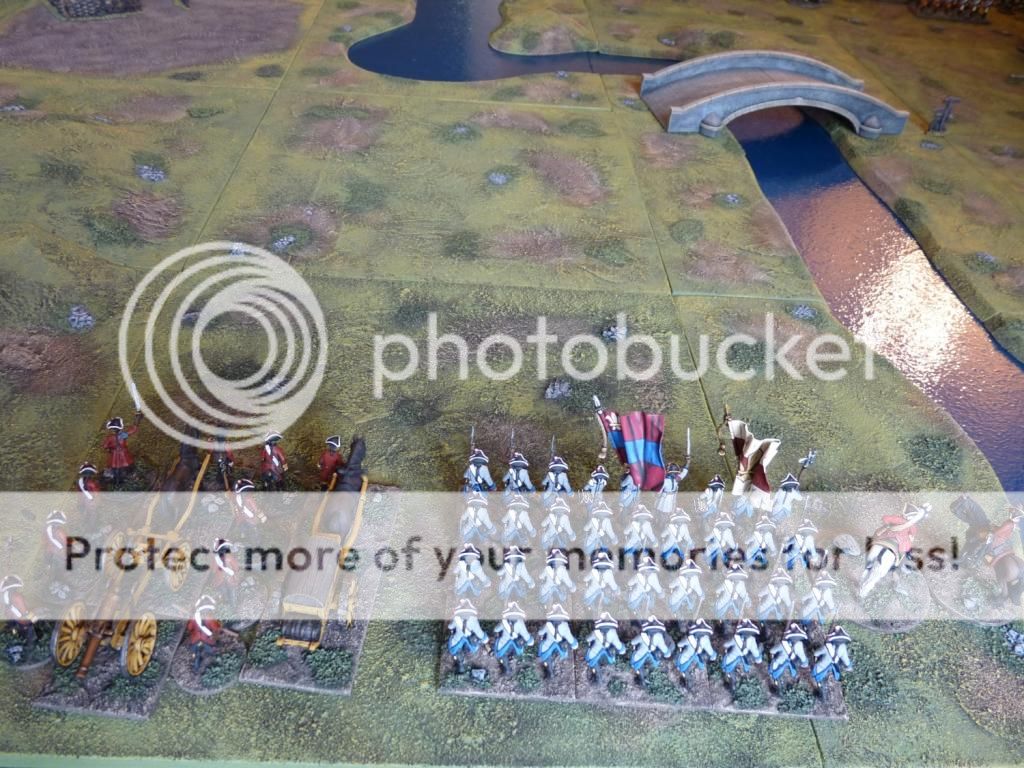
The Army of the Grand Duchy of Medetia
Advanced Guard under the command of General Amore (a veteran
of the campaigns in Byzarbia and Granprix).
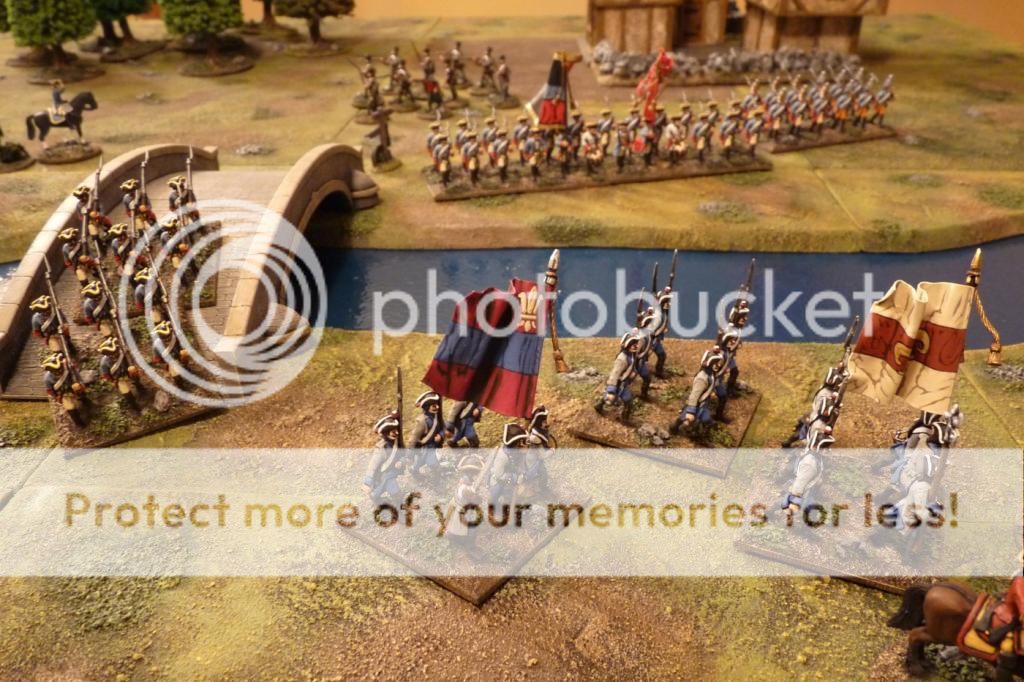
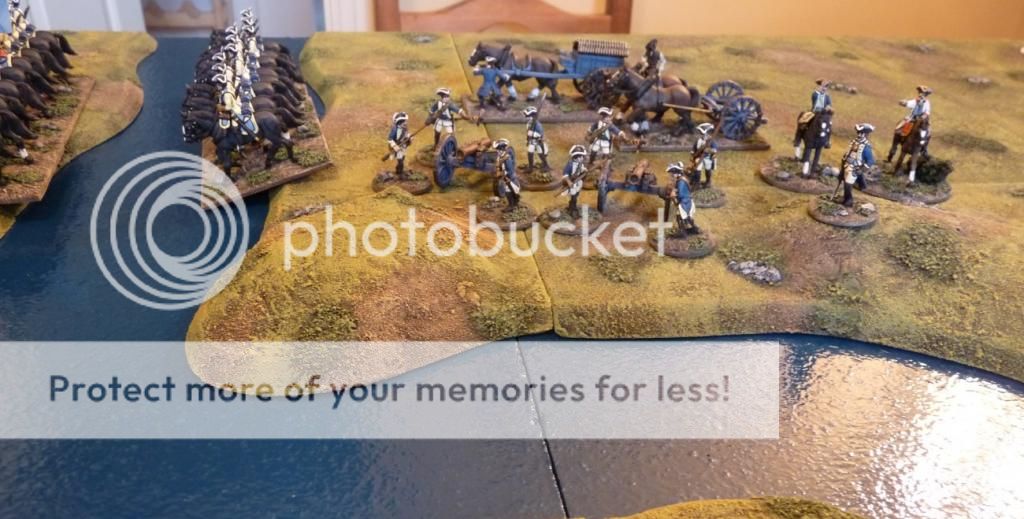
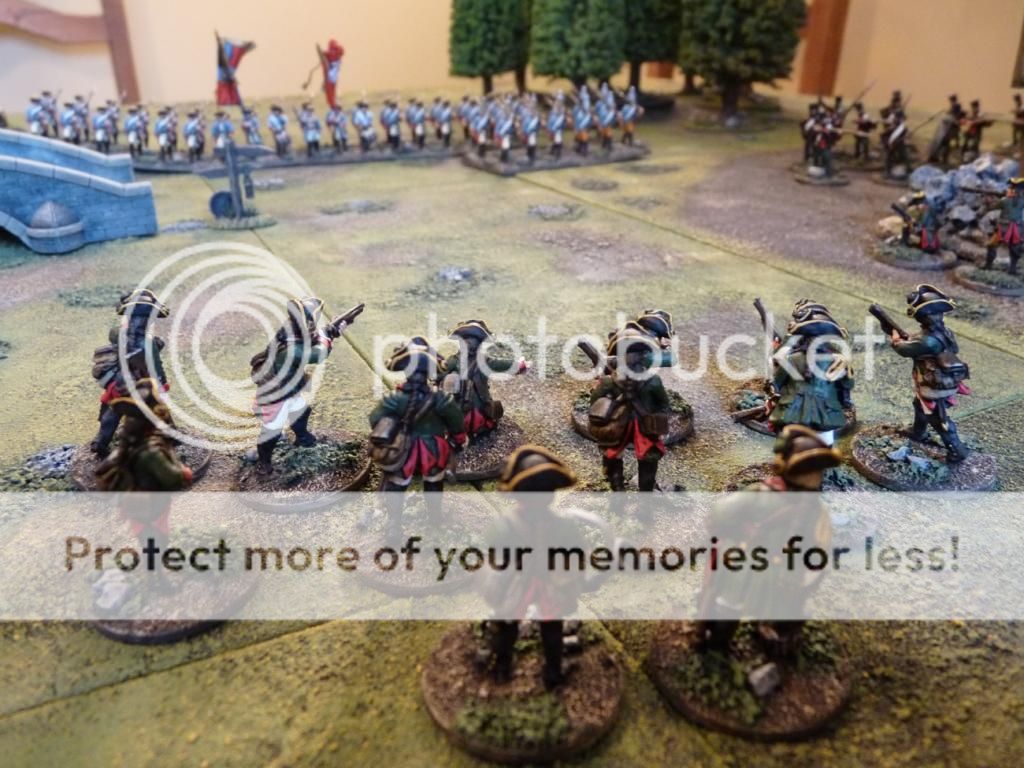
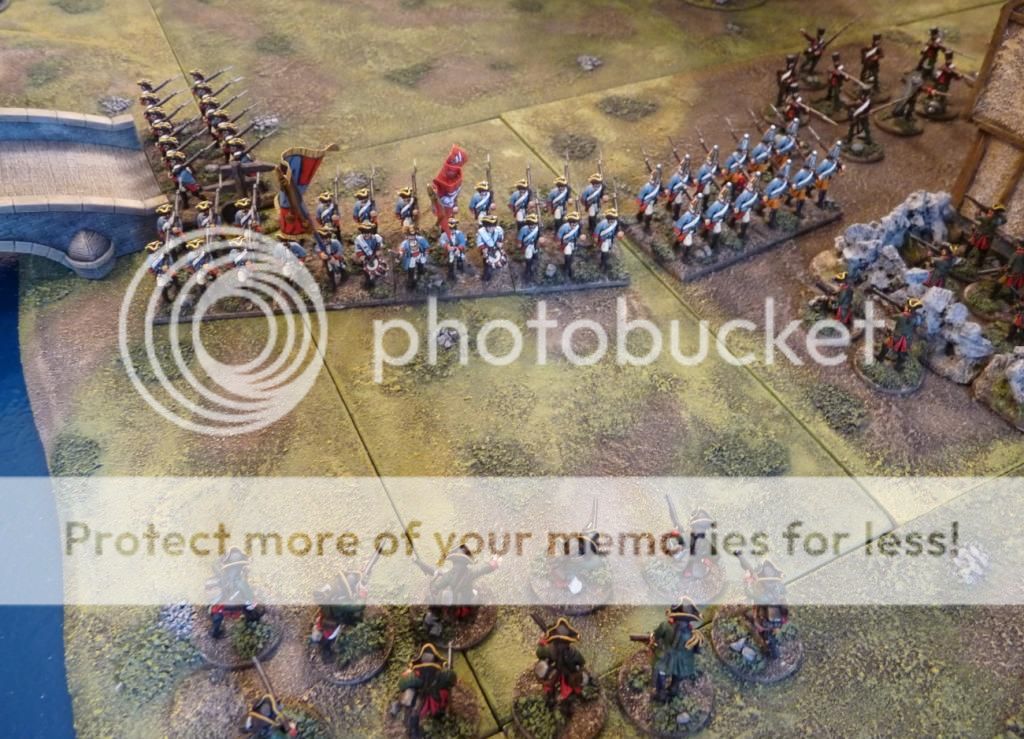
Borganza Regiment                                              (Line
infantry, 36 figures)
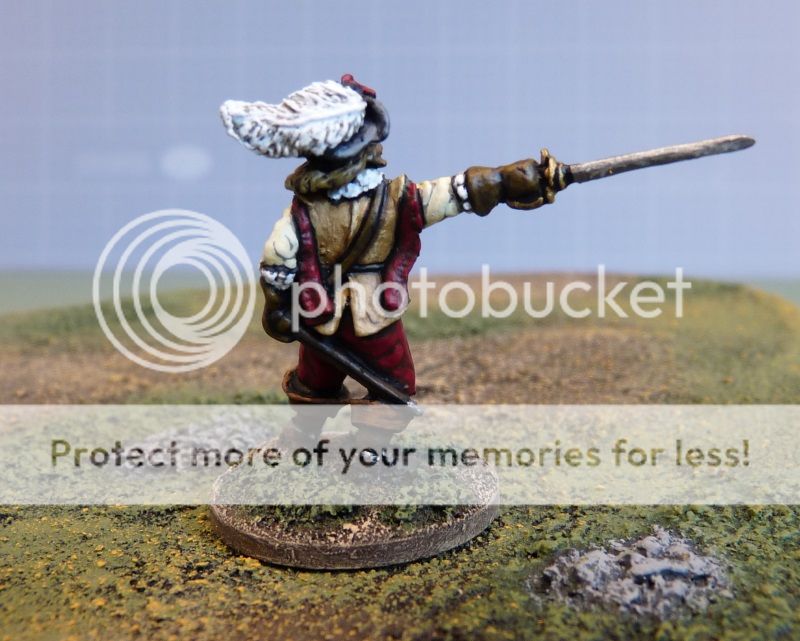
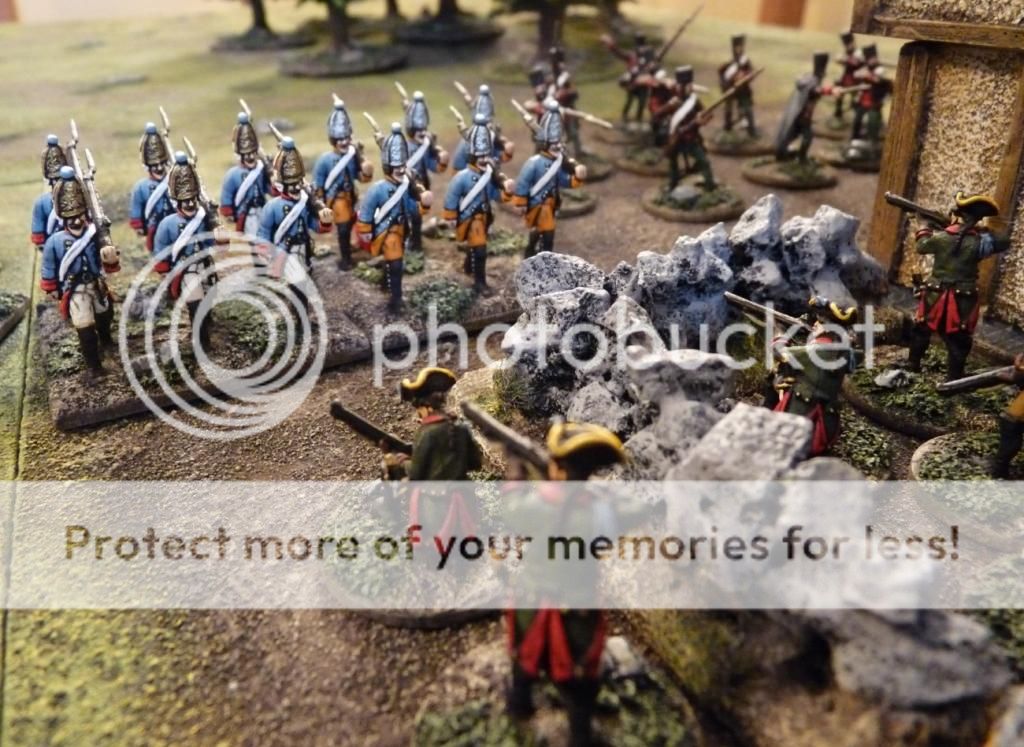
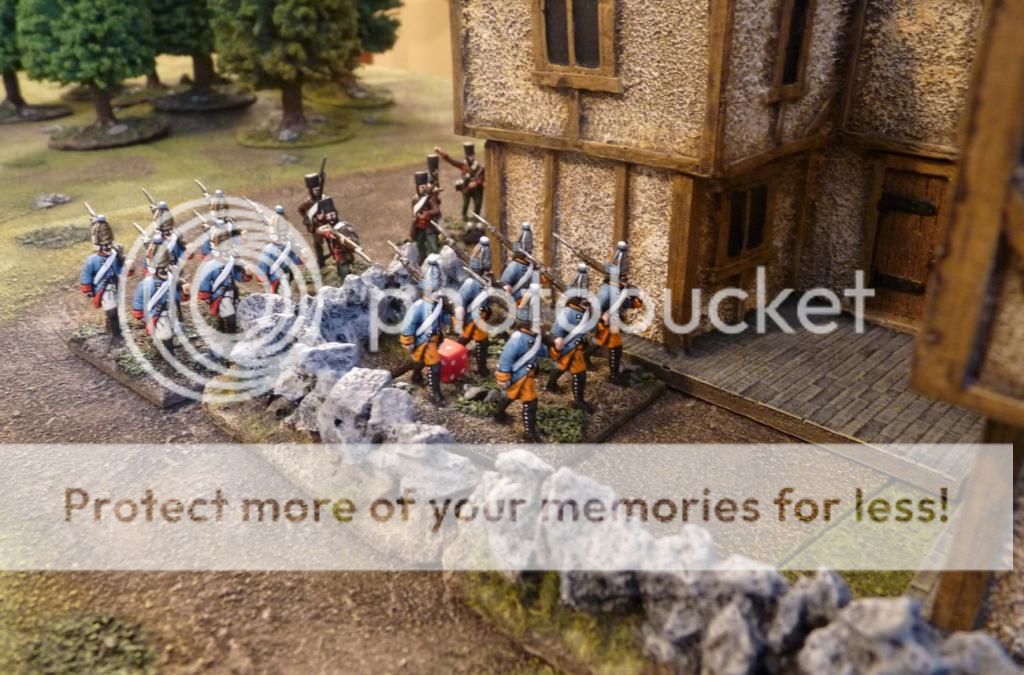
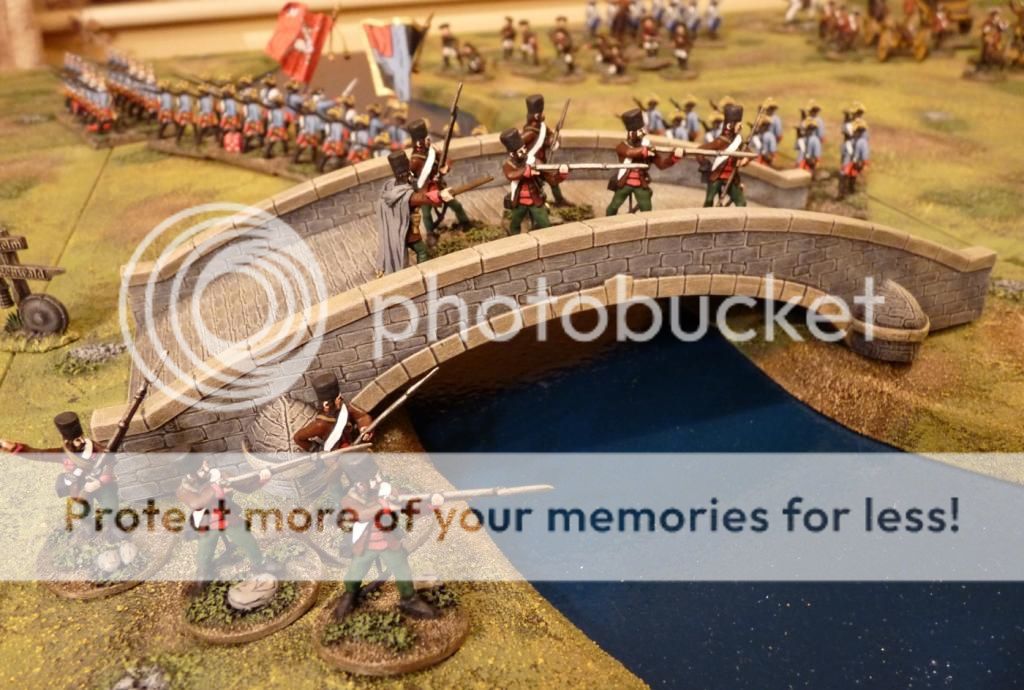
Sebastiani’s Converged Grenadier Company       (Elite infantry, 12 figures)
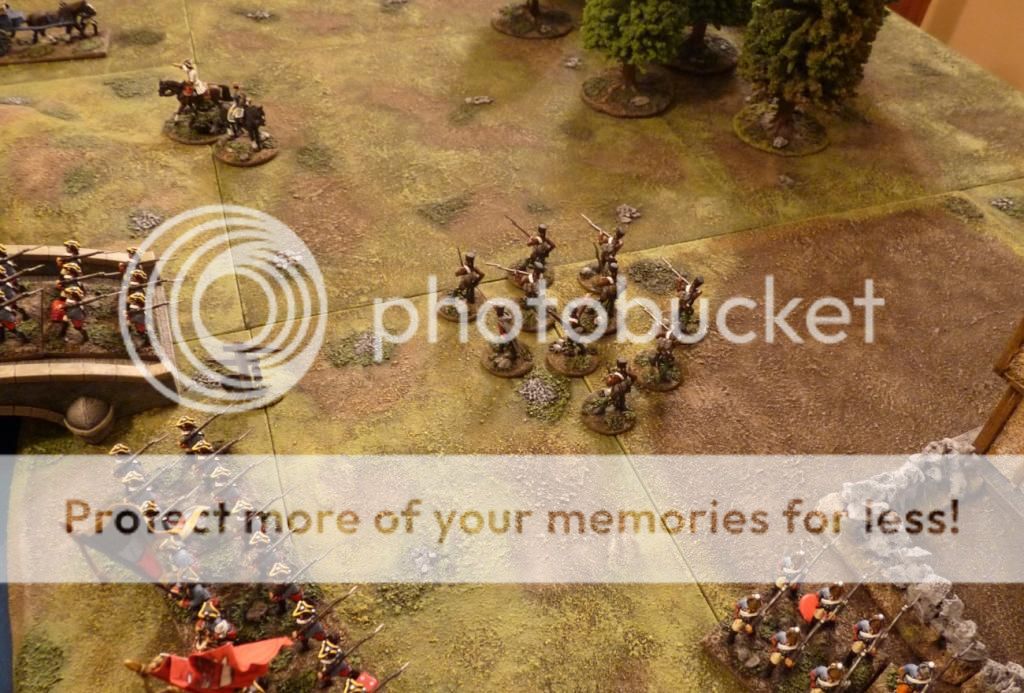
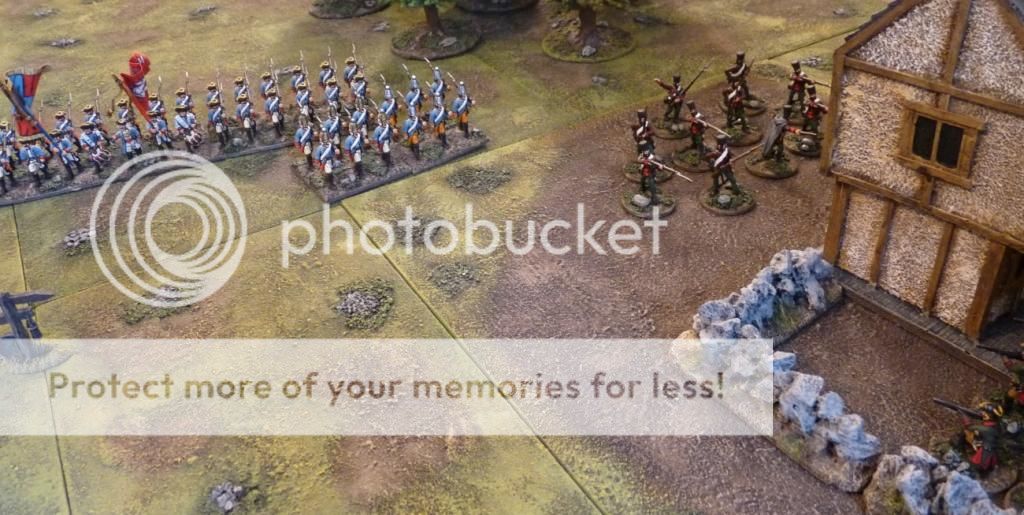
Weissach Grenz Company                                   (Light
infantry, 12 figures)
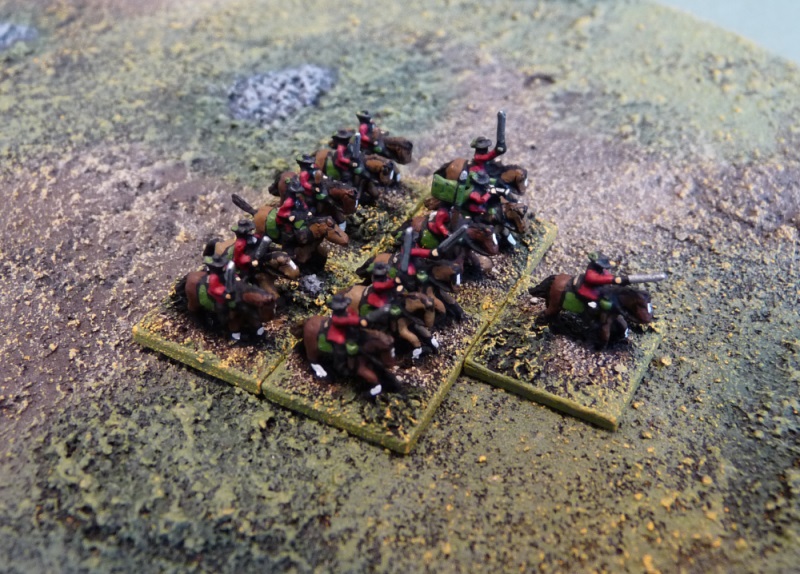
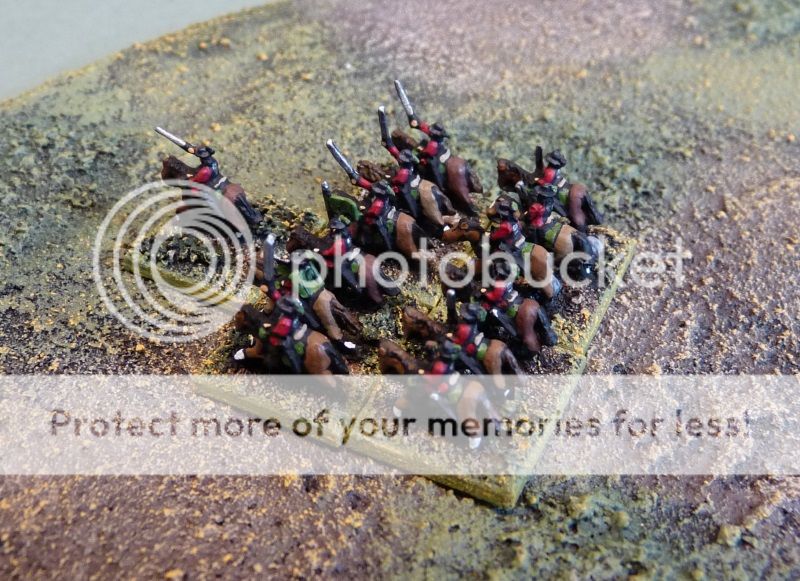
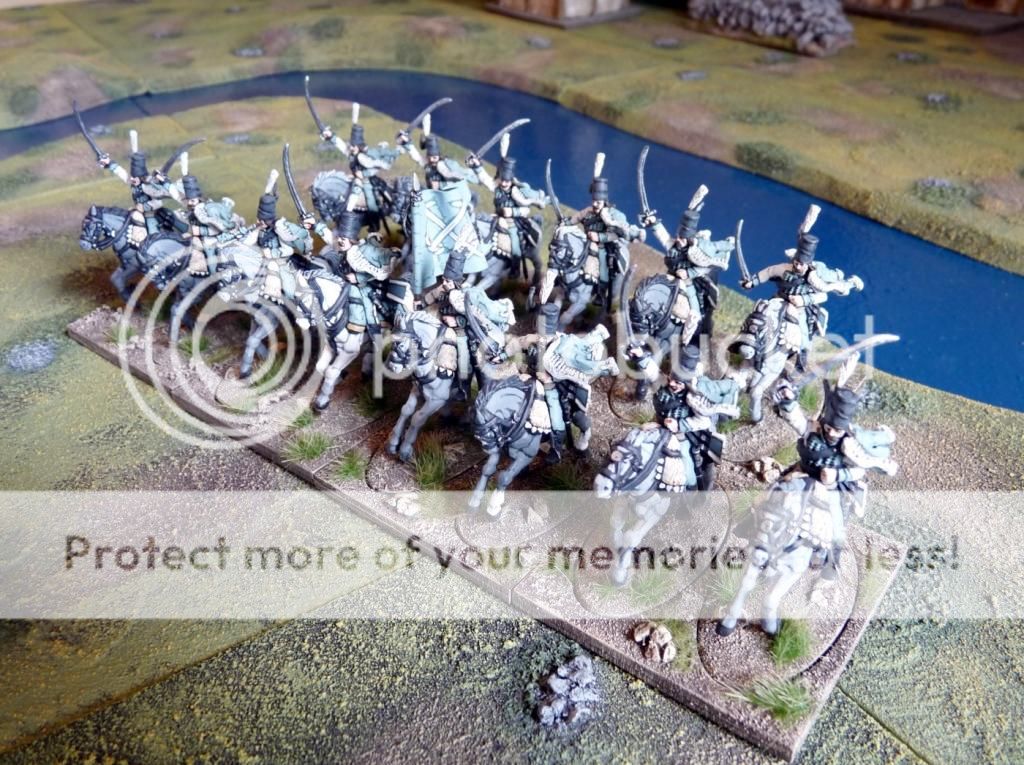
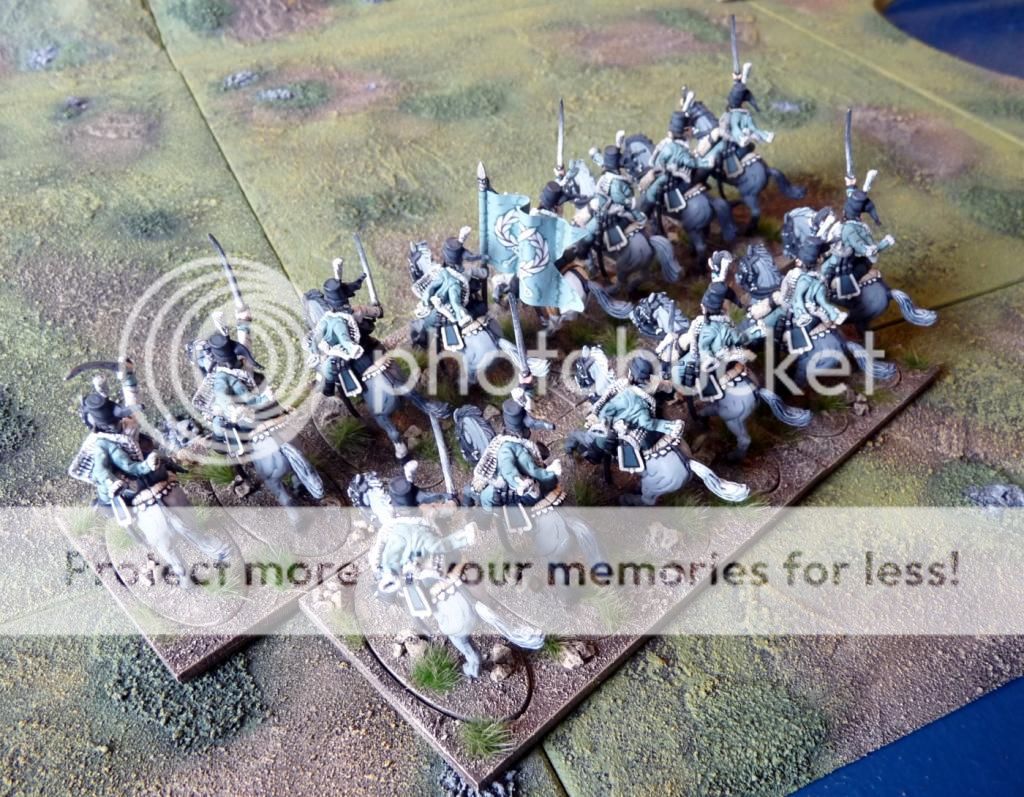
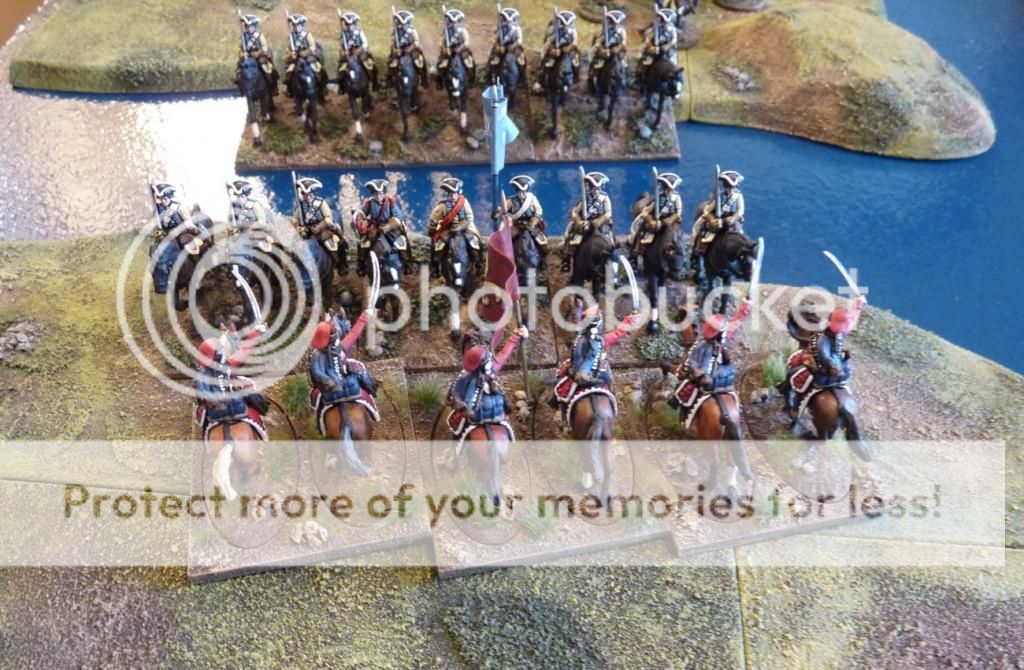
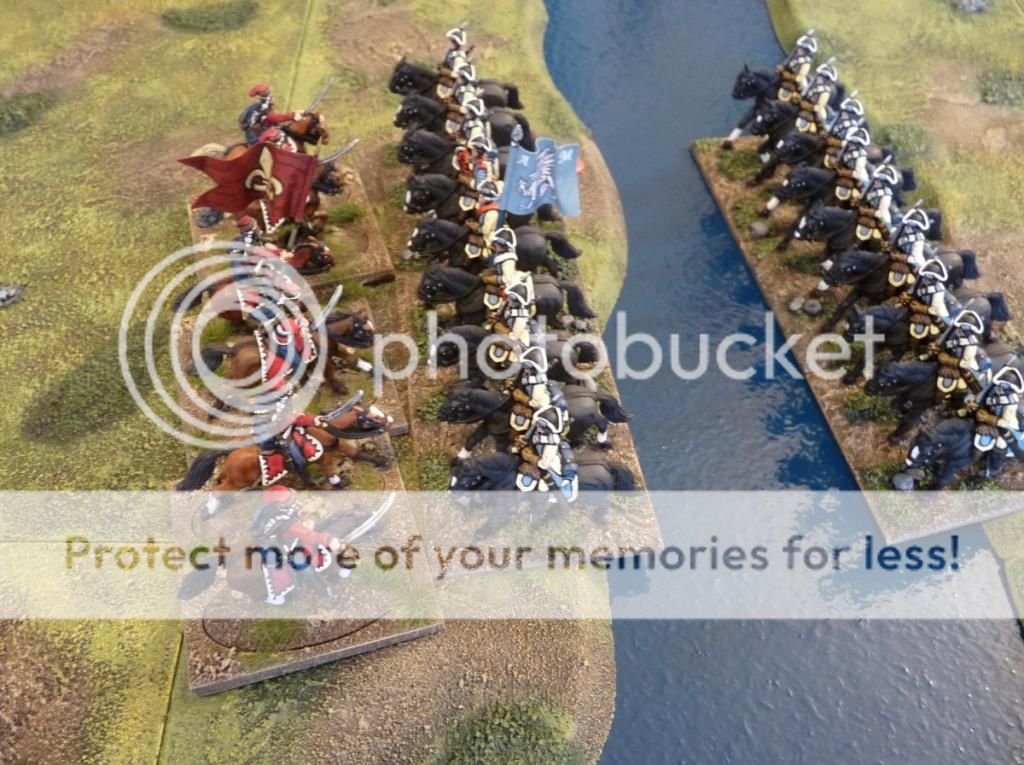
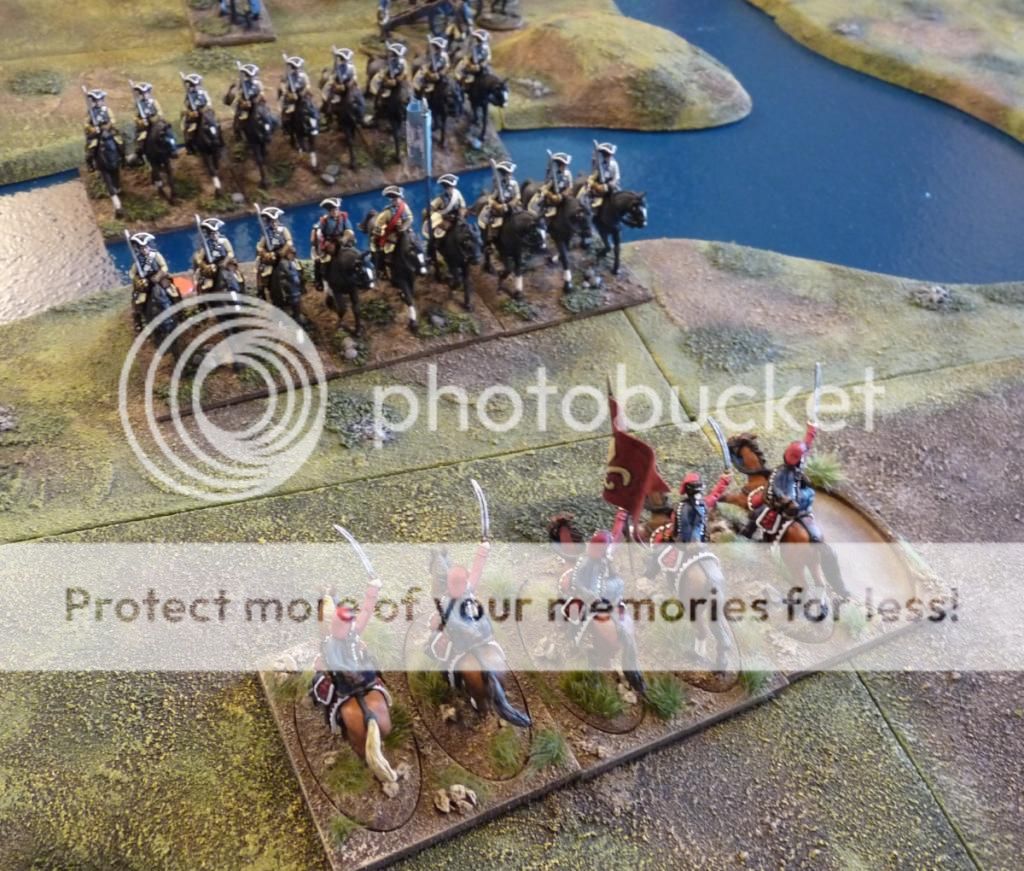
Montanelli Cuirassier Regiment                            (Heavy cavalry, 3 squadrons,
                                                                              18
figures)
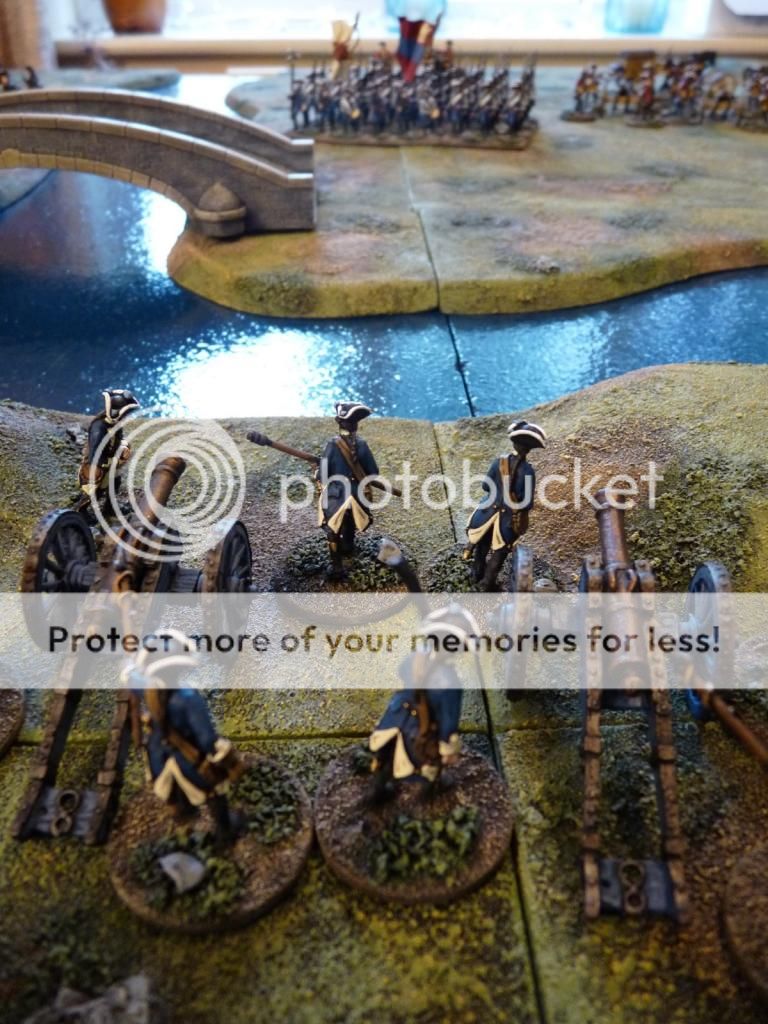
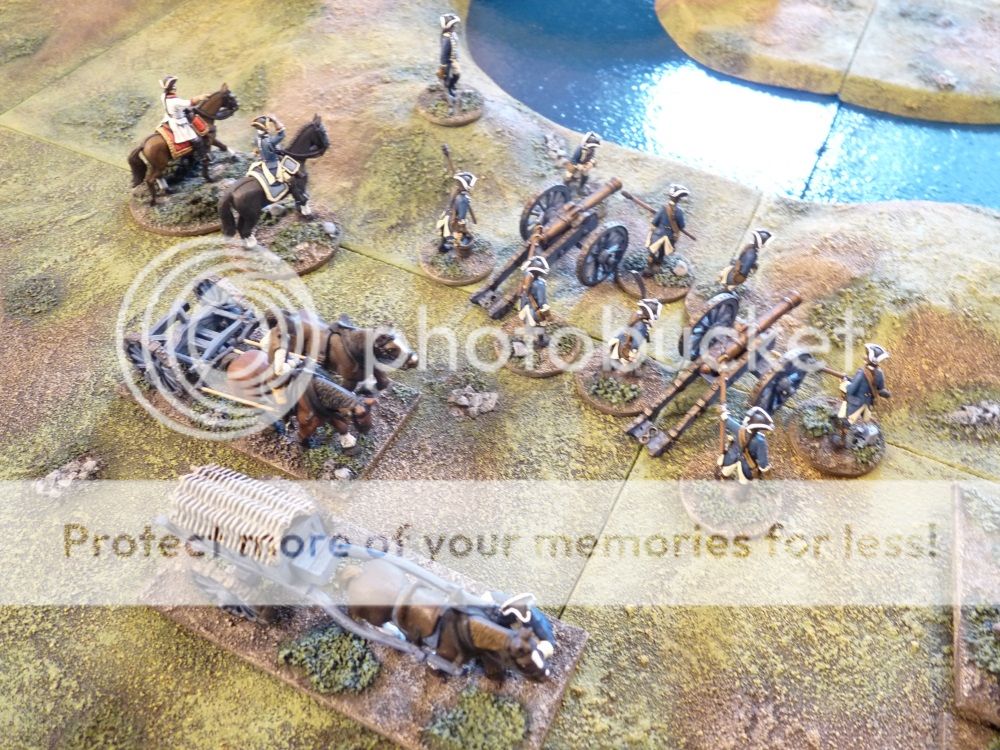
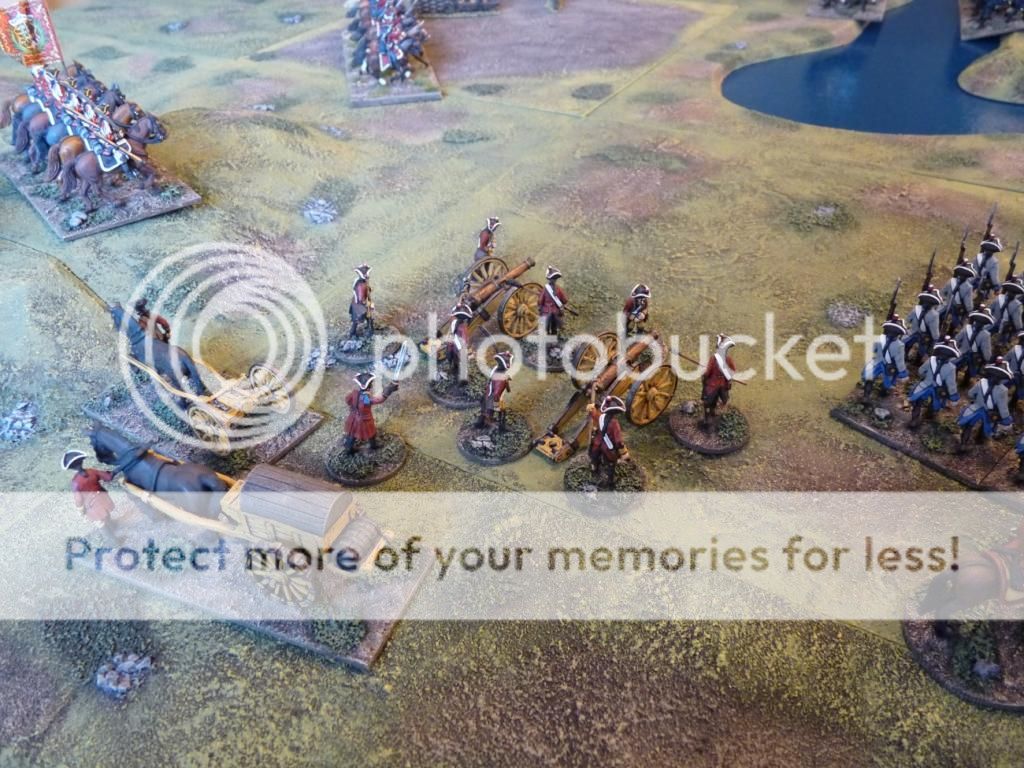
Pagani’s Field Battery                                   (Medium artillery, 2 guns, 8
crew)
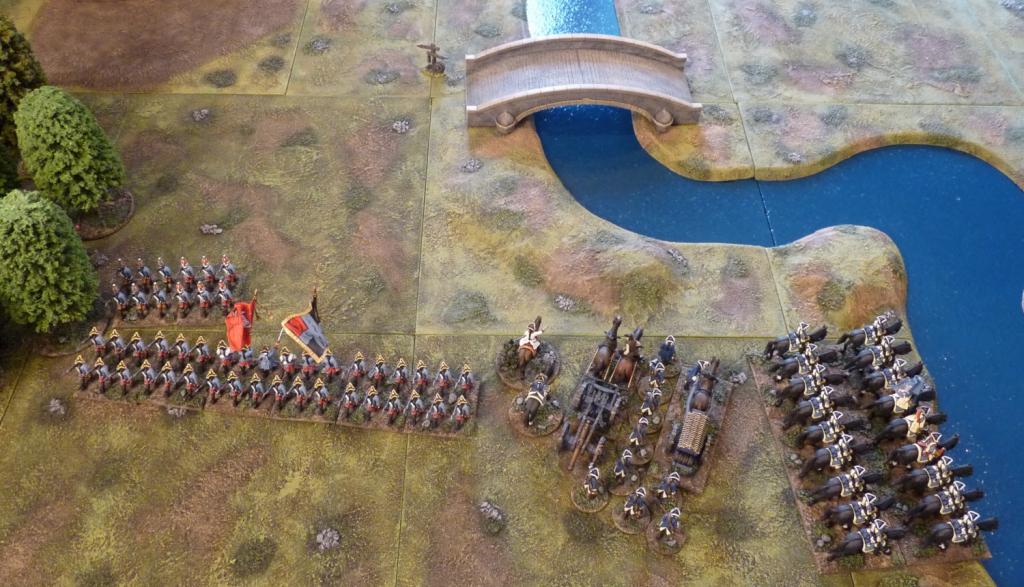
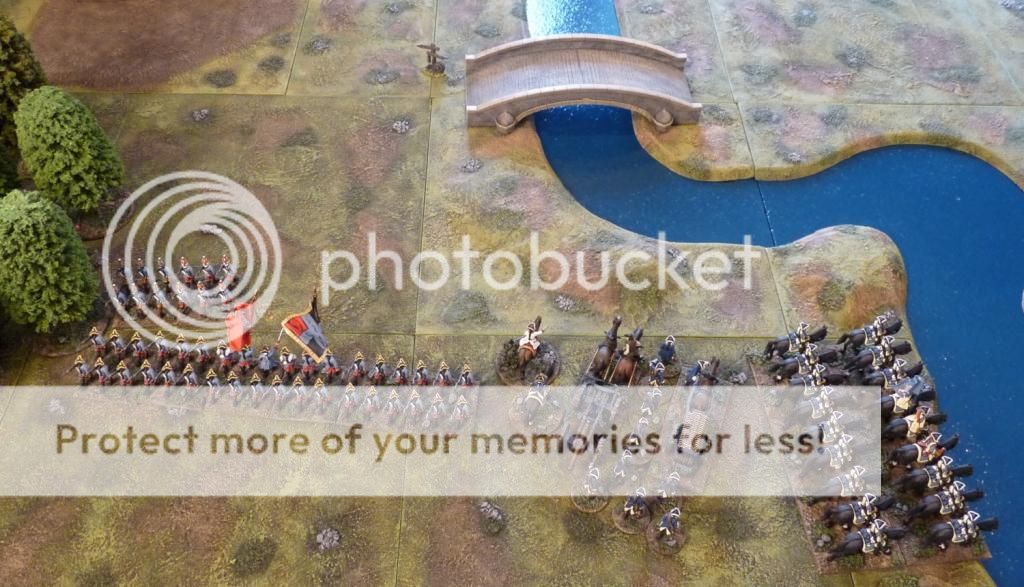
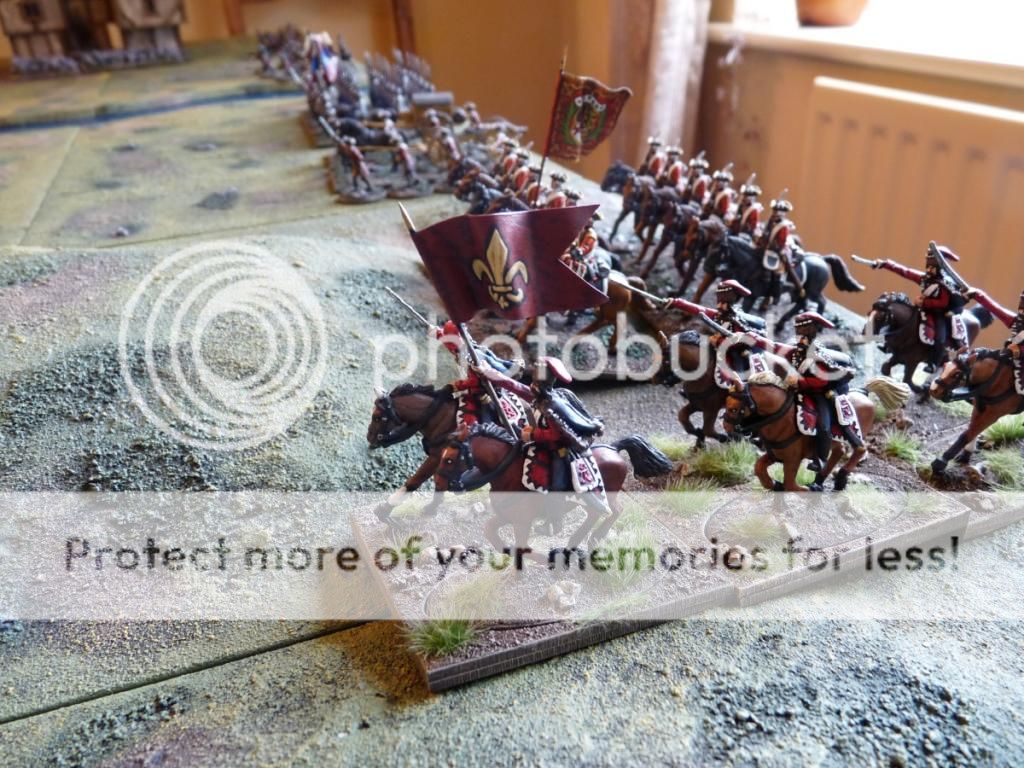
The Army of the Kingdom of Fleurie
Advanced Guard under the command of the Baron de Bevue.
Bravence Regiment                                              (Line
infantry, 36 figures)
Friant’s Jager Company*                                      (Light
infantry, 12 figures)
Wurttemberg Jager Company                               (Light
infantry, 12 figures)
Rutowsky Dragoon Regiment                               (Heavy
cavalry, 2 squadrons,
                                                                               12 figures)
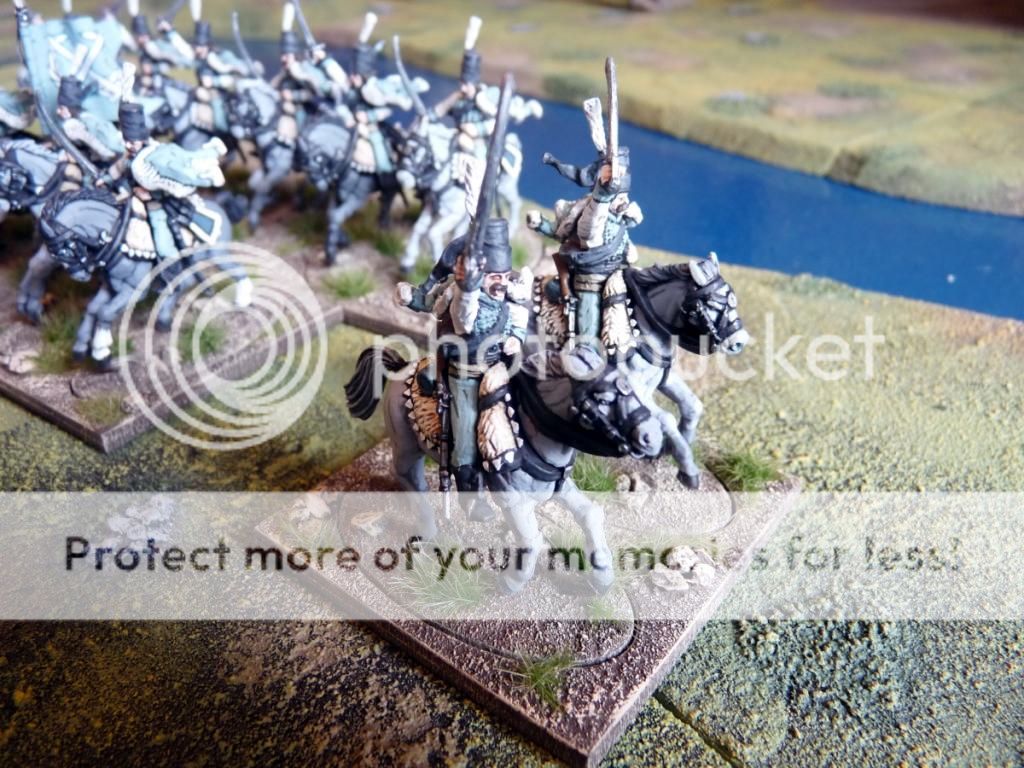
Legion de Fleurie Hussar Squadron                      (Light cavalry, 6 figures)
Rasalle’s Field Battery                                  (Medium
artillery, 2 guns, 8 crew)
*this unit is standing in for the recently painted, but
regrettably not yet fully based, Legion
skirmishers I posted about last month.
 
Rules
The rules I’m using for this battle are Henry Hyde’s ‘Shot,
Steel and Stone’ as used at the big multi-player games at Ayton. They should
certainly suffice for this little encounter.


This is the first solo game I’ve ever played with this
collection, and the first time I’ve used a 6’x4’ table at home, so it’s all
new!  Deployment next, and then the battle report to
follow..