The Defence of Arnor – A Dragon Rampant mini-campaign

I’ve finally started my Middle Earth campaign, which will be an on-going series of linked games set in the mid-Third Age. The background is the fight for survival of the declining kingdom of Arnor, or rather its one remaining splinter state, Arthedain, against the Witch King of Angmar and his allies.

The idea is to play games of Dragon Rampant (with a few minor scene-setting tweeks), both solo and 2-player. There’s no campaign map or ordering troops around, just battles and minor book-keeping to record who the faction leaders are and how they’re progressing (or not).

The objectives are to have fun and get a bit of immersion in Tolkein’s world. Arnor in the T.A. 1650s offers lots of scope for different forces, alliances and troop types, so I can free-form things in whichever direction I choose to go.


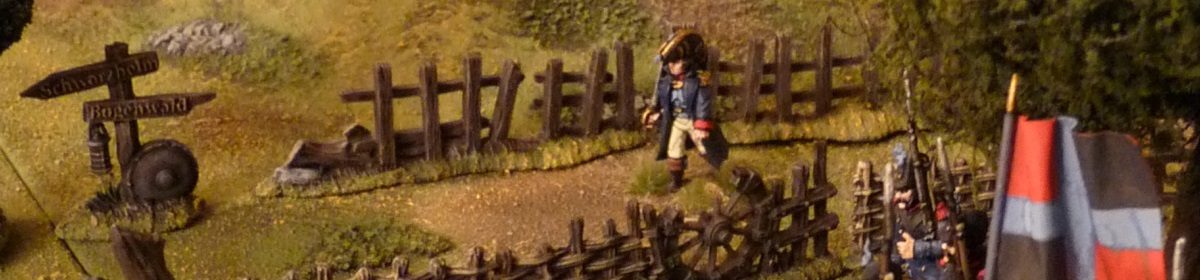
Lord Finaroth gallops out to turn back a border incursion by Rhudaurim raiders. Despite his heroic efforts he was slain by an arrow in the second game, giving his enemy some useful victory points.

No orcs or other nasties on the table yet, just men in a classic good vs evil confrontation.


Helgmar, a Rhuadar Chieftain, leads his savage hearthguard on a raid. His unit has routed in both the first 2 games, costing him victory points and loss of face, but unlike his initial opponent, at least he’s still alive.

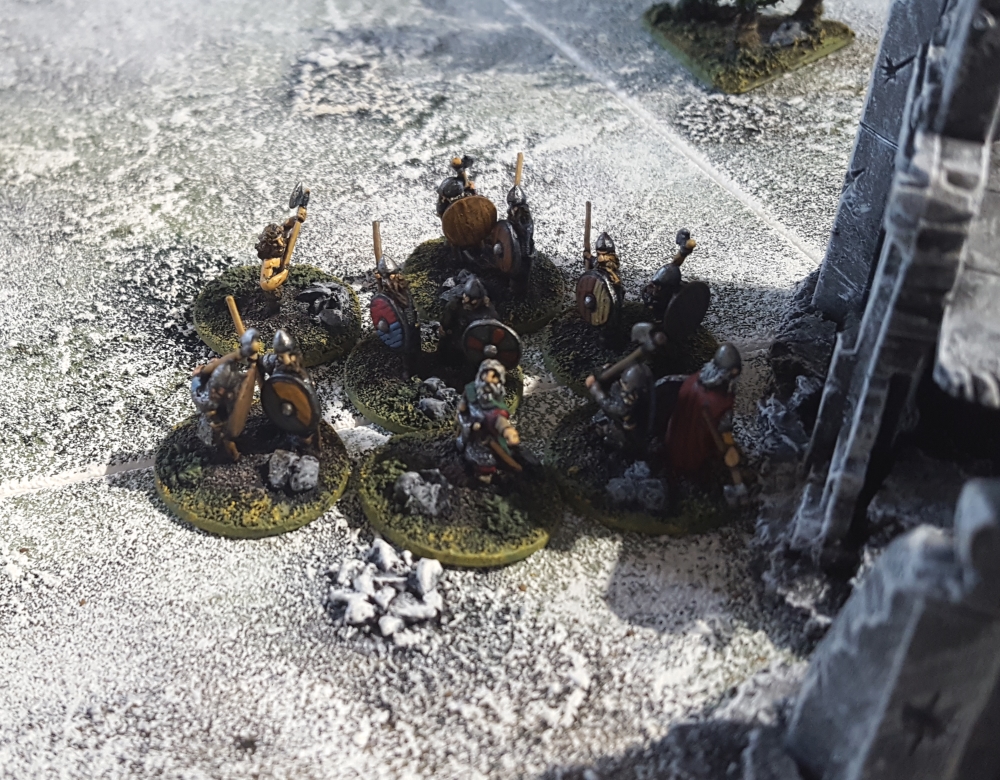
Figures are from various 15mm Dark Ages and Late Roman era armies. I have plenty of fantasy figures to introduce over time, and am working on some Arnor royal troops for when these initial minor border clashes turn into something more serious.

The Chronicle so far:

# Scenario & Location Arnor Angmar
1 ‘Take them head-on’

March Lord aims to stop a Rhudaur incursion on the border

Ruins of Caer Molir watchtower

Lord Finorath (Might 10, Aggressive)

Attacker. +6 Might

Helgmar (Might 10, Energetic)

Defender. +0, Might, routed

2 ‘No Quarter’

Rhudaur chieftain seeks to restore his reputation by killing his adversary

The Weather Hills north of Amon Sul

Lord Finorath (Might 16, Aggressive)

Defender. Slain by an arrow. +1 Hero

Helgmar (Might 10, Energetic)

Attacker. +3 Might, routed. +1 Standard bearer

3

next

‘Ride Now’

With Finorath’s force destroyed, a nearby border patrol is outflanked and attempts to retreat

The Weather Hills north of Amon Sul

Ealdorman Branost (Might 10, Proud) Helgmar (Might 13, Energetic)


Bold – won scenario, otherwise drawn

Mollwitz in 6mm – part 2

The game played out much like the actual battle. The Austrians held tight except for the inevitable big charge by their left wing cavalry. The Prussians drove forward with their infantry but then paused to see how their right flank fared. Although the Prussian cavalry, and eventually the interspersed grenadiers too, were swept away, they held for just long enough for the right-hand infantry brigades to re-deploy and shore up the exposed flank.

The Prussian infantry then went forward to engage the Austrian battalions. Their superior musketry and discipline was soon showing, and the Austrian infantry began to suffer.

Although still a force to be reckoned with the Austrian left wing cavalry was going to be tied up dealing with the reforming Prussians, and sorting themselves out again in time to intervene in the centre was looking unlikely. This was made tougher by having poor old General Romer lying dead on the field, along with one of his brigade commanders.

The Prussian left wing cavalry flirted with their opponents across the rough ground around the stream, and did at least draw off a few Austrians who were sent to block the flank. Fighting was minimal though and neither side tried to escalate things into a major engagement.

Within 3 turns the Austrian centre was overcome by the Prussian’s devastating firepower. Their commander, General Neipperg, was shot from his horse and most of the battalions had retreated in confusion into Mollwitz. It was clear that it wasn’t going to be possible to reform them, and with the Prussians taking precautions against any final desperate attack by the victorious Austrian cavalry, the battle was effectively over.

The Austrian cavalry and the remains of its left wing infantry would be sufficient to cover a general withdrawal. The Prussians were in reasonable condition, but a long march through the snow followed by some fierce fighting, meant that there would be no vigorous pursuit. Frederick, who hadn’t actually fled the field this time, was satisfied enough with the first test of his new army, and was happy to let the beaten enemy go.

The game took about an hour and a half to play, same as it took to set it up. The fairly historical result was good to see, but I think I’d have enjoyed it regardless. The armies have taken a lot of effort to get to this stage (and there are still plenty more to do) so half the pleasure is just to get them on the table. Hopefully I’ll play some more games with them soon. I suppose I could work my way through Frederick’s battles in order – at least they start relatively small. Maybe it’ll be Chotusitz next!

Mollwitz in 6mm

This weekend I played a solo refight of Frederick the Great’s first battle, Mollwitz 1741, in 6mm. The rules were my Seven Years War variant of the Realtime Wargames set, Trapped Like a Fox, which has relatively simple mechanisms and is played on a grid.

Although a little short of space (the Austrians lacked the room for their cavalry to swing wide of the Prussian right wing) I was able to represent the full orders of battle. The armies were deployed ready to clash, as I didn’t feel the need to play out the Prussians’ slow march through the snow from their distant original deployment.

View from behind the Prussian infantry, looking towards Mollwitz and the Austrian infantry drawn up in front of it:

The Austrian view in return:

The powerful Austrian left wing cavalry, under the ill-fated (in both the real battle and the game) General Romer:

Some more pics of the Austrians:

I tried to reflect the various troop qualities, with the Prussians having by far the better infantry, and the Austrians the better cavalry. There were a decent number of generals and sub-commanders on each side. Well, at least at the start.

In game terms the options available to the two sides were basically what they were for the real commanders. The Austrians need to make their superior cavalry count on their left flank, their best chance of victory being to drive off the meagre Prussian cavalry and roll up the infantry. The Prussians need to hold off the enemy cavalry long enough for their excellent infantry to march up and crush their Austrian counterparts. For both armies the stream and rough/boggy ground made the other flank an unlikely place for any decisive action.

Oh yes, a pic of the battlefield before everyone turned up:

That’s the preamble, the next post will cover the game itself.

Ayton Event 2019 – A VBCW Naval Force

As in previous years, the LAW forum get-together in Ayton took place over the May bank holiday weekend.

There were several games on the 2 days, with the biggest one being a Very British Civil War game on a grand scale. I’ll post about the games separately, but thought I’d put a picture up to show the force I took along.

This was a naval contingent from HMS Scarborough, just back from the Indian station and aiming to help restore a bit of order in this part of Yorkshire.

Half the figures are actually colonial sailors (including Gatling gun) I already had. Although a bit anachronistic this gave me a decent starting point as, despite being really up for the games/setting, I didn’t really want a major VBCW painting project. So, I picked up a box of Warlord Games naval party and a few packs from Empress Miniatures and added these into my force. They were nice to paint and helped bridge the gap to the pre-war period.

To motorise some of the units I added a couple of Warbases MDF vehicles, which were a bit fiddly to assemble but ended up looking OK. Goat Major also kindly donated a couple of diecast lorries which got an armour plating and paint make-over. In honour of 2 of the navy’s most powerful battleships of the time, they were duly named Nelson and Rodney.

This made up a relatively standard platoon-sized force for the VBCW rules we used: ‘Went the Day Well?’ It comprised an HQ section including standard bearer, 3 sections of infantry (sailors), an HMG support weapon and a special section of Royal Marines (in helmets).

Finally, I contributed a whole 1 civilian to the table, Miss Marple herself.

Pics of the games and terrain to follow. Naturally it was an excellent weekend all-round!