I’m quite pleased to have made it to a hundred posts. You’re never sure with this sort of thing if you’ll keep it going or if it will just fizzle out. Anyway, it’s been fun so far so I’ll see if I can get to 200.
I didn’t have much new to post about but then, with Ayton 2015 fast approaching, I realised that I never did share my account of the Ayton 2014 campaign, other than with Henry Hyde. So, here is the official Medetian history, not too biased I hope, but naturally concentrating on my perspective of the pre-weekend planning and the on-table events themselves..
particularly) was the first priority so that a discussion could take place
about plans and timings. A conference was duly called and hosted by General Hauptzeige in the Governor’s Palace in Castell Sebastian. Numerous ideas were put forth, although geography, initial deployments and limited campaign time clearly suggested a two-pronged invasion, from the east by land, and from the west by sea.
coherent plan, with everyone more or less in agreement, was a welcome surprise. That the various contingents’ own intentions (some of which were already being implemented!) were largely incorporated in the combined plan was no doubt the reason for such co-operation.
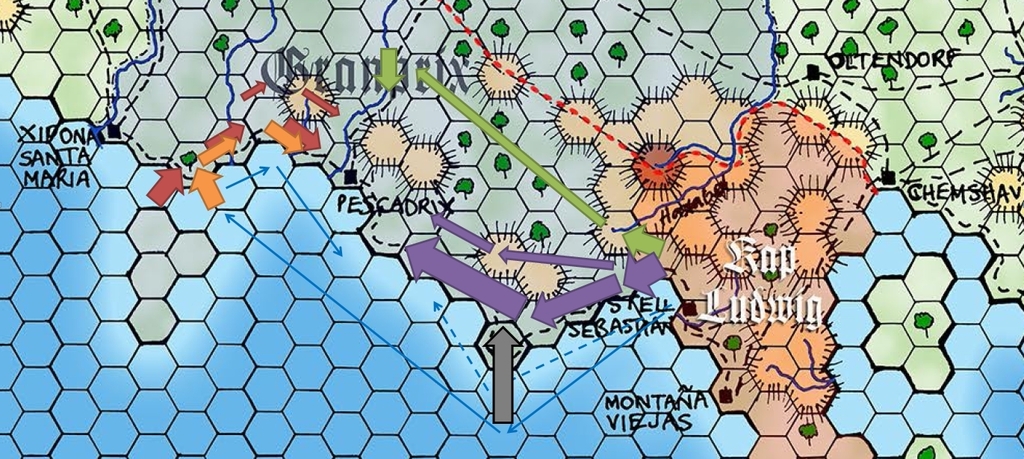
island off the Duchy’s southern coast, were to invade Granprix from west of the capital and its river lines. The Prunkland bridging column, kindly loaned by Hauptzeige, would go with them to assist in their advance east, and the doughty Wheyeydians would take ship to land in their support. Subject to what opposition they encountered, they would attempt to approach Pescadrix from the west and hopefully draw off a proportion of the defenders’ strength.
coast road, with light troops covering the hilly right flank where enemy advanced forces might be lurking. The rest of the main army would follow closely, consisting of the infantry and light troops of Darien, and the army of Prunkland, who would be last to depart. The Granprixian forces under the Duke would land by sea further along the coast and thereby link up with the main army, creating a combined (and hopefully unstoppable) force of over 2,000 figures.
would not have arrived in time, so instead the Darienite cavalry marched to the right of the main army and was close enough to be able to make a crucial contribution to both battles.
Granprixian Invasion Plan (click to enlarge)
Granprixian guerilleros were encountered, providing intelligence, confirming that the enemy were out of position guarding against non-existent threats to the north west, and offering assistance in the coming fight. Both were welcome. Some naval skirmishes took place off the coast but, coming as they did after the key landings, without serious impact on the land campaign.
and with their combined cavalry in the plain between. Granprixian forces were assigned the extreme left of our attacking army, aiming to capture the village and had assault troops, led by their Grenadiers, literally advancing along the beach. The forces of Darien, Prunkland and Medetia occupied the centre and right of the army, with their units intermingled to give best advantage. A very strong cavalry force (largely from Darien) deployed to the right of the Granprixians, opposite the enemy cavalry. A mighty combined battery dominated the centre, and both close order and light infantry faced the hills and woods ready to advance and throw the enemy from them.
confusion. Meanwhile the grand battery pulverised the enemy positions, and some of their cavalry, forcing the Altefritzenbergers to make the decision between being destroyed in place or advancing to their doom. They bravely chose the latter and, by coming to grips with our infantry down the slopes, actually protected themselves from much of the artillery’s fire. The skirmishes among the woods and ponds were prolonged, but a strong column of Medetian battalions, led by the Bravence Regiment, was pushing forward inexorably on the extreme right flank and when the enemy facing them finally broke, the end was in sight.
cavalry (some 130 figures) also hastened the enemy’s decision to give up the fight and save themselves for another day.
march west to liberate Pescadrix.
enemy and the city. General Barolo sent them a message urging them to send a force to approach the city from the west and capture the main bridge over the river.
die down. Gateway and Medetia commanders signalled a tacit ceasefire and the brave defenders began to withdraw into the city, where their fate would no doubt be decided by diplomats eager to extract what advantages they could in the peace negotiations.
Gaming Weekend Day 2 – A Granprixian Skirmish
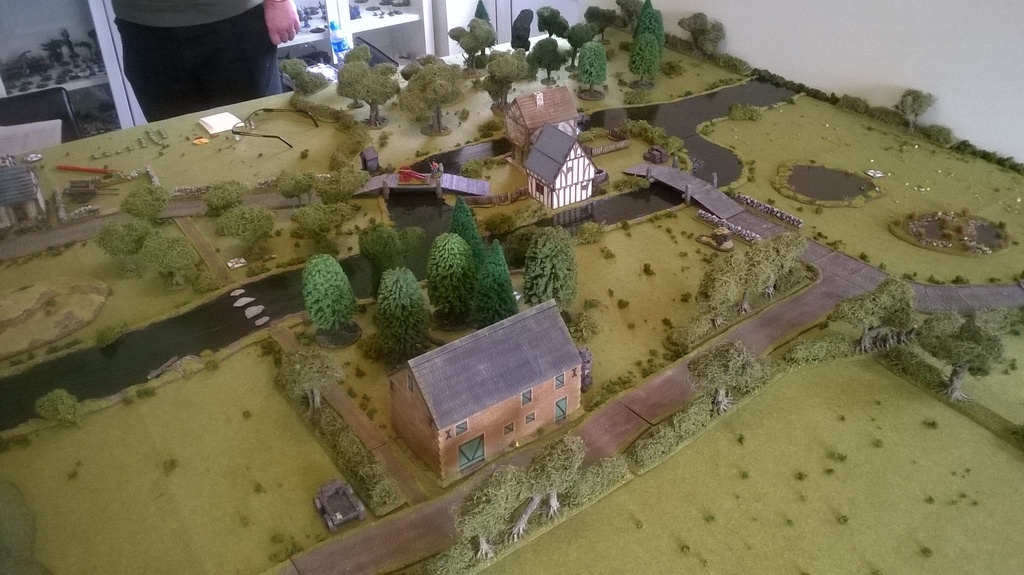
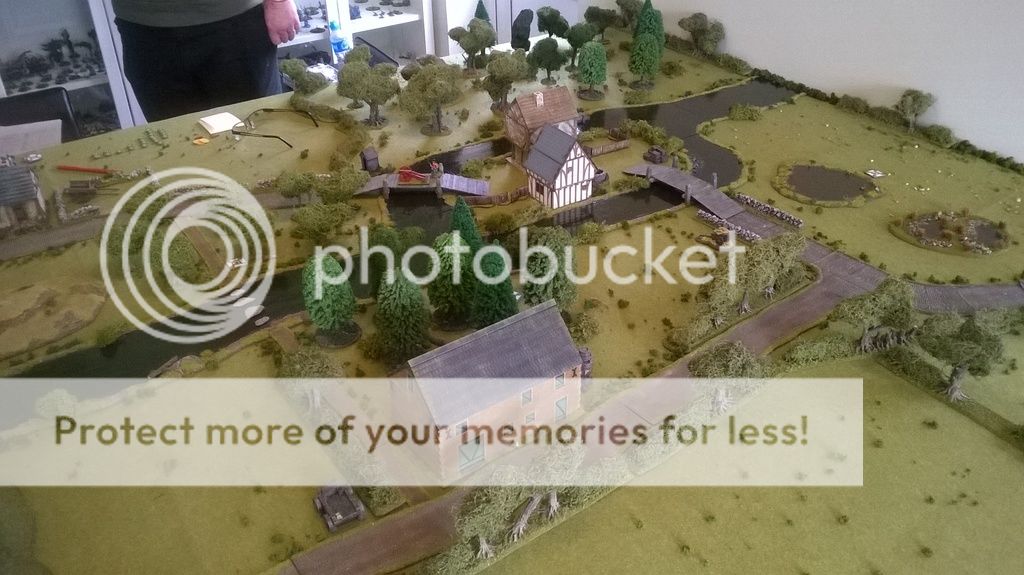
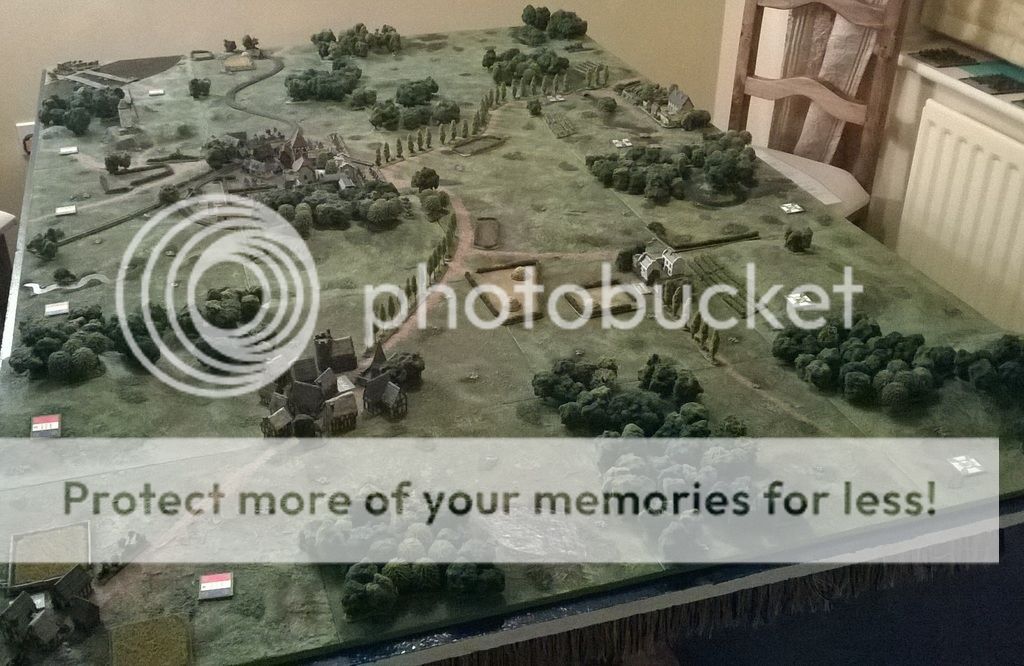
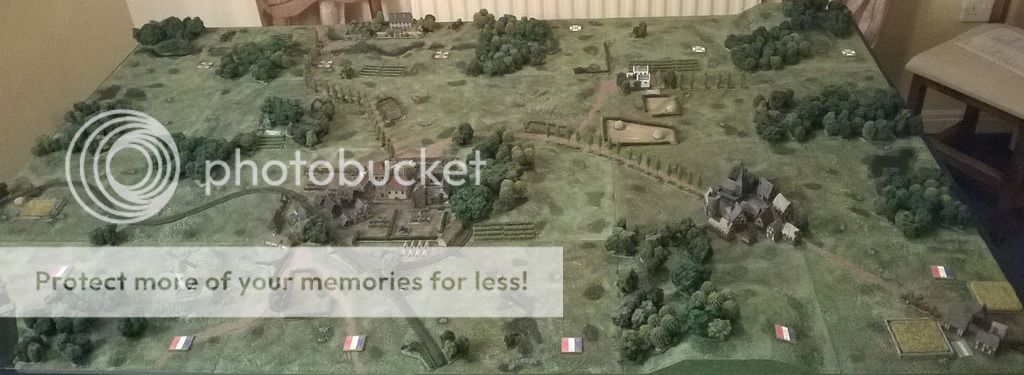
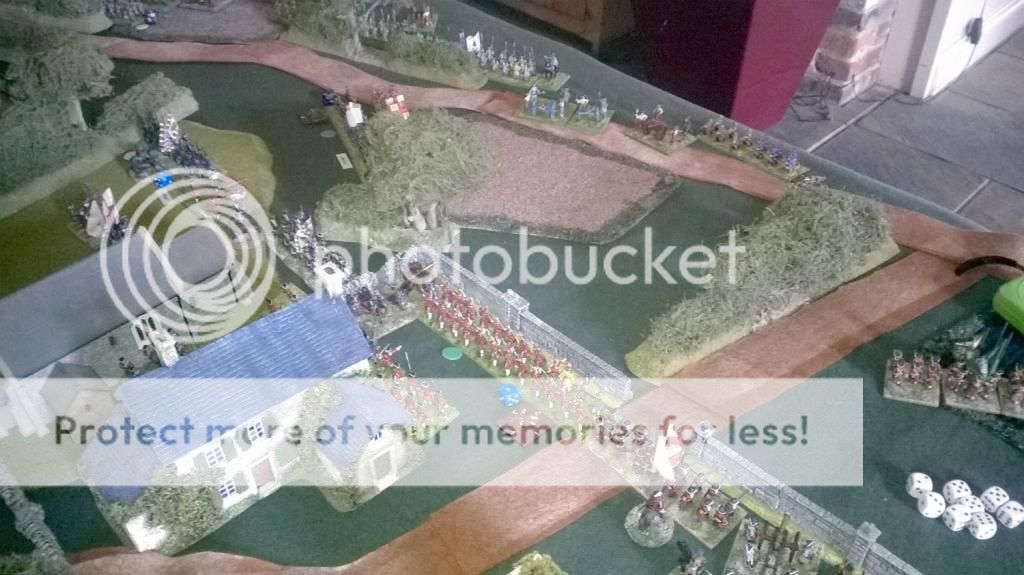
Once we had breakfasted and returned to the land of the living, we set off in convoy (herding Iain between 2 cars to ensure he found the place) for Simon’s house near Lincoln. We were greeted by very nicely pre-prepared terrain, including excellent new home-made rivers, on Simon’s extended 8’x6′ table.
A very interesting (and entertaining, as it turned out) scenario had been prepared for us. We were to play out some post-Ayton 2014 action, with Gateway (Iain) and Altfritzenberg (Andy) forces making for their transport ships along the Granprixian coast following their defeat at the big battle outside the capital Pescadrix. My Medetians were trying to cut them off, while a small number of Simon’s Prunklanders were already in place as a (sleepy) garrison on the island in the river that the fugitives needed to cross.
We all got to bring our own figures to use, and it was good to see the various imagi-nations contingents together again. The 4 of us had fought opposite each other in 2 battles at Ayton with the big version of these forces so it was an opportunity for a re-match, and there was plenty to enjoy!
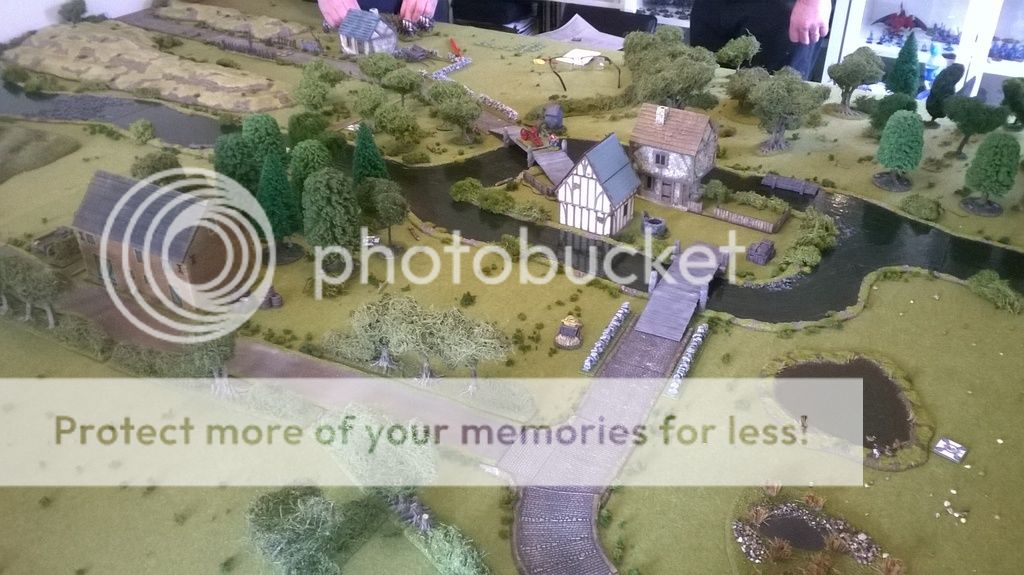
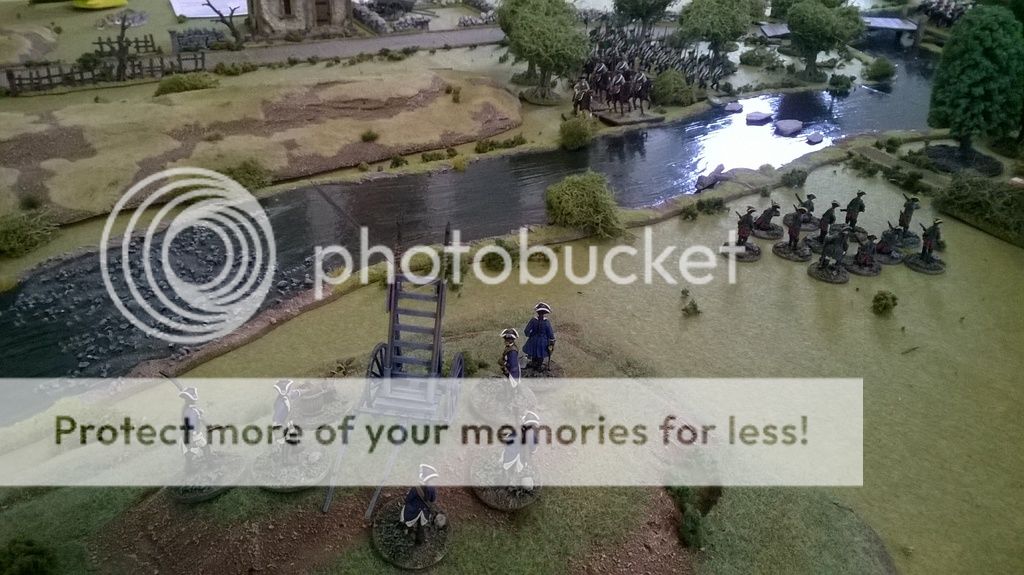
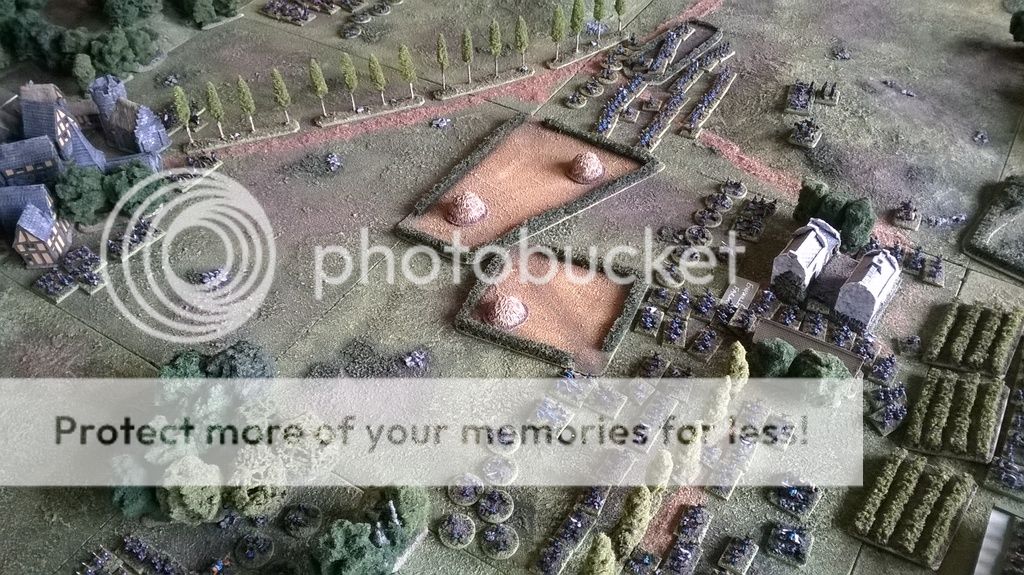
The table before the mayhem ensued:
There were lots of surprises in the scenario, and as usual the Sharp Practice rules threw up plenty of entertainment. Although new to the rules, Andy and Iain got on with them very well. We played a lot of turns, had a lot of laughs and banter, and got a result before it was time to go home.
I won’t try to narrate the battle and all of its twists and turns, but I’ve captioned the pictures I managed to take. Hopefully they do the game justice, because it was great to play in as well as being a visual treat..
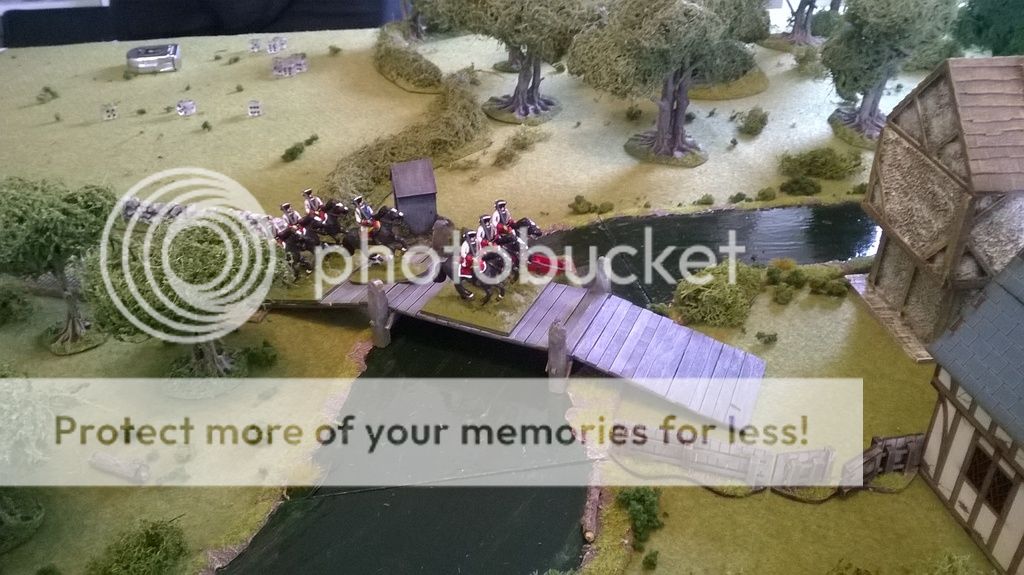
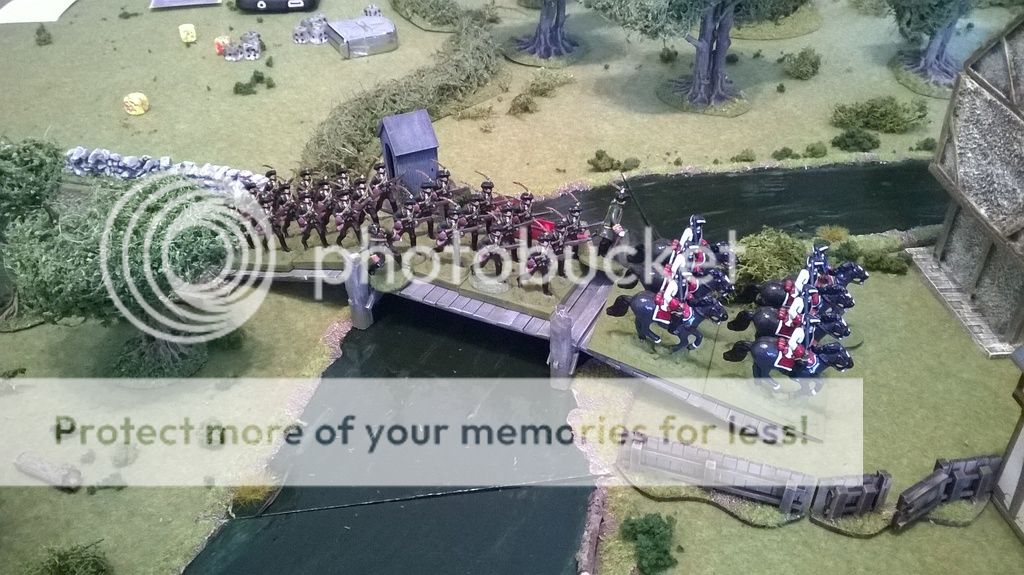
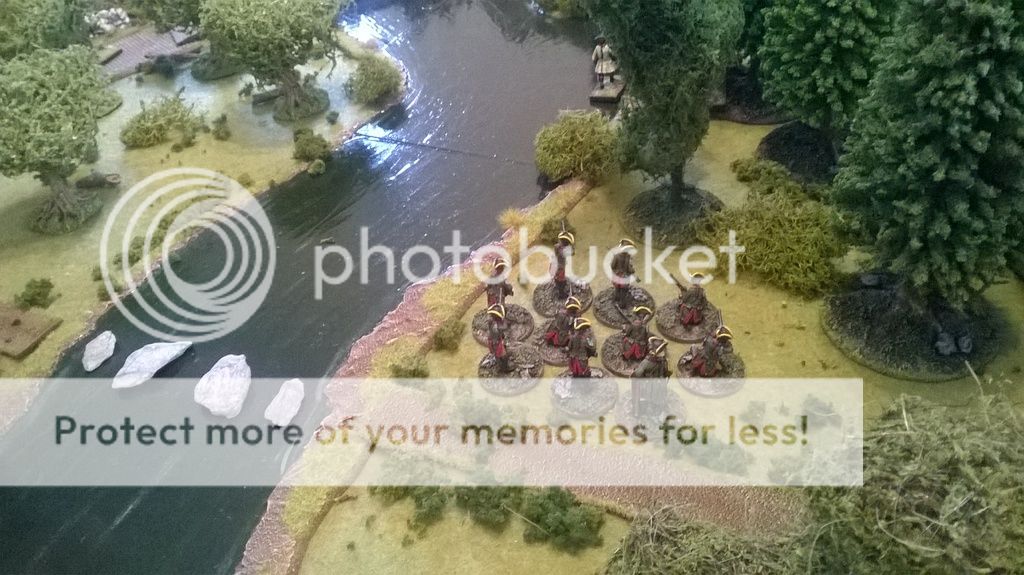
Deploying off a blind, Iain’s Gateway dragoons made it to the bridge quickly. They just missed catching the sentry but had time to dismount and push the unattended cannon into the river. This was to be their high point in the game, and after this most of their actions should have been accompanied by circus clown music!
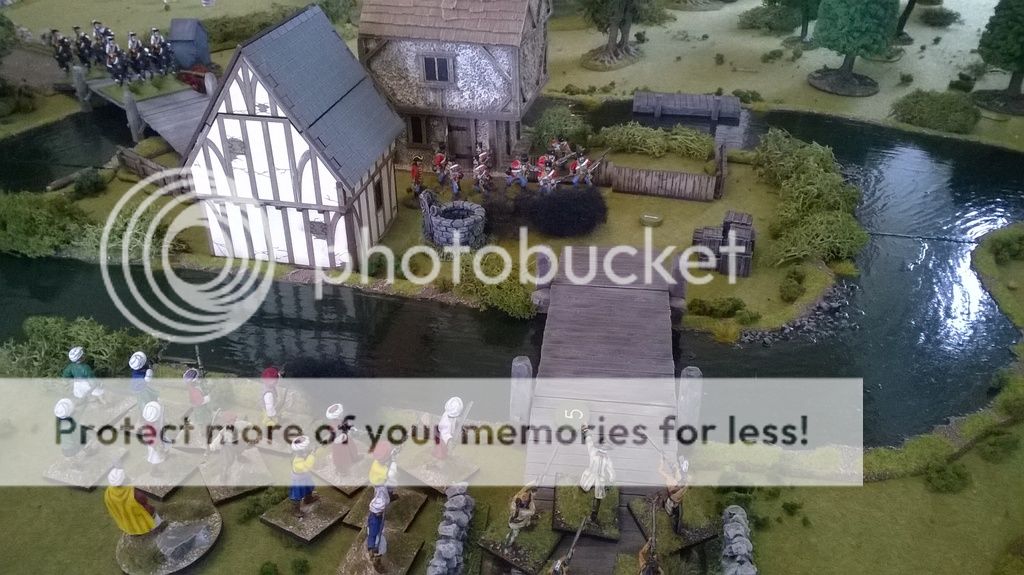
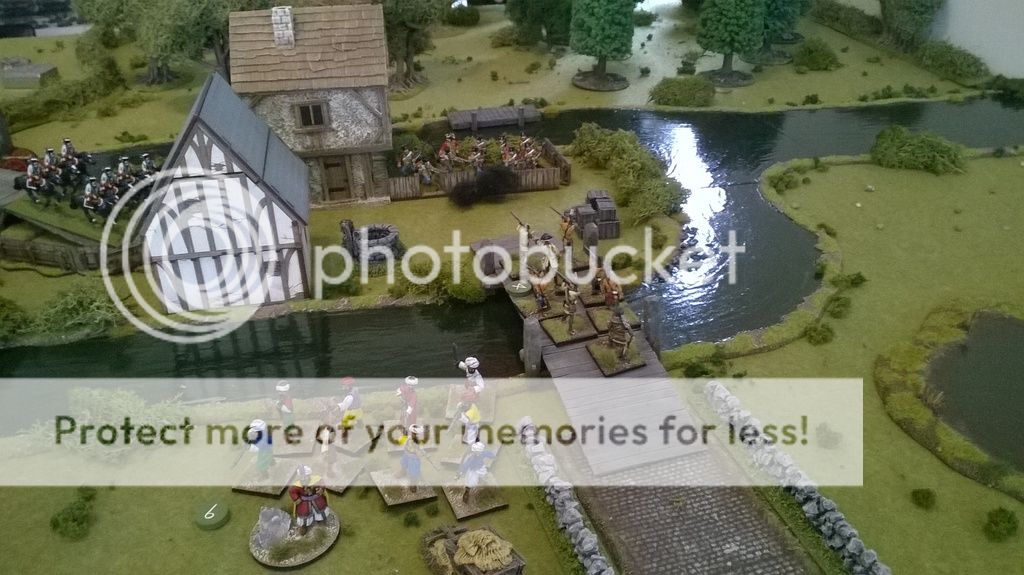
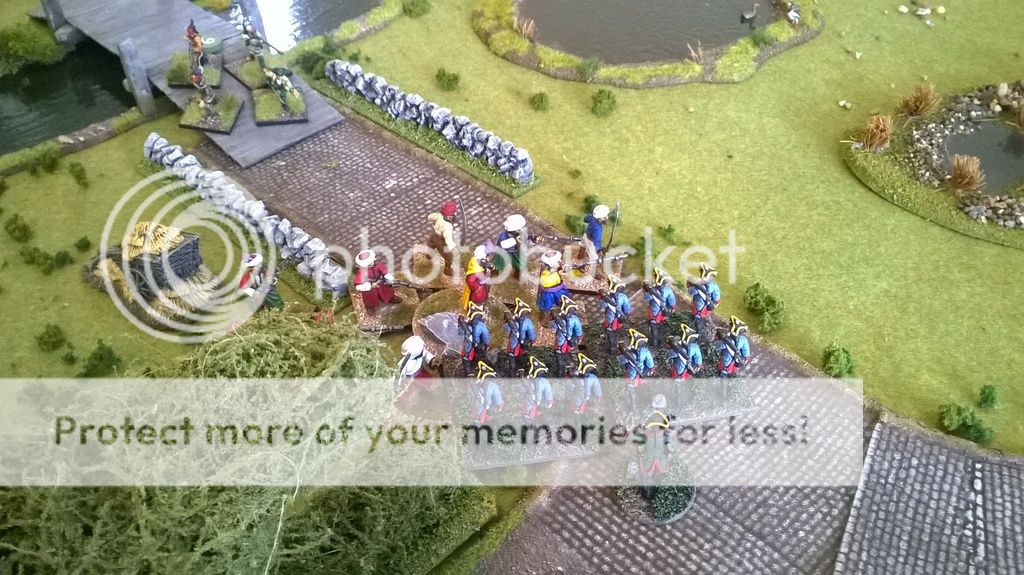
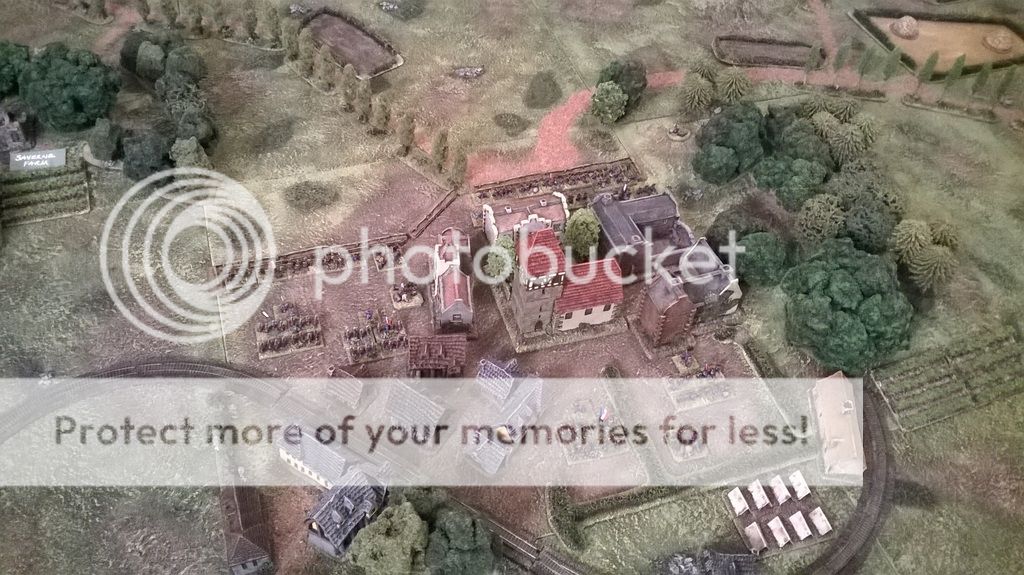
Alerted by the sentry just in time, the Prunkland Grenzers dashed out of the main house on the island, to take up a defensive position in the adjacent garden:
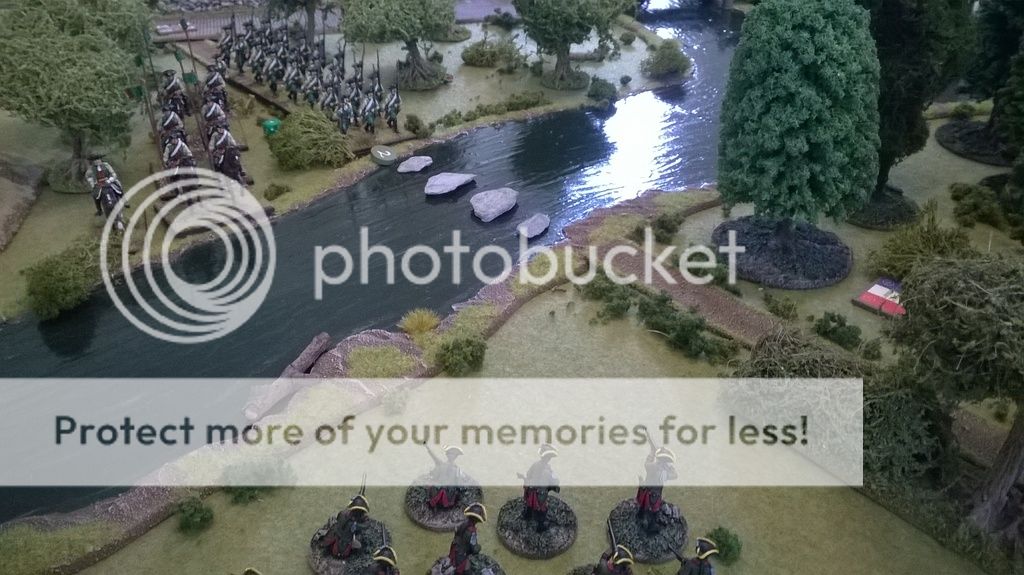
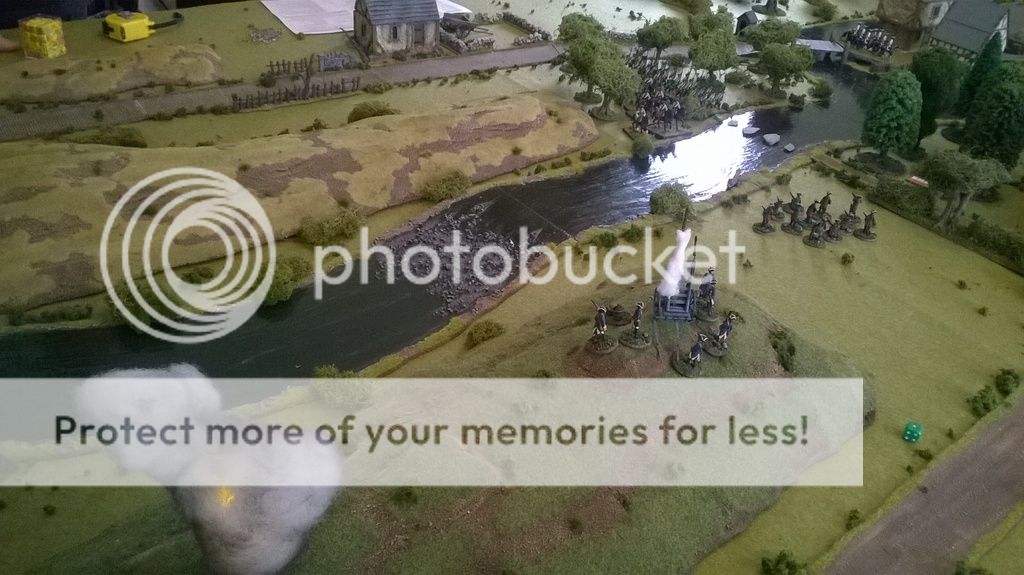
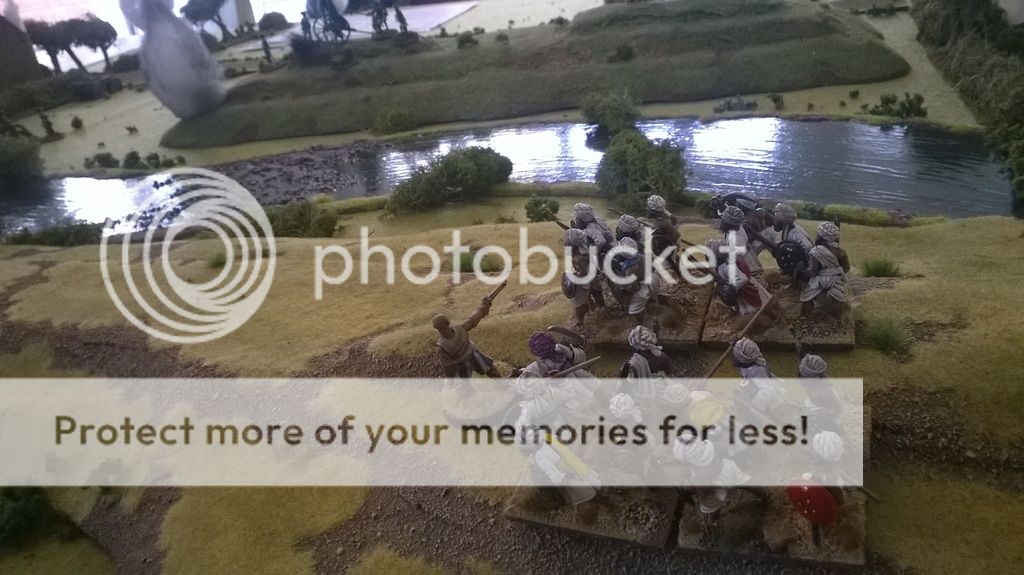
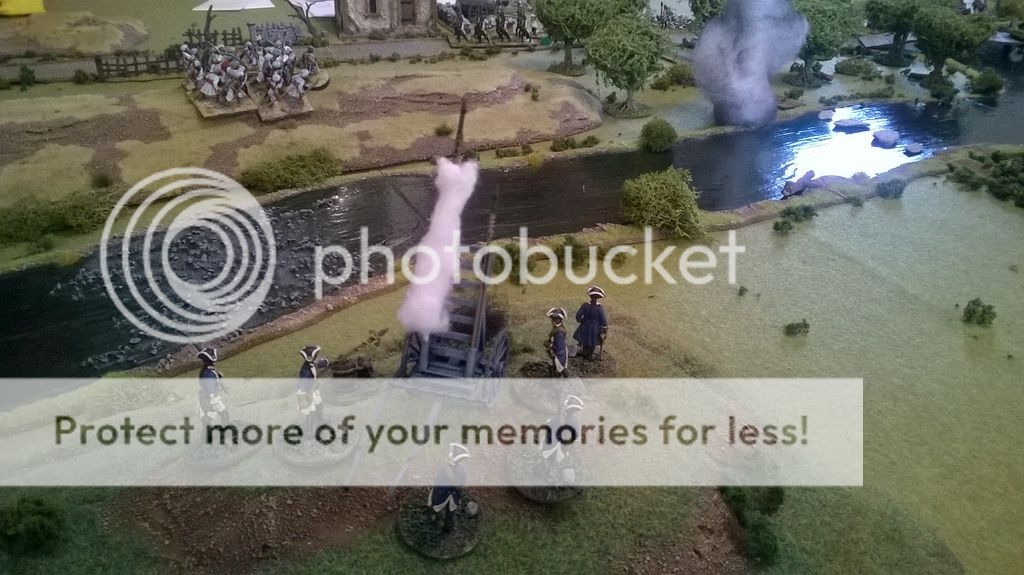
Troops were arriving on both sides of the river, racing in parallel towards the bridges. The Medetian Jager led the way, buying time for the rocket battery to set up on a handy hilltop with a very good view of everything:
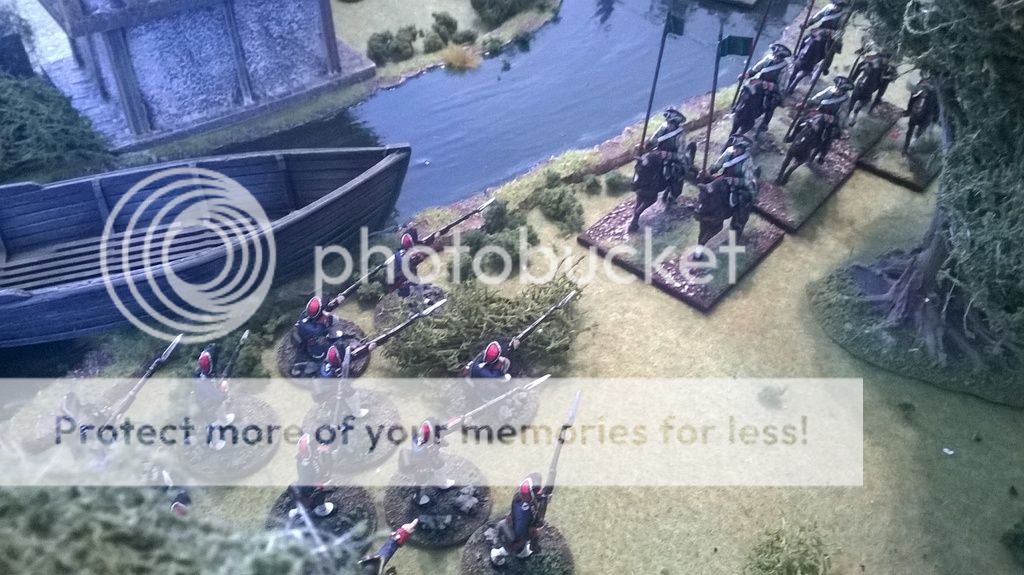
Andy’s Altfritzenbergers decided to get across the river early, which involved coming at the Medetians head-on. Some very accurate (ie. lucky) fire made this a real challenge, however:
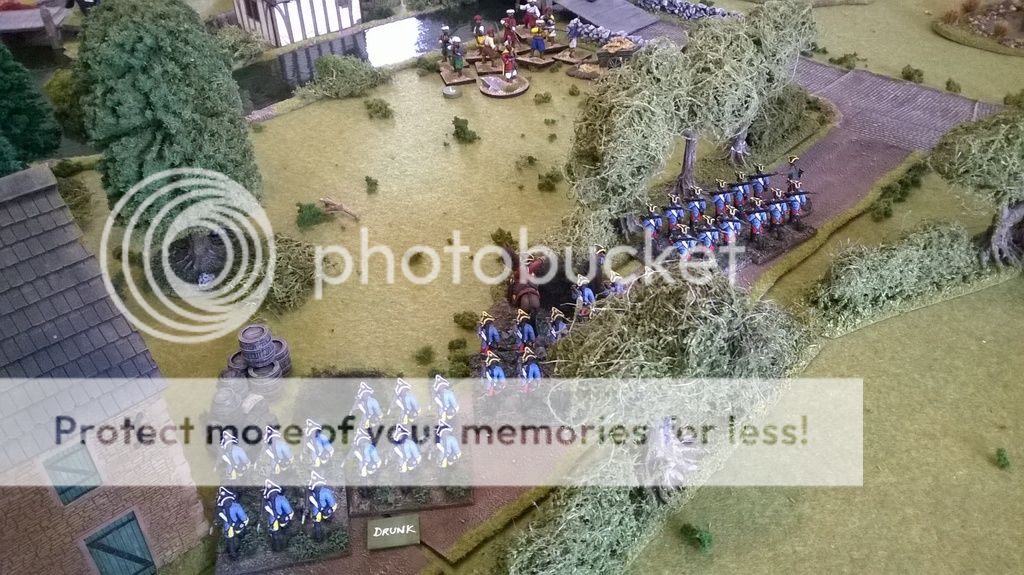
Up ahead, the bulk of my Medetians had made fast progress and were able to take the dastardly natives and corsairs (who had infiltrated deep onto the table from the start) by surprise:
Andy’s natives charged over the bridge but were seen off by the tough Grenzers. Their officer was badly wounded in the melee but his popularity meant that he was rescued and helped to safety:
As always, the first rocket wasn’t a great shot, landing behind the battery(!). The safest place to be is generally the target zone, as everybody knows:
After a volley or two it’s always best to follow up with the bayonet, and these Medetians did just that, dealing decisively with the corsairs and seeing them routed off the table:
Iain’s Gateway mob stormed over the bridge, or at least they would have if in front of them his dragoons hadn’t decided to dismount, mount, not move, and dismount again in successive turns. Answers on a postcard if anyone has a clue as to what was going on:
Hey, the rockets were getting more accurate. I’d like to reassure people that no enemy were killed by a rocket during the making of this game (sadly, one Medetian was however), although they did cause a fair bit of panic a couple of times when they zigzagged through a unit!
Late on my elite grenadiers finally arrived by boat and soon attracted enemy fire from a variety of sources, as well as a pretty determined cavalry charge by Andy’s lancers. Tough as nails, the grenadiers saw them off though:
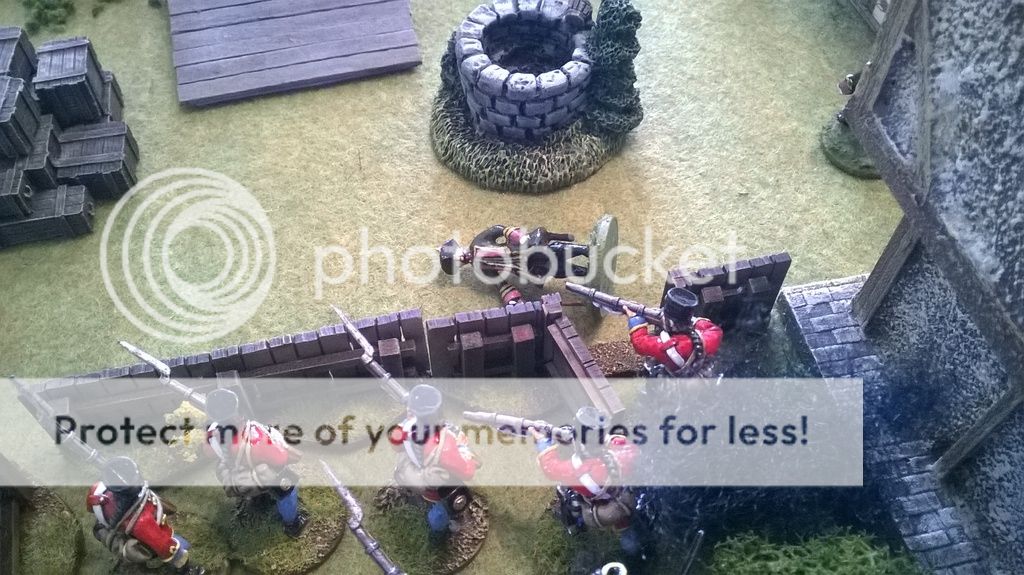
The latest attempt to chase off the Grenzers saw a repeat of the charge of the natives – Iain’s commander was laid low and his men routed. Unfortunately, this chap was less than popular with his men and they were careful to leave him behind when they fled! The Prunklanders reloaded and left him groaning on the other side of the fence, where they could keep an eye on him:
More surprises arrived; locals with an agenda of their own – but who would they side with?
The Gateway traffic jam finally clears the bridge, allowing my grenadiers to pick off sufficient of Iain’s artillery crew to send the remainder packing. At least Prunkland might get a replacement gun at the end of the game! This was the beginning of the end, and the survivors would have to find another route if they were to reach the safety of their ships.

After having a very torrid time (a rocket came awfully close!), Lt Lamm scampered out of harm’s way and rejoined his men just in time to be captured at the end of the battle. At least he wasn’t shot in the back as he legged it into the woods having crossed the river alone (actually he had company for most of the journey but when he reached the far bank and looked behind him, he realised that another close call from a rocket had been the final straw for some of the Savage Swans and he was suddenly Billy von No Mates with a nasty looking bunch of Medetians coming for him!)
A well-oiled machine by the end of the game. Oh yes.
What a great game. Thanks to Simon for all the prep and hosting, and Andy and Iain for providing such good fodder, er, I mean company.
Roll on the next gaming weekend!
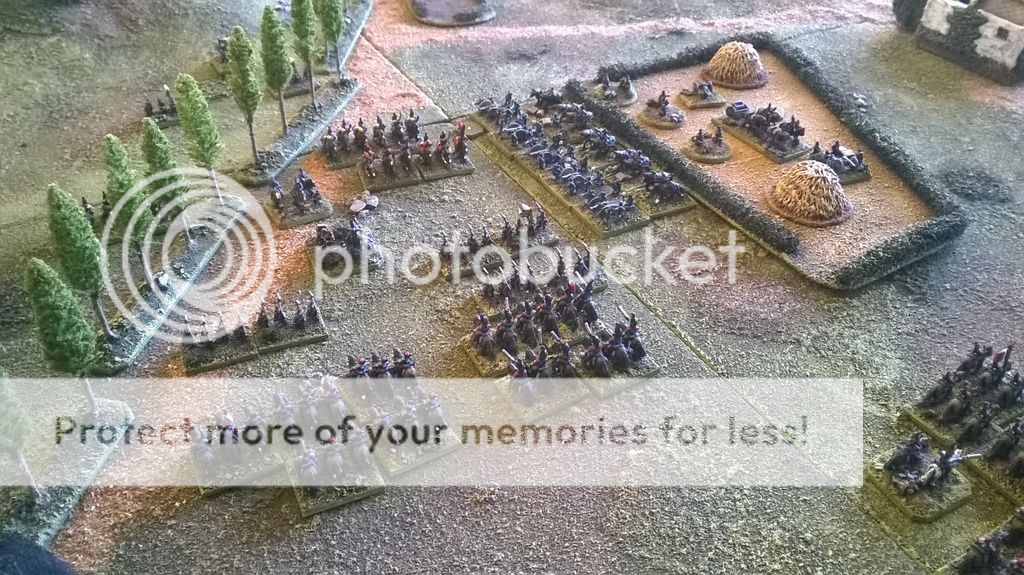
Gaming Weekend Day 1: The Battle of Hoffen 1870

Last weekend I was privileged to take part in, and share the hosting duties for, a 4 player gaming extravaganza that more than lived up to expectations. I was offering massed 6mm on day 1 and Simon provided a large 28mm skirmish game on the 2nd day. Our guests Iain and Andy came from opposite ends of the country to do battle, socialise and exchange banter. We even squeezed in an excellent night out between games.
On Saturday morning everyone picked up a baton and took command of a corps in a Franco-Prussian War battle between 50,000 French and 60,000 Germans. I (as General Douay of VII Corps) assisted Iain (Marshal MacMahon, I Corps) in attempting to hold the important (but slightly fictitious) town of Hoffen, near the border on day 2 of the German invasion. Fighting alongside each other, but with neither in overall command, Simon took the role of Prussian General Kirchbach of V Korps
and Andy was General Von der Tann with the Bavarian I Korps.
The French had a division from each corps already on the table. They had arrived the day before and camped, digging in a little, overnight. The Prussians and Bavarians were marching onto the field from the north, unsure of each other’s position or that of the enemy. Everyone had a number of arrival points for their marching columns and reinforcements. These were pre-determined by the players for new arrivals before each turn and led to some interesting dispositions and confrontations.
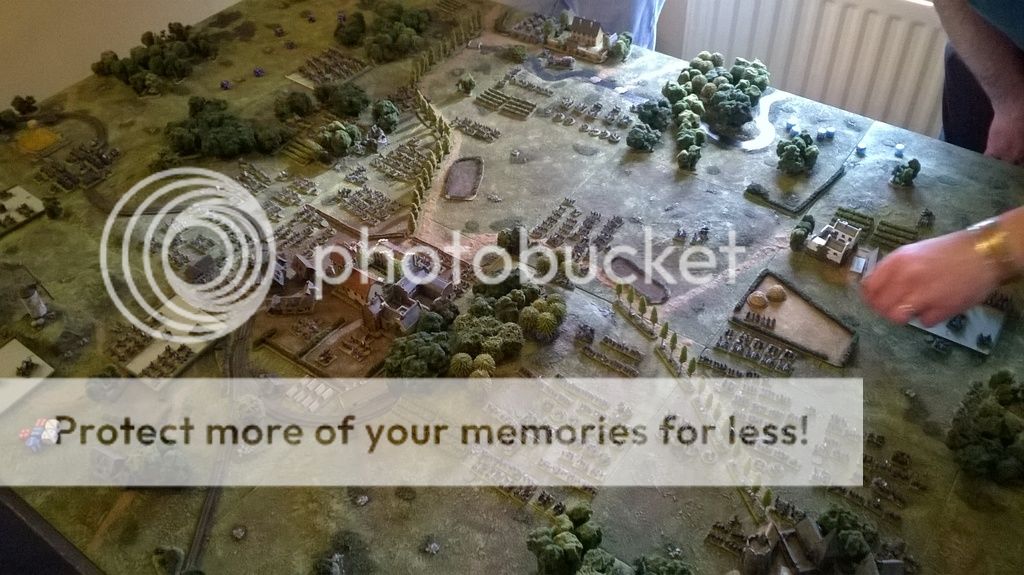
The table before the battle:
Unfortunately my usual camera was away from home, so these pictures were taken on my phone. Hopefully they at least convey the gist of how things looked.
In typical wargamer style, not everyone had read the briefing or the introduction to the rules (To the Last Gaiter Button by Realtime Wargames). I set the scene to the uninitiated, and provided lots of coffee to help.. Nevertheless, before too long hordes of horse, foot and guns were trampling over the previously tranquil Alsace countryside and some serious fighting erupted across several miles of front.
I threw my French forward to stop Andy’s Bavarian horde from enveloping Hoffen from the east, and managed to put a dent in his advance, tying up his forward troops and drawing in reserves. Iain and Simon competed to build up the stronger force to the west of the town, using newly arriving formations wherever they could to keep the initiative.
Early moves:

The battle in full flow:
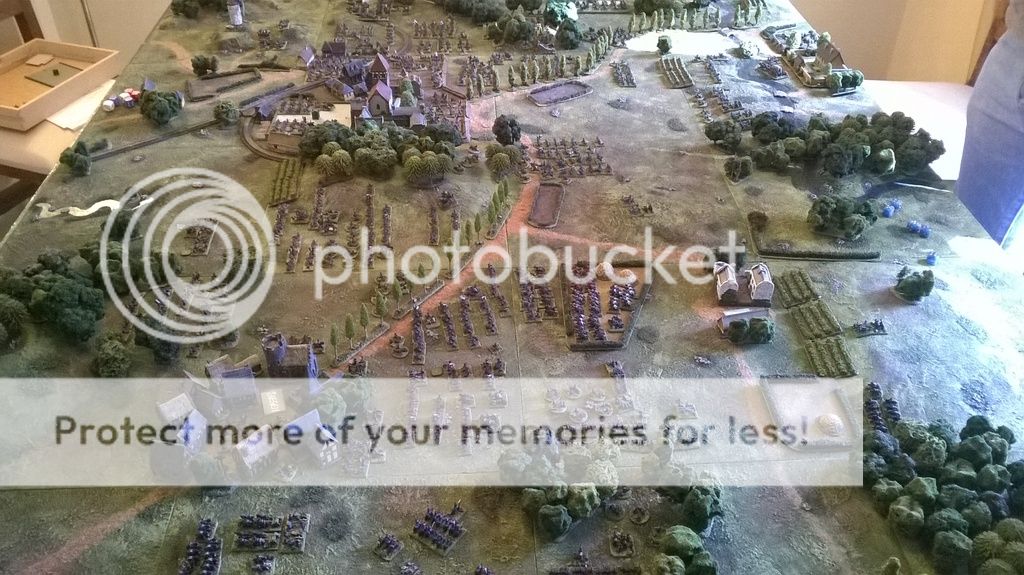
The escalating fight to the west of Hoffen, between the French and Prussians:

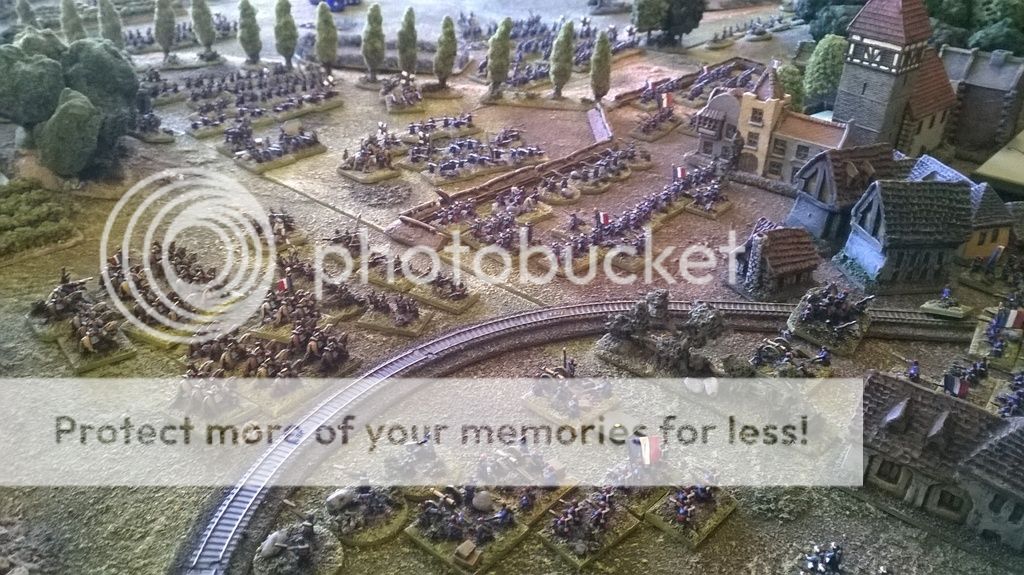
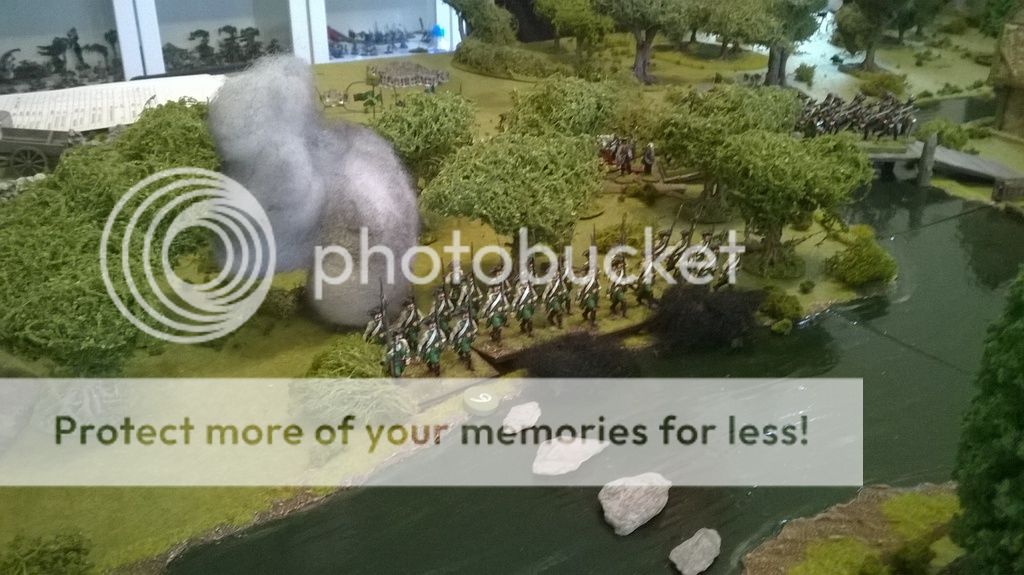
My beleaguered French in the village of Seigen which they used as a bastion against the Bavarians (I borrowed these beautifully scratchbuilt buildings, and some of the trees, from a very generous friend):

French cavalry launch a desperate charge, which took the fight out of the Bavarians in the same turn that the Prussians to the west reached a similar state of exhaustion:
It was a close thing though, and a few more turns might have allowed the Germans to capture the town. It wasn’t to be, however, and in the end they had to fall back to await assistance from the rest of 3rd Army before trying again.
Everyone seemed to enjoy the game and got to grips with the rules (which are very different to the norm) pretty quickly. The Germans never really got their artillery superiority into play fully, which was probably down to my hasty pre-game rules briefing which seems to have led to the commanders deploying their guns a little early! Oh well, it was only day 2 of the war and they’d have to learn as they went back in the day too!
The Chassepot did its bit, the Mitrailleuses were unpredictable and quickly targeted, and the Zouaves seemed to fight ferociously when cornered. With the cavalry being used as expendable shock troops (as they sometimes were in the war) the game provided a decent flavour of the period, and especially the command and control challenges experienced by the generals.
For another perspective, a very good write up and lots more pictures visit Andy’s site: Belisarius.org
It was a great day, and we topped it off with a night out in Newark, enjoying beer, curry and some strong spirits to finish. The full English breakfast in the hotel was very welcome in the morning, and got us going ready to tackle whatever Simon had in store for us on the Sunday – part 2 to follow..
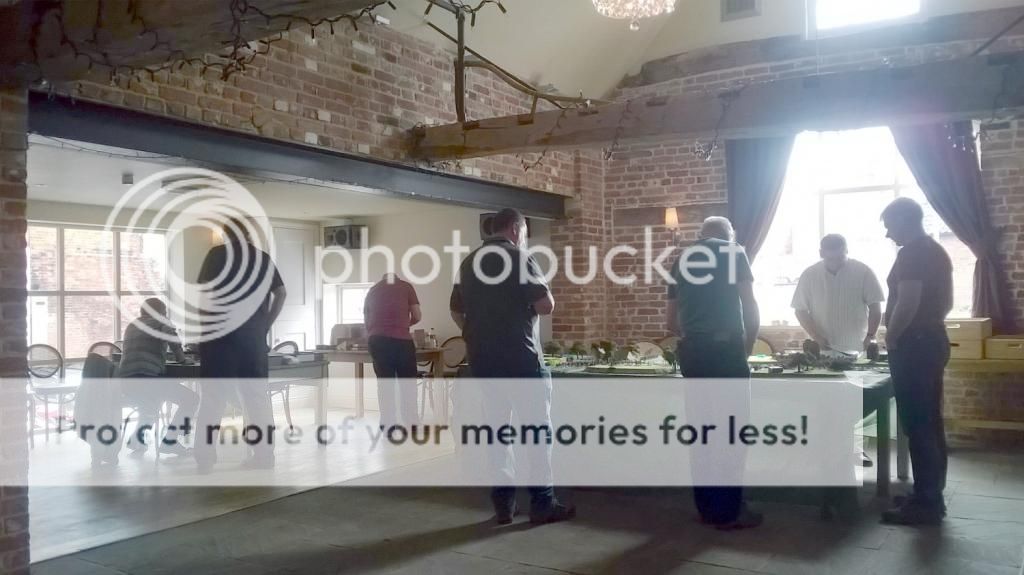
A Weekend in Framlingham

This weekend saw a get together of a group of wargamers from up and down the length of England (unfortunately our Scottish contingent couldn’t make it). We congregated on Friday evening in the Suffolk town of Framlingham, where our local host Tim had made the arrangement for us to have an excellent couple of days of gaming, socialising and recovering from hangovers.
It was a fair old way to go, especially for those coming from the North East, but everyone agreed it was more than worth it. Great company and top-notch games throughout, and lots of laughter and banter to go with it.
We used the very nice function room at The Crown, a lovely hotel/inn where some of us were staying, which gave us plenty of room and facilities to spread out in. Despite this pic, the lighting was a bit dim when the sun wasn’t shining (ie. most of Saturday) so I didn’t get many decent photos on my phone.
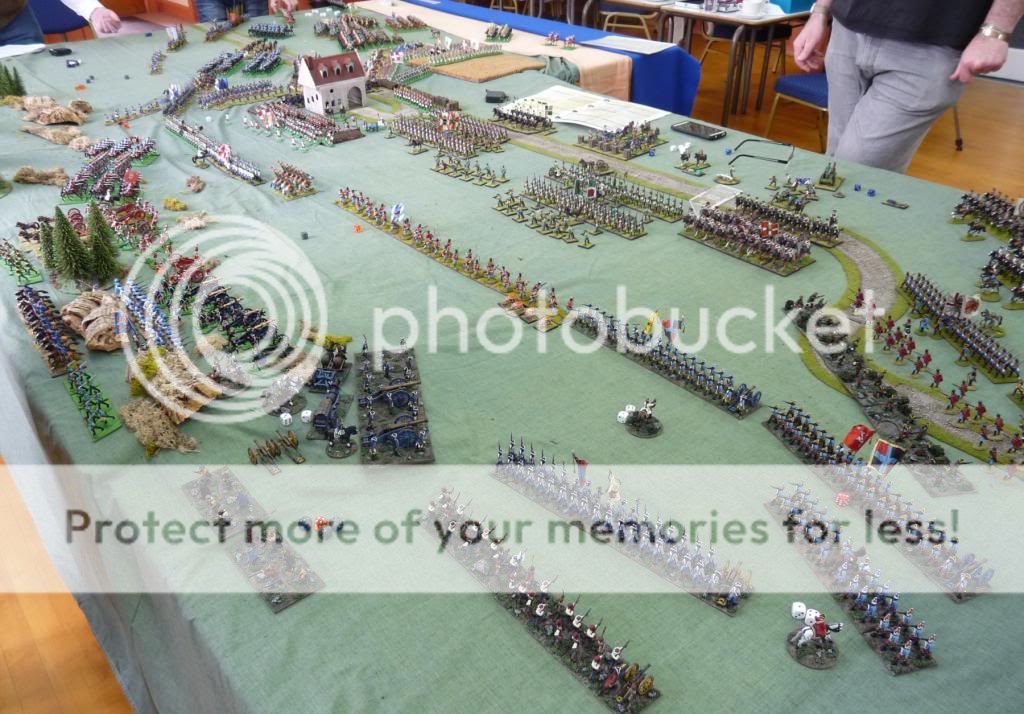
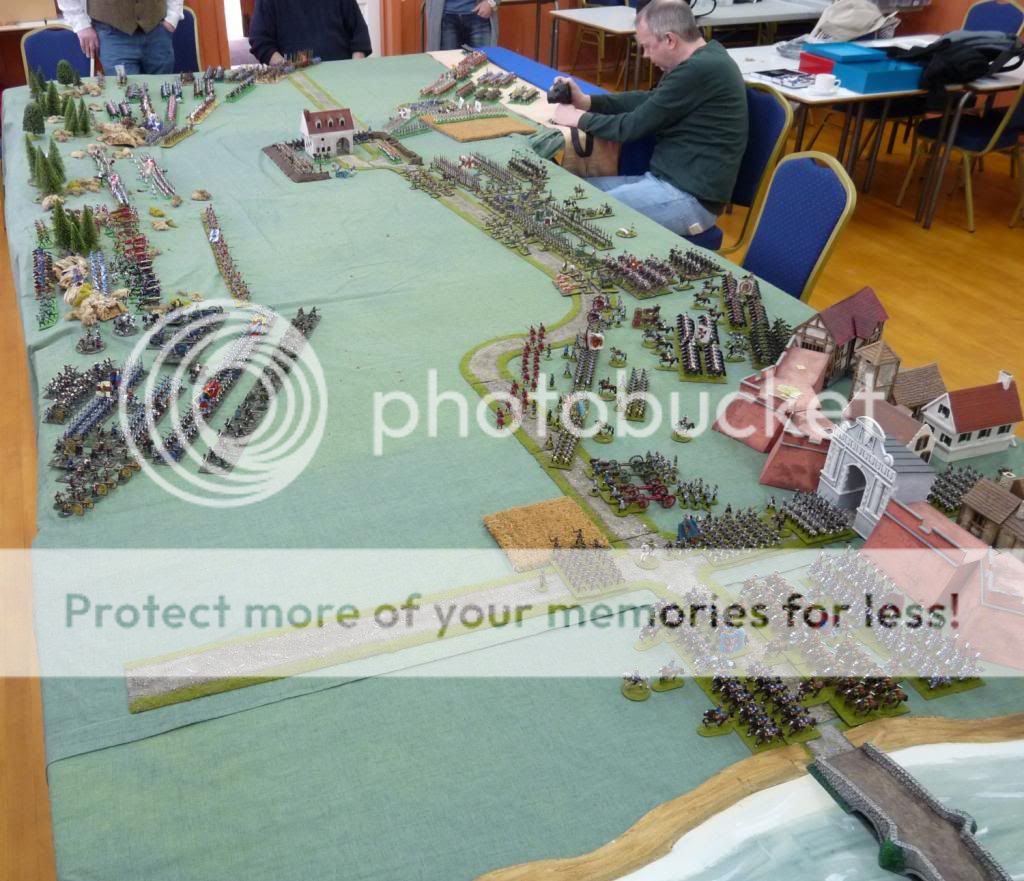
Several people had offered to put on games (there were several rounds of voting(!) over a year ago), providing the figures, rules and scenery for others to play. These included Peeler’s Leipzig DBN taster (for Simon, who seemed to enjoy it immensely), Essex Boy and GaryP’s 20mm Marlburian game (which Andy and I joined), and the main event – Tim’s awesome ACW collection in a full-on 2 day clash which started on Saturday and which we all joined on Sunday.
The WSS game was great fun, and it was a pleasure to play with Iain and Gary’s superb collections. The rules used were Rank and File from Crusader, and they gave a quick realistic game with simple, easy to learn, mechanisms. We played at least 12 full turns which says a lot for how easy the rules are to pick up. Everyone agreed that it looked and fought out as they imagined a Malburian battle would, and we had some very exciting moments as both sides had triumphs and reverses.
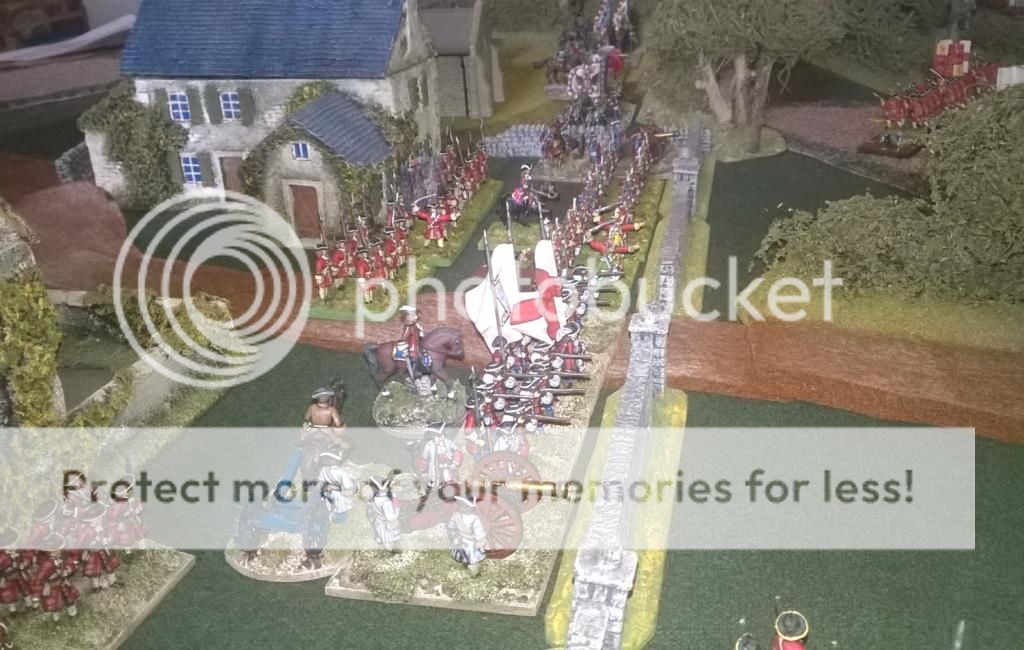
As allied commander I had the dubious benefit of Iain’s dice rolling assistance (he was also the scenario designer and umpire) but fortunately the English, Dutch and Danes fought tenaciously among the hedgerows and successfully held the right and centre against the French infantry. It didn’t go so well on the left, however, where the cavalry fought it out in the open fields. Here the enemy gradually got the better of the allied squadrons, helped by an infantry brigade which came up and held the farm in the middle of the melee. Their volleys emptied a good few saddles and by the end (which was deemed to be dusk) our flank had collapsed.
We all surveyed the battlefield and agreed it to be a strategic success for the French, as the allies would eventually have to retreat down the only road they remained in control of, but a tactical draw, as 2/3 of the table remained in allied hands as night fell. A really enjoyable game all-round, with friendly and generous opponents in Andy and Gary, and lots of thanks to Iain for the effort he put into planning and running the game.
Then it was off to the bar for a well-earned beverage or two and the usual debate about basing, followed by an excellent curry in a nearby restaurant and more beers in Tim’s local.
On Sunday we all re-assembled (some more slowly than others..) for the now-expanded ACW game. Tim, Phil, Dave and Tim W had fought the opening moves of this encounter battle (Coinville I think) on day 1 and developed the battlelines that the rest of us joined for day 2. I was on the Union side (which I think I’ve been on every time I’ve played this period, but which is fine by me) and I was involved in trying to defend the centre and right against an outflanking Reb attack, while waiting for our reserve division to arrive.

There was lots of artillery fire initially, and then the infantry got to grips and casualties mounted. The whole time JEB Stuart was dashing round our right flank and things were a bit nervous as we waited for the outcome of the Union CinC’s rolls to see where the reserve would appear. Naturally Iain’s dice ensured it would be at the other end of the table, and that sounded the death knell for the North! Unfortunately I had to leave before the final turns were played, but it was a delight to see these armies on the table again and to be involved in such a great looking game.
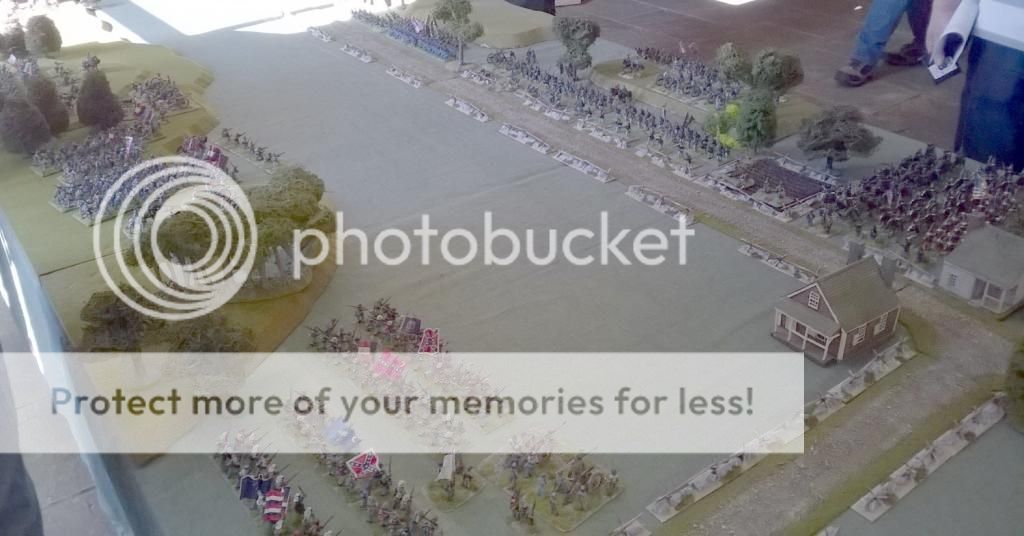
Some of my division, all gorgeous figures from Tim Hall’s collection:

All in all, everything went even better than expected and we’re looking forward to the next opportunity to get together again for another one. Big thanks go to Tim for all the planning/arranging, and to everyone for their excellent company!
Ayton 2014

Ayton 2014 – What a way to fight a war!
What can I say? Once you’ve spent 12 months anticipating an Ayton wargaming weekend; planning, collecting and painting your forces, and looking forward to meeting up with good friends again, expectations are pretty high. Fortunately this year’s event, as with all the previous ones, hugely exceeded those expectations.
Although I’d promised myself there wouldn’t be a frantic rush at the end this year I was still finishing off the last of my new hussar unit, St Angelo’s Ghosts, on the Friday morning – just as I knew deep down I would be. Those Perry plastic French hussars do take some painting..! Fortunately I’d packed all the rest of the army a day or so before, so once the paint on the bases was dry I was ready to set off.
My journeys there and back were very easy, considering the first one was on a Friday afternoon before a bank holiday. I stayed at the Lodge which was very comfortable, and for some reason I had a suite including a full kitchen and four poster bed. Not bad for the standard room rate! Most people gathered at the hall from about 5pm onwards, which allowed time for the tables and scenery to be set up for the 2 opening battles that would be fought on the Saturday. It was also a great opportunity to say hi to everyone again, catch up generally and of course admire each other’s newly painted figures. To say there were some stunning units present would be an understatement – the photos of the event will do them better justice.
Everyone took pictures during the weekend and many have been posted on the LAW forum. They’re well worth a look. Mine are here for day 1 and here for day 2
Henry’s YouTube videos are excellent too, giving an overview of the final battle and capturing the atmosphere very well.
Here are a couple of tasters from the final battle just to add some colour to this post:
In brief then, our team of Simon, Paul, Ken and Dave M (and Peter on day 1 as the Duke) were invading Granprix to recover it for Duke Zigor. We even had a plan, worked up over the preceeding weeks under Henry’s umpireship. Opposing us were Mark, Iain, Richie, Mike, Andy (and Peter on day 2 as the King of Grenouisse). Due to the way the campaign progressed, we pretty much achieved our aim of approaching the capital, Pescadrix, from east and west simultaneously and this resulted in the 2 battles on day 1. There were also naval actions taking place off the coast and these has some impact on the success and timing of our amphibious landings. A final show-down between the 2 main fleets is to be played out by Henry who will hopefully let us know how things panned out. Hopefully we will be victorious!
On day 1 we clearly outnumbered our enemies in the east (things appeared more even in the west) but that didn’t prevent Iain and Andy fighting a tough defensive battle for the coastal village, inland hills and the plain between them. We prevailed however and pushed them back on the capital, following up for the big denouement before the city walls on day 2 (actually set 2 days later after some R&R and a brief march). Here, after a much harder battle, we were again victorious and captured the King to round off the liberation of Granprix in glorious style. I’ve written up an account of the campaign from the Medetian perspective for Henry and am happy to see what use he makes of it before posting anything in more detail here.
Despite winning the war however, the true highlight of the event was the social side with its cameraderie, fun and wargaming in the best possible spirit. Everyone was clearly there to ensure that their opponents got as much enjoyment from the games as they did themselves. I played against Andy and Iain on the 2 days and more pleasant, good natured, company you could not hope for. My allies, Paul and Simon, were equally enthusiastic and fun to play alongside.
There were also a few other games staged by members of the group who wanted to attend, but had plans of their own that they’d been working towards. Tim and Tim have got seriously into the world of proper toy soliders (54mm etc) and put on a couple of stunning games over the 2 days. Albions vs Europans in the age of empire was superb, as was Aussies vs Japanese in the Pacific. The scenery on both ocassions was excellent, fittingly so for the sumptious armies on display. Bob and Heather played a couple of good looking VBCW games too, with the usual interesting forces being deployed (it appeared to be police vs ladies). They were clearly enjoying themselves and everyone was welcome for a natter.
Of course no Ayton weekend would be complete without copious food (courtesy of the Dennison Arms) and copious beer (the social club next door to the hall this time), which was all consumed against the backdrop of very enjoyable wargaming conversation. Naturally next year’s game was a hot topic and I’m pleased to say that we’re returning to the 19th century for this one, and in rather hotter climes..
Thanks again to everyone for attending and putting in the effort and creativity, in particular Peeler for organising things again, and Henry for his fantastic umpiring and background work. All in all a superb weekend with a great bunch of guys. Roll on 2015!
Ayton Event 2014 – Grenouisse Ascendant
Now that we’re into April, the preparations are gathering pace for the multi-player 18th century game at Ayton at the start of May. There are 3 and a bit weeks to go, and painting still to be completed (and not just by me – I’m sure most of the other participants are feeling the pressure too). A little bit of time most evenings seems to be moving things on fairly well, but no doubt the final push will be just as frantic as last year!
Over the last week the momentum, and excitement, has started to build. Although local arrangements are mostly in the hands of Peeler (as he’s widely known), the game and background are the work of Henry Hyde, who is currently working feverishly at the multitude of tasks and communications a full-on unpire needs to look after. The volume of messages and intelligence reports that 12 players can generate is clearly enormous, but Henry is handling it with style and creativity, and there’s always a period flavour to what you receive back, and a sense that we’re involved in great events and embarked on a course that will re-shape history. Some of the general information/news items are being reported by Henry himself at Henry’s Blog but naturally most exchanges are private and bilateral with the unpire, unless players’ characters are understood to be face to face with each other in which case we can contact each other directly.
At the moment the 2 sides, one nobly seeking to recover the Duchy of Granprix which was lost to the dastardly invaders from Grenouisse in the 2011 game, the other seeking to hold onto these ill-gotten gains (you can guess which side I might be on!) are beginning to assemble and manouevre. Plans are being made, well sort of (due to the challenges of differing opinions and troubled communications), and there will be some pre-weekend campaign moves by land and sea which will hopefully set everything up nicely for some dramatic on-table action as the culmination of the story.
Orders of battle are of course secret too, and that’s where the painting pressure really comes in. No-one will want to take the field with fewer troops than they’ve previously committed to, as the only one to suffer will be themselves. I will of course post pictures of my recent additions soon, but have to be careful not to give too much away to any enemies that may be watching..