Bridges, bridges

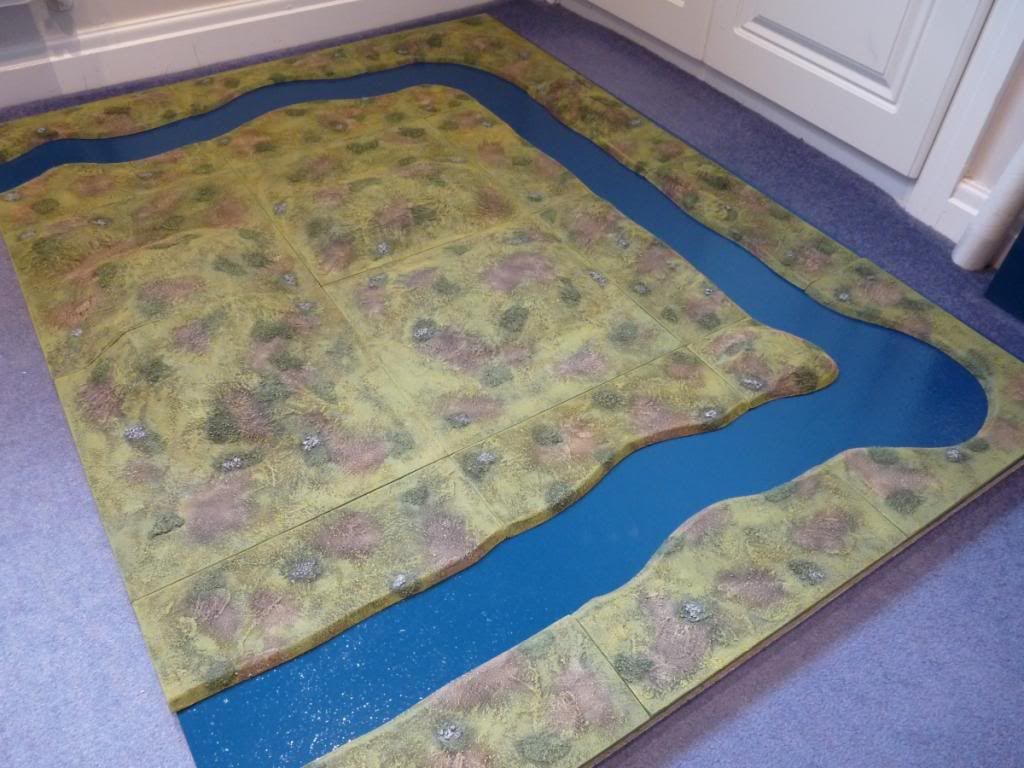
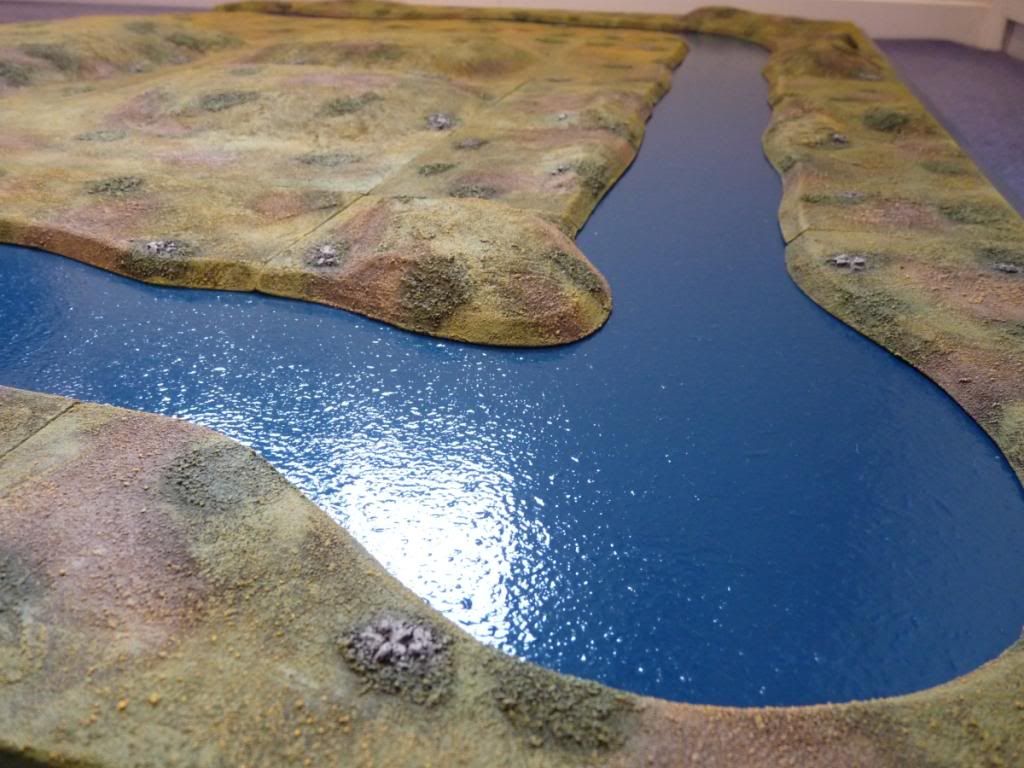
Since completing my new river banks I realised two things:

1. I didn’t have enough bridges to provide the scenery options I might need for future 28mm games
2. The bridges I did have were now compromised as they weren’t designed to work with 9-10mm banks – their centre supports wouldn’t reach the water!

So, to fix problem one I decided to find a decent stone bridge model and after some web surfing I settled on the Italeri plastic kit. This provides a very simple by effective model, with a road width just under 80mm, a span of about 130mm (more than enought for my 90mm rivers) and total length of about 230mm. I ordered mine via Amazon and it came within a couple of weeks – from Hong Kong, for a total of under £14 including P&P. Not bad.

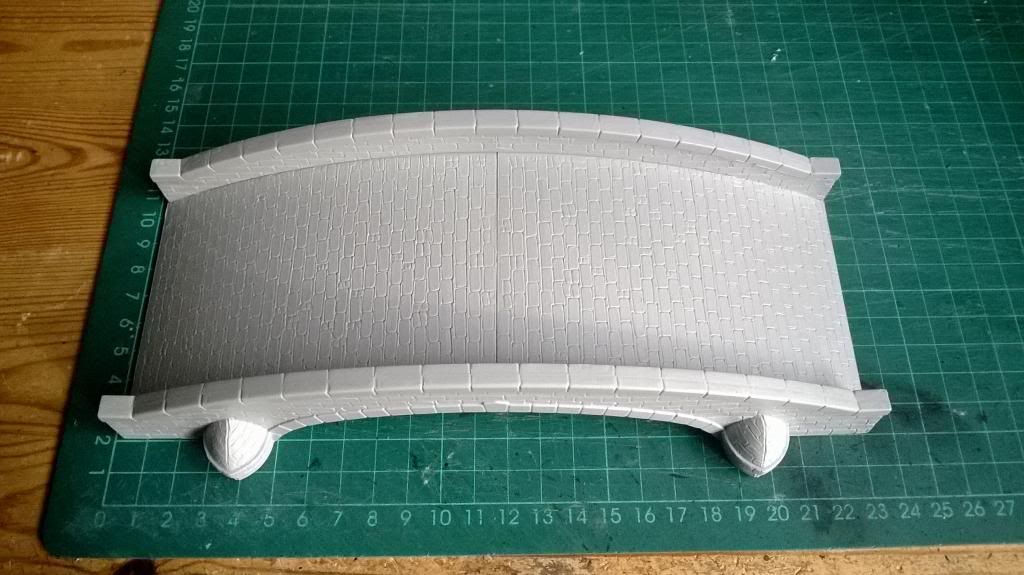
Here are the kit components, 2 sides plus a top roadway and a underside arch, all nicely detailed with stone and paving.

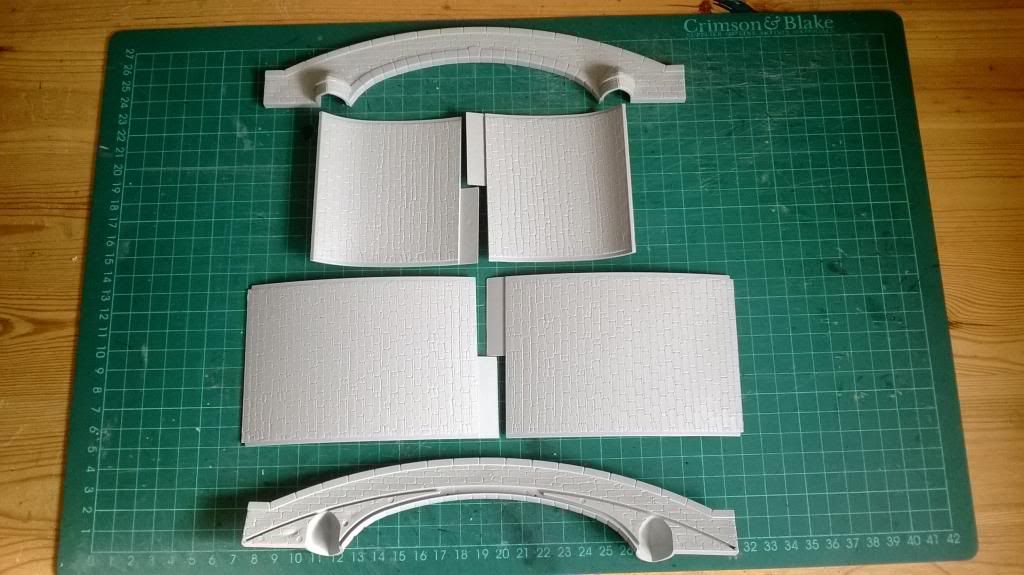
With box cover art to make sure I put it together properly!

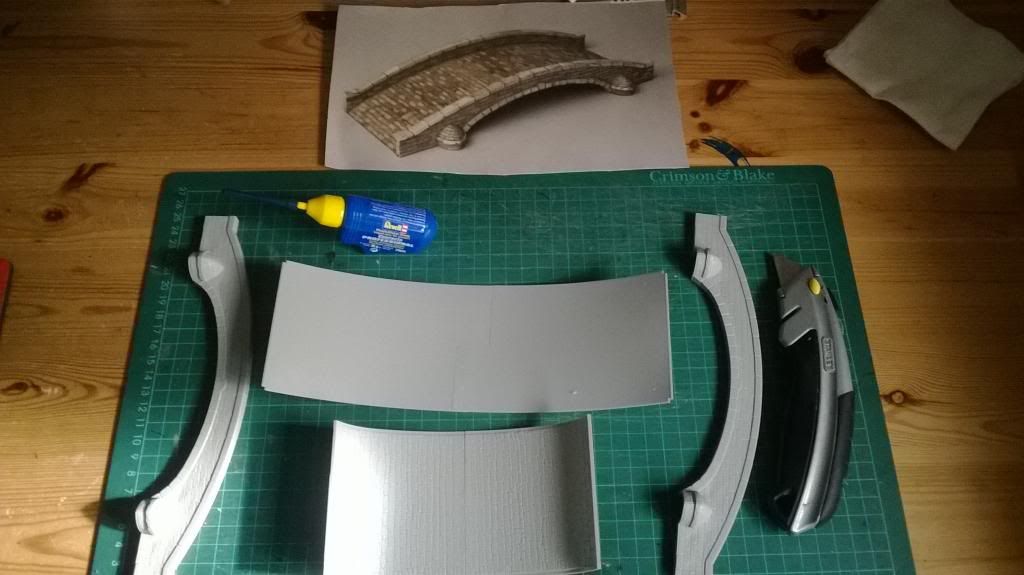
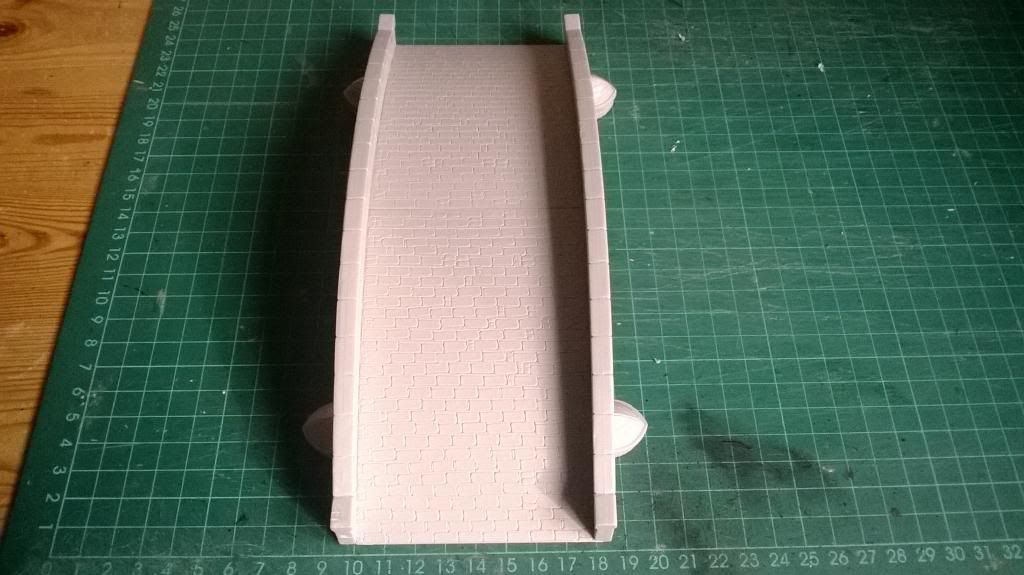
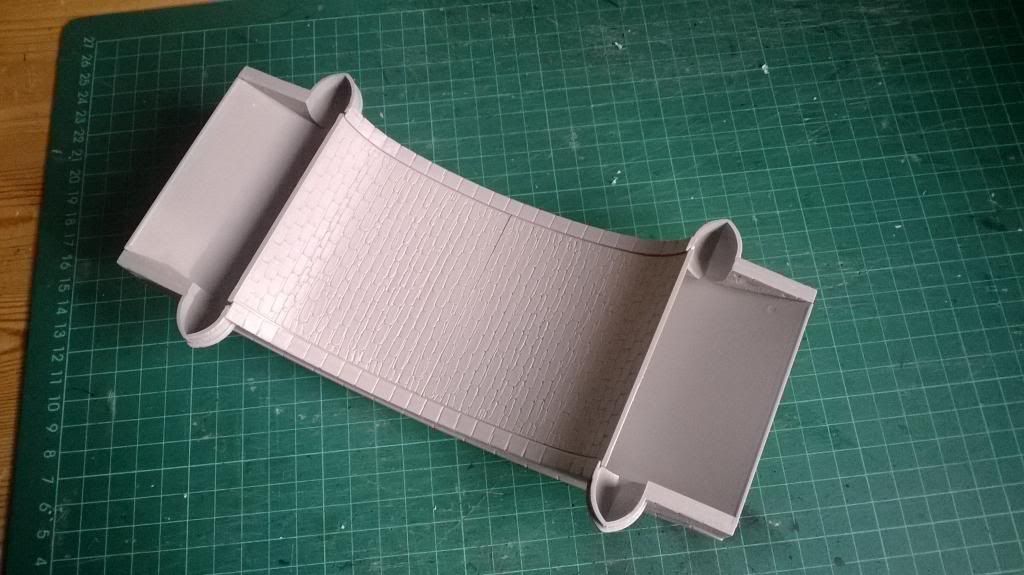
Ta daa! It took about 20 minutes to put it together, requiring a small amount of prep to ensure the arches went fully into the slots on the side sections. I used plastic cement, the same I’ve used for hard plastic figures, and it worked very effectively as you’d expect. I used the old rubber band trick for holding it together while the blue dried, and the result is a pretty sturdy bridge ready for undercoating and some fast dry-brushing.


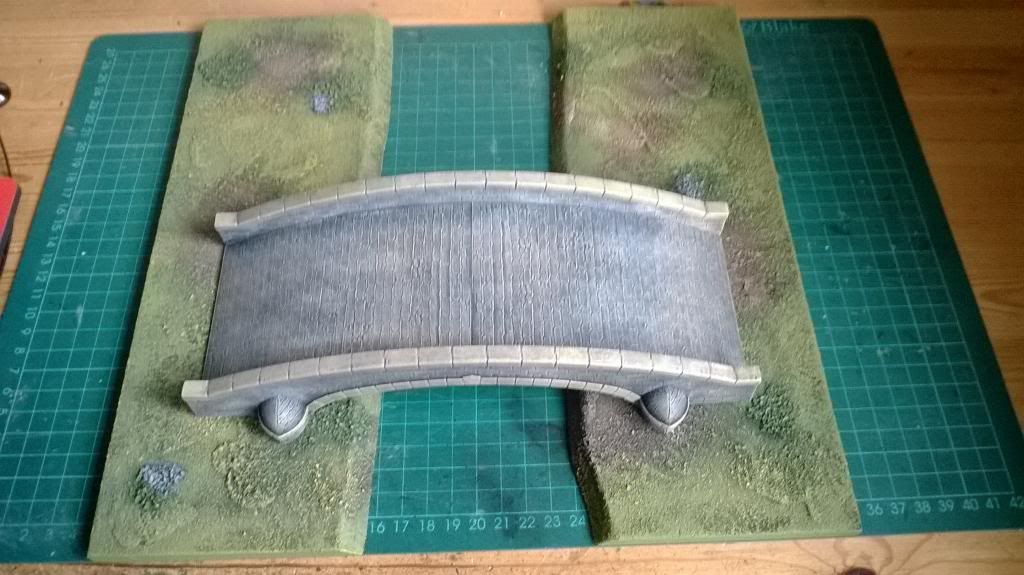
Slightly blurry picture of the finished article. Painting took about 30 minutes. Black undercoat followed by a mid grey and then a light grey build up of dry-brushes. I then used a pale yellow/brown shade for the feature blocks and covered everything with a diluted GW brown wash. Finally I gave it all a light dry-brush of Vallejo’s Iraqi Sand, which softens everything and ties into all my terrain and other scenery as I use it for pretty much everything.

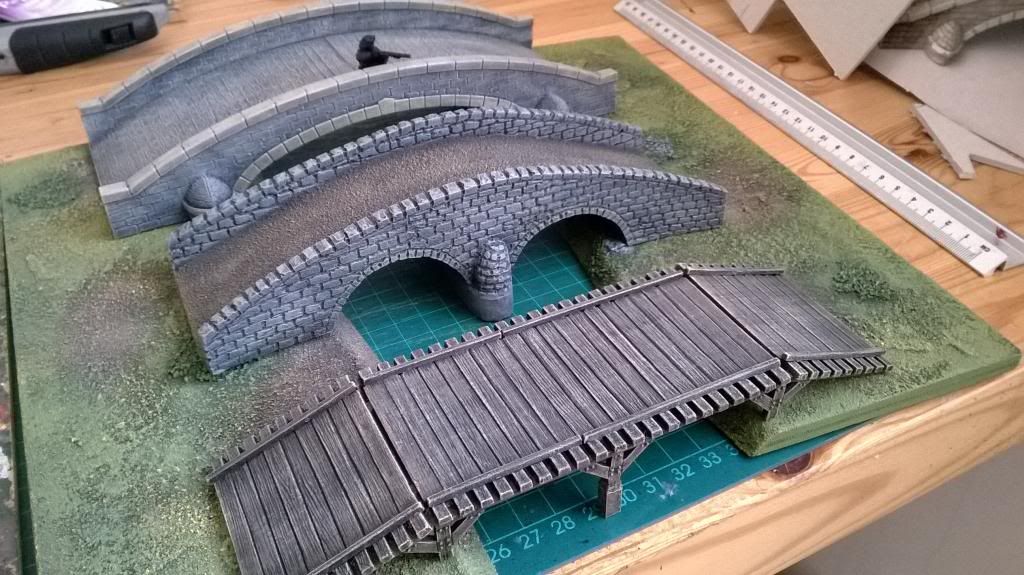
To solve problem 2 I added the necessary depth to the centre supports on my other 2 bridges. The (Hovels?) stone bridge received a stack of thick card pieces, stuck together and carved to shape. They then had a scraping of quick-dry plaster before being painted to a reasonable match for the existing stonework. The Renedra wooden bridge had a couple of plasticard struts added, which were painted to match. Now my troops can cross and re-cross my rivers with abandon!


Planning a Legion

I’ve decided that one thing I’d like to include as part of my growing 18th century collection is some sort of all-arms legion, as was pretty common in a number of armies around the time of the Seven Years War. My preference would be to add one to the Fleurian army, it being inspired by the French, who had a good number of this sort of privately-raised, flexibly organised force. Getting a nice cheap copy of this recently has provided further inspiration:

So, the Legion de Fleurie then.

I’ve got the figures, just need to paint most of them. My head-start is that I’ve done the cavalry contingent already – 2 squadrons of hussars (Minden Miniatures, below), and the legion commander (the Nadasty command figure from yesterday’s post). I’ll extend the blue-red-white colour scheme to the rest of the legion which will eventually include a full battalion with battalion gun, plus a light infantry company. Theyll all be in bearskins – using RSM Austrian Grenadiers and Minden Legion d’Hainaut respectively, and head swap conversions for the gunners.

This is something I’d like to finish by the end of the year, so I need to make sure I find some time to get them done!

Powdered wigs and a bit of lace

Despite a shortage of posts this month I’ve not been completely idle. The figures I’ve been painting recently only had their bases painted this weekend so this is the first opportunity I’ve had to take some pics. Also, with the Ayton multi-player game at the start of May (and more specifically the pre-game campaign that Henry is going to run) there is a requirement for a little discretion about the forces being mustered in case any dastardly enemy spies are operating in Medetia!

Not much to be given away here though, so here are some command and staff figures and a new company of grenadiers from the Vantua Regiment resplendent in their new uniforms and mitres.

Minden Seydlitz figure and one of the mounted colonels. Grenadiers are Huzzah figures.

Minden Nadasty and another mounted colonel.

Nadasty again, showing the use of a bit of Rendera’s plastic fencing for scenery. Lovely stuff to work with, easy to snip bits away and takes a dry brush very nicely.

Seydlistz again, fantastic posing of rider and horse.

The daddy himself. Medetia’s General Barolo who’ll lead the expeditionary force to Grenouisse. Fife and Drum Knyphausen figure, with another Minden colonel.

In the gentlemanly spirit of the age, and for the benefit of any potential enemy agents who may be watching, I will offer the information that each of these pictured luminaries will of course be commanding a full brigade, or more, in the forthcoming campaign.

I wish!


Rivers Need Water

..and here are a couple of boards I prepared earlier (last October to be precise). They’re 4×3 feet of 20mm chipboard, so they’re pretty heavy. I’ve had them for about 15 years and in recent times they’ve been relegated to garage rafter storage duties, but I decided to renovate them with a fresh coat of a dark blue gloss paint in readiness for the riverbanks project. They’re stored behind the door in my games room/office, resting face to face with the reverse of one board painted the same colour as the wall, so they’re pretty much invisible unless you’re looking for them.

Here’s a quick set-up with some of the new boards placed on top. Obviously the addition of some trees, buildings and other scenery will enhance things, but this is the basic look I was after.


With a row of terrain squares removed the river can be widened, allowing for the off-cut islands to be used. I think this will offer me plenty of flexibility and options for different types of battlefield. I can do a large bay or inlet, a big central island, as well as straight or winding rivers. As I’m aiming to get my post-Napoleonic Sharp Practice project ready to play this year, I think a bit of water, with the odd bridge or boat, will make things interesting! These rivers, like the rest of my terrain, are designed to be used for all scales I play with, from 6mm to 28mm, and I’m looking forward to getting plenty of use from them.

Rivers and Hills part 5 – Finished!

Finally some colour!

All the boards have now been given a coat of green to bring them to life a bit. The colour is a specific Dulux mixed shade (‘Jungle’) found after a lot of trial and error, which I’ve used for probably 20 years on all terrain, scenery and figure bases. I suppose it’s a brybrush or overbrush technique, I’m not sure which, but it allows a hint of the black beneath to show through to add some depth and texture. I’ve brushed green over the edges of the brown patches too to blend them together as I don’t want them to look like bunkers on a golf course later. The board edges are painted too.

Next step was to dry brush the brown areas with my highlight colour, Vallejo’s Iraqi Sand. This not only lightens, but also softens the underlying brown, which is otherwise pretty dark.

After that the patches of vegetation were recovered, having been mostly lost in the ‘green’ phase. I use Vallejo’s Luftwaffe Green for this, although on this occasion I actually tried their new Heavy Green basecoat colour which appears to be an identical shade, just with presumably slightly better covering power. These will be drybrushed again later.

The next step was the real key to tying everything together – the yellow drybrush. Trying to keep it light and even is always a challenge when you’re also trying to do it reasonably quickly, but it worked out OK I think. Then the dark green patches were re-highlighted with the main green, to soften them a bit while still keeping them distinct. Lastly the rocks were given a coat of dark grey and then dry-brushed with a light grey.

Which meant… everything was finally finished! A fair amount of work over the last couple of weeks, and further back into last Autumn when the river banks were cut, but I’m very pleased with the results and it was well worth it. These boards can now be added to the ones I already have (making just over 40 square feet in total) and hopefully be used in a game before too long. I’ll post some pics of them in situ with the water base boards before putting them away.