Ponte di Spurlacco Part 3 – Opening Moves

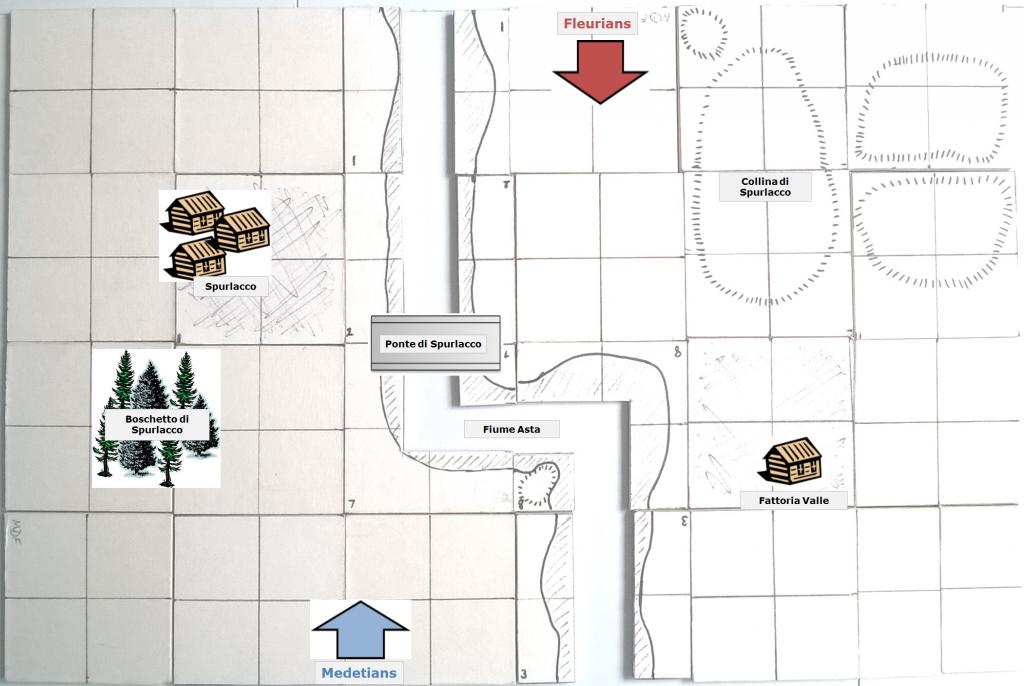
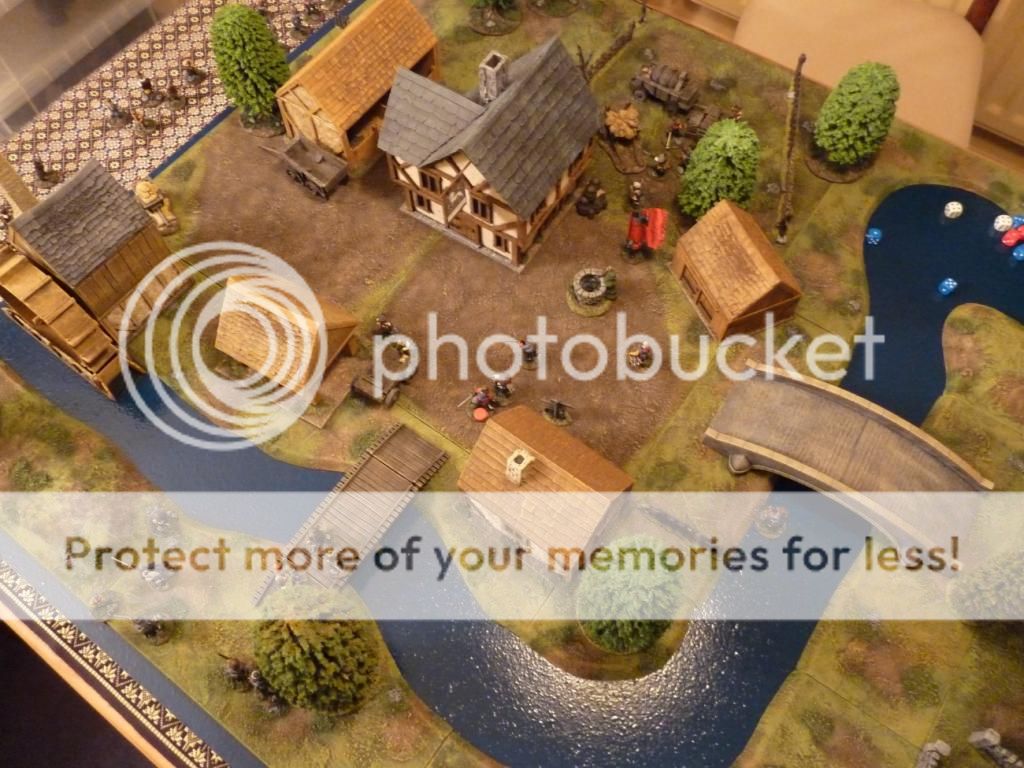
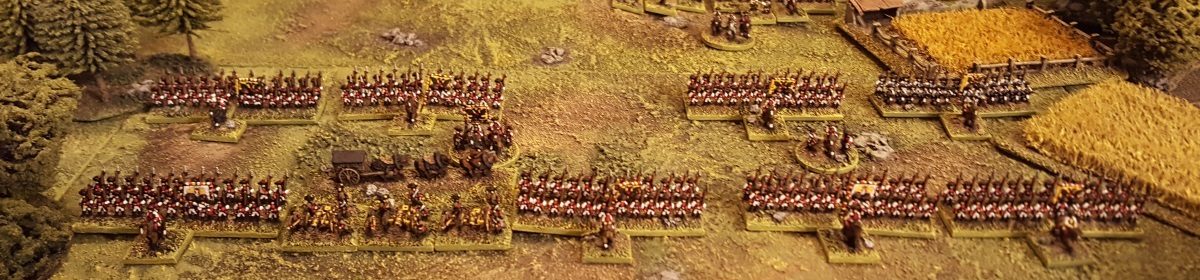
There was little hesitation on either side, and the first turn saw plenty of movement.
Both armies advanced according to their orders, although the command rolls created some variety in the urgency of their marching. Good old General de Bevue was a bit slow off the mark and the more impassioned Amore got the jump on him a little.

So, to the action:

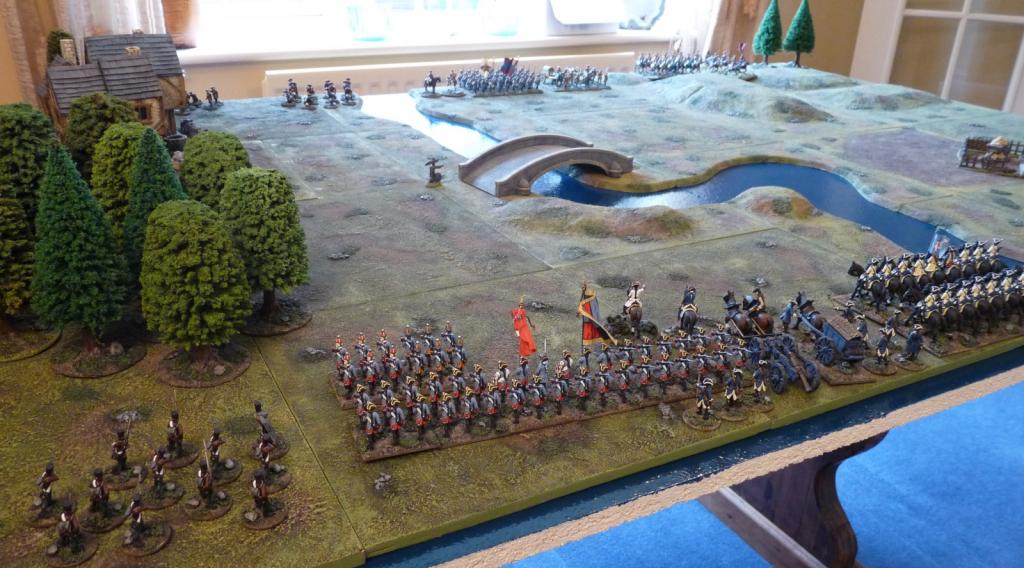
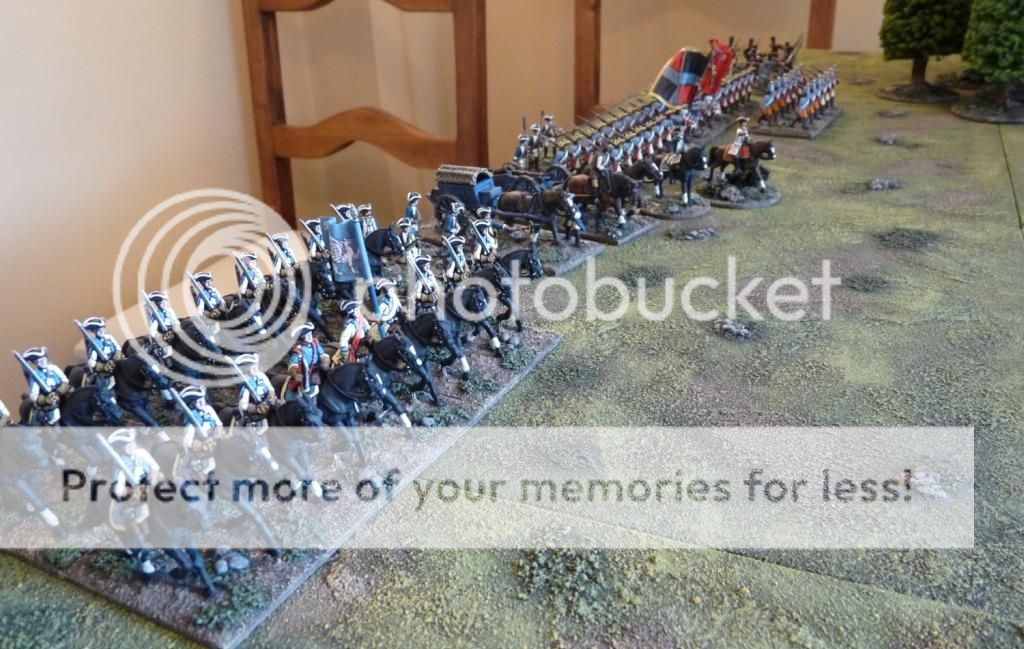
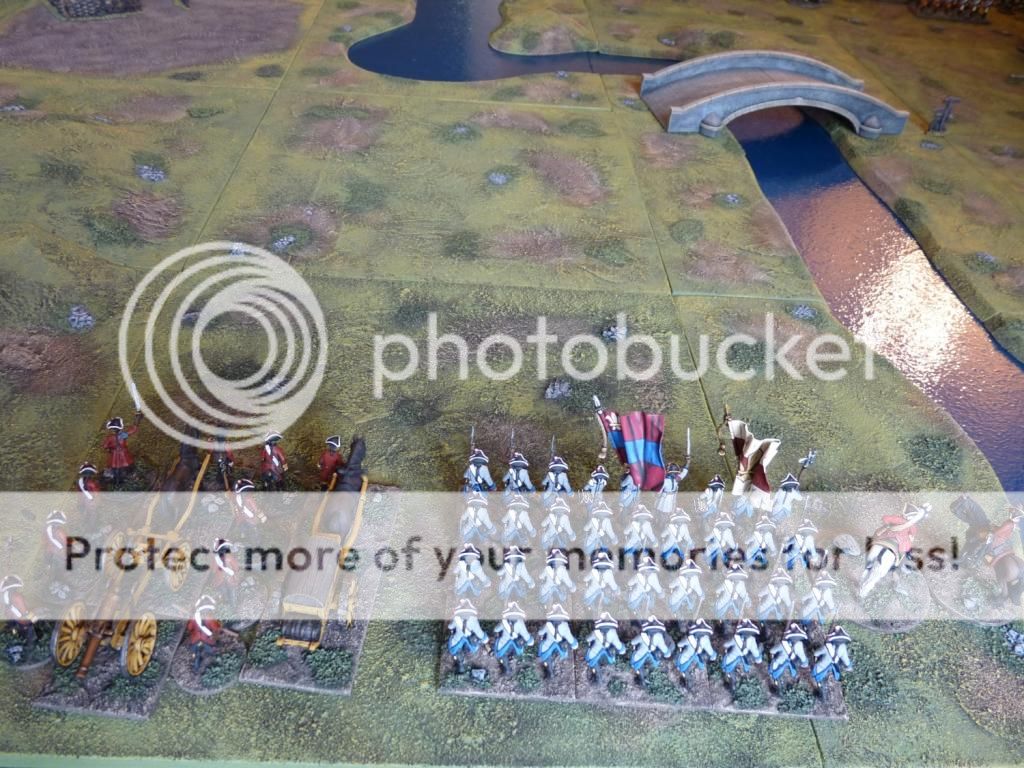
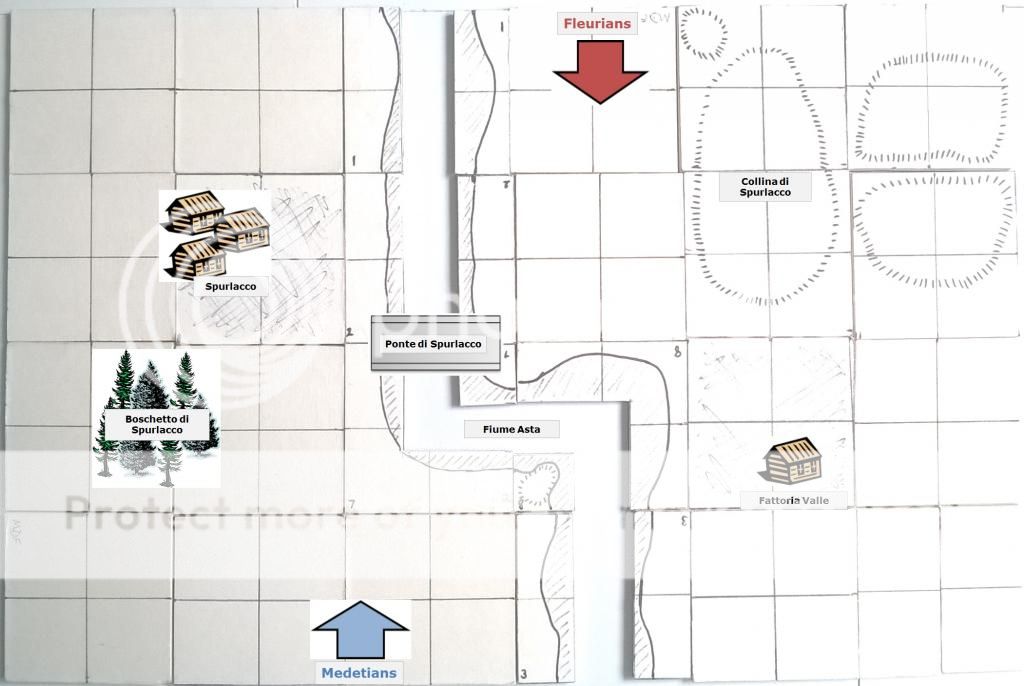
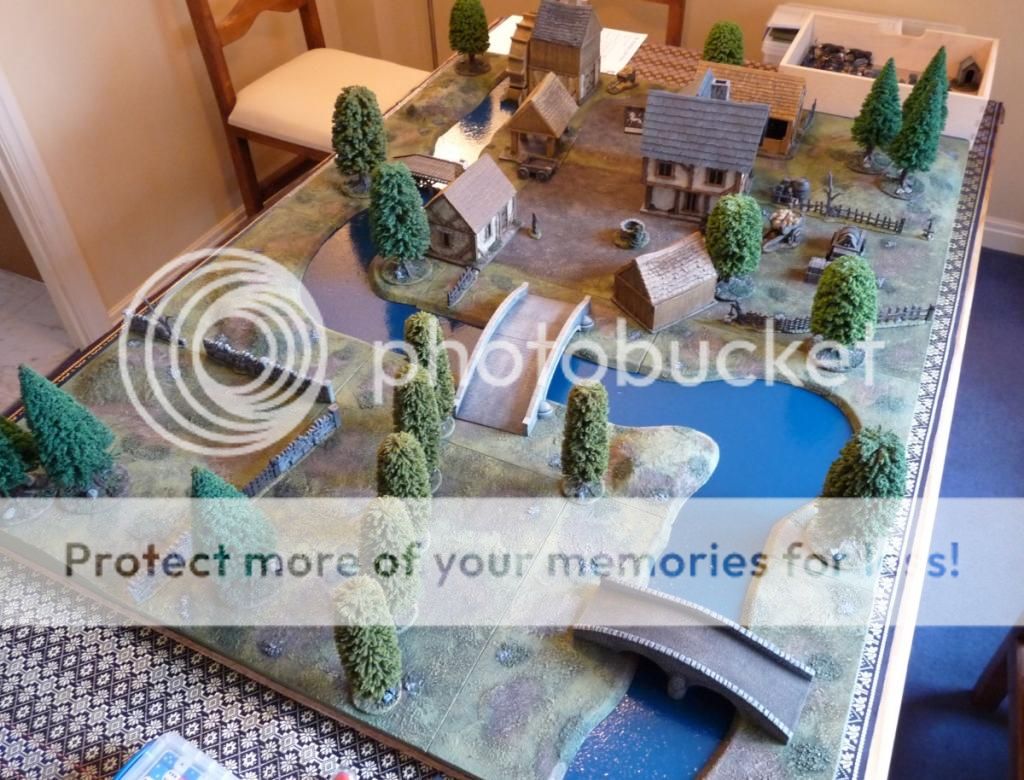
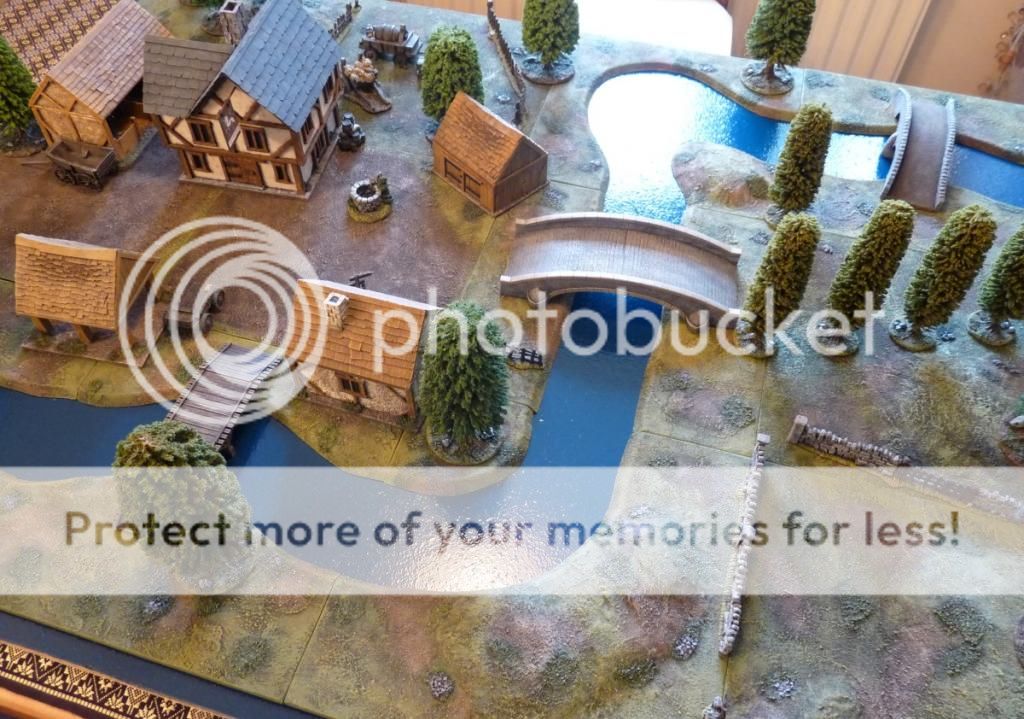
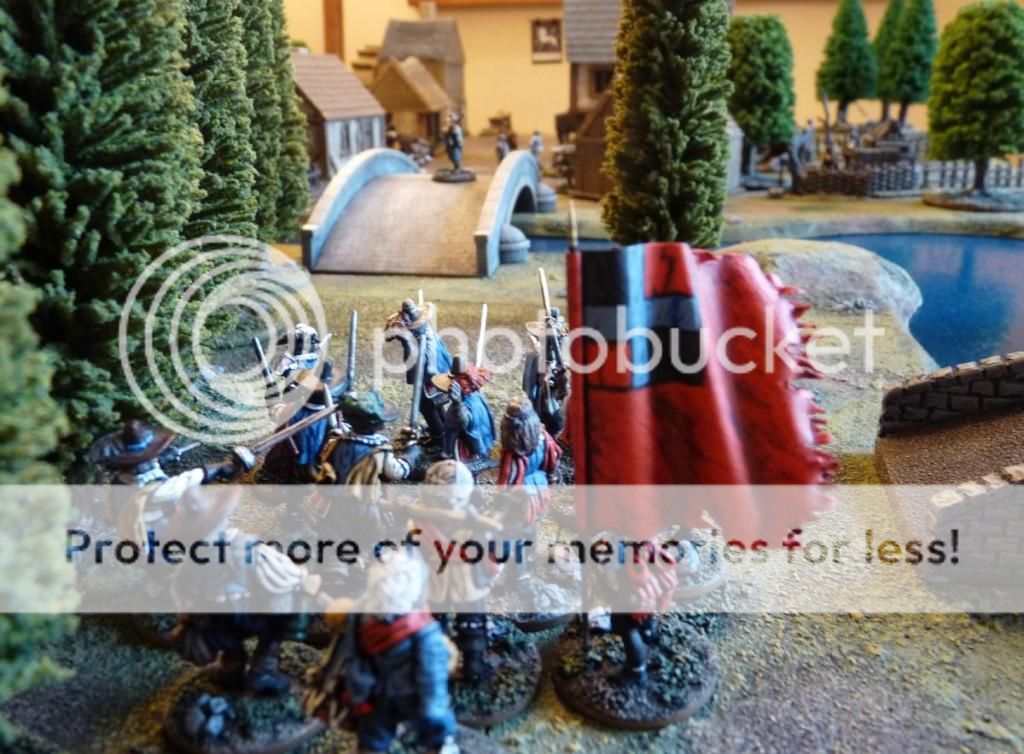
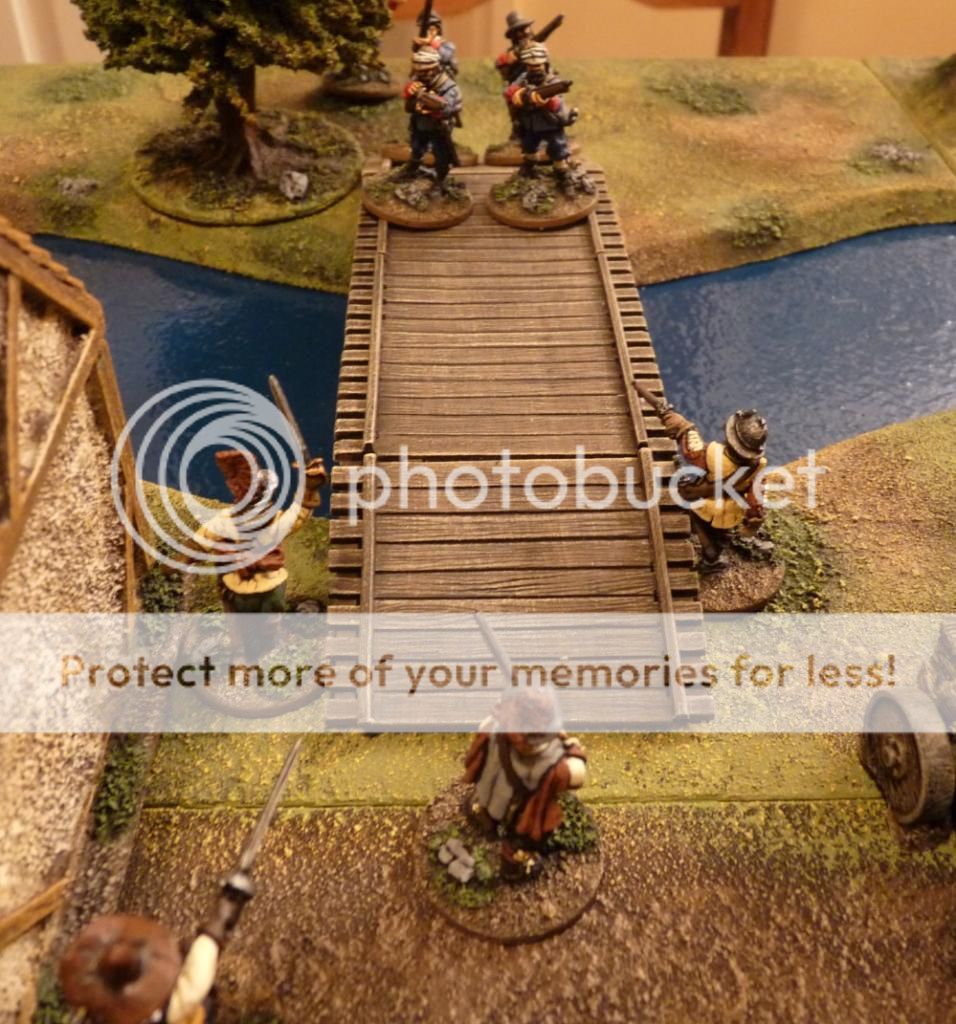
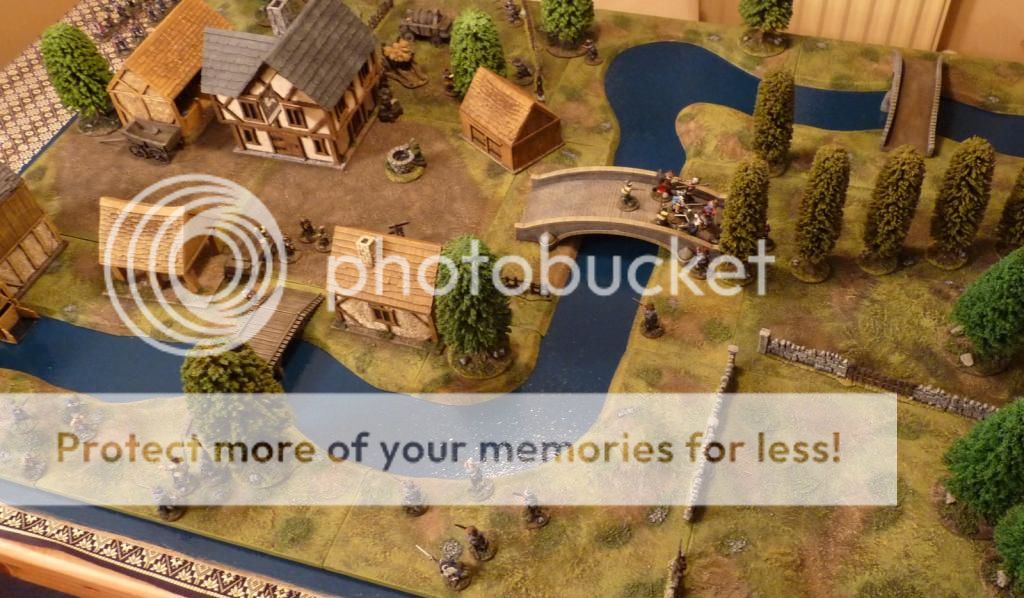
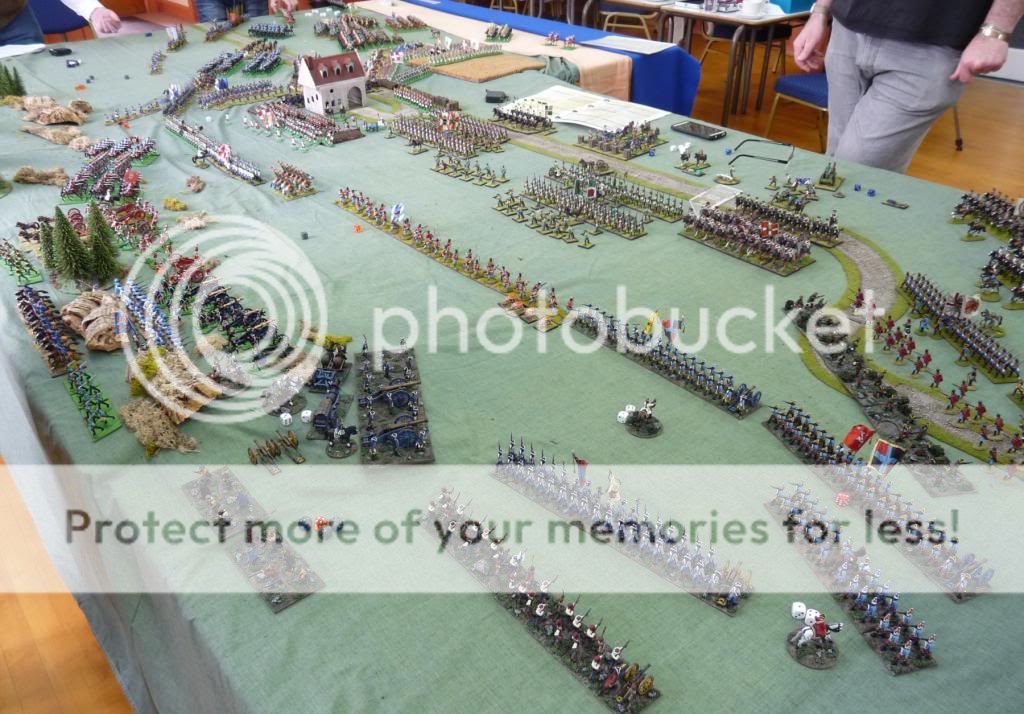
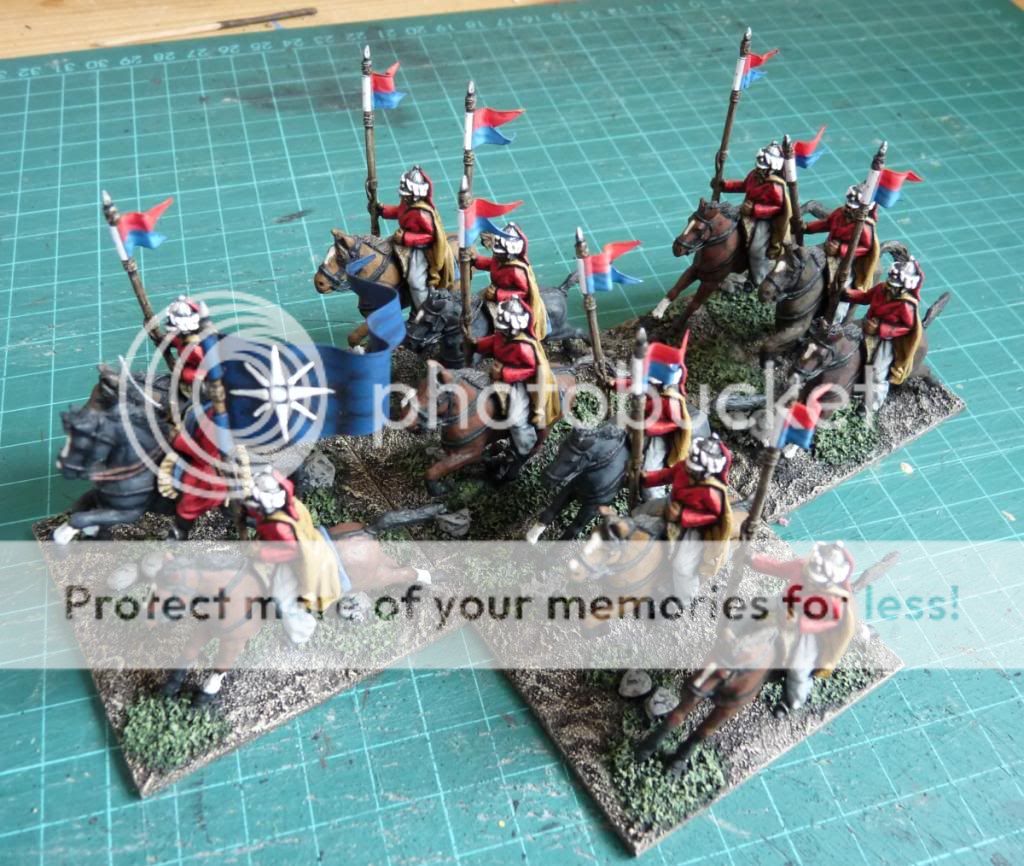
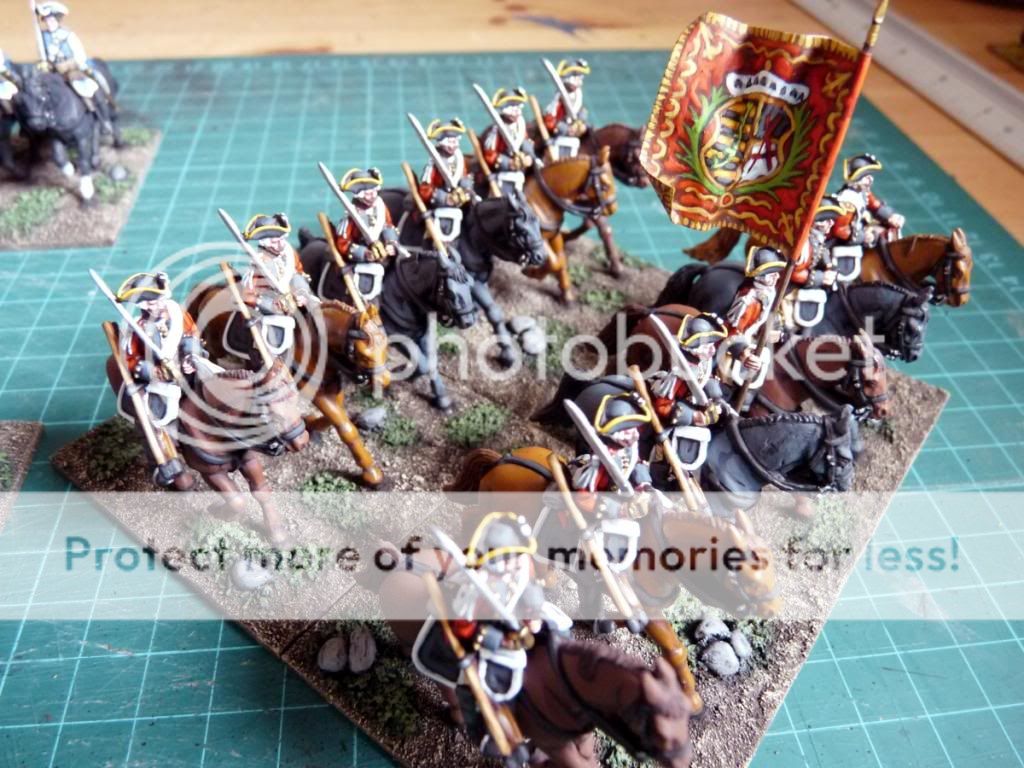
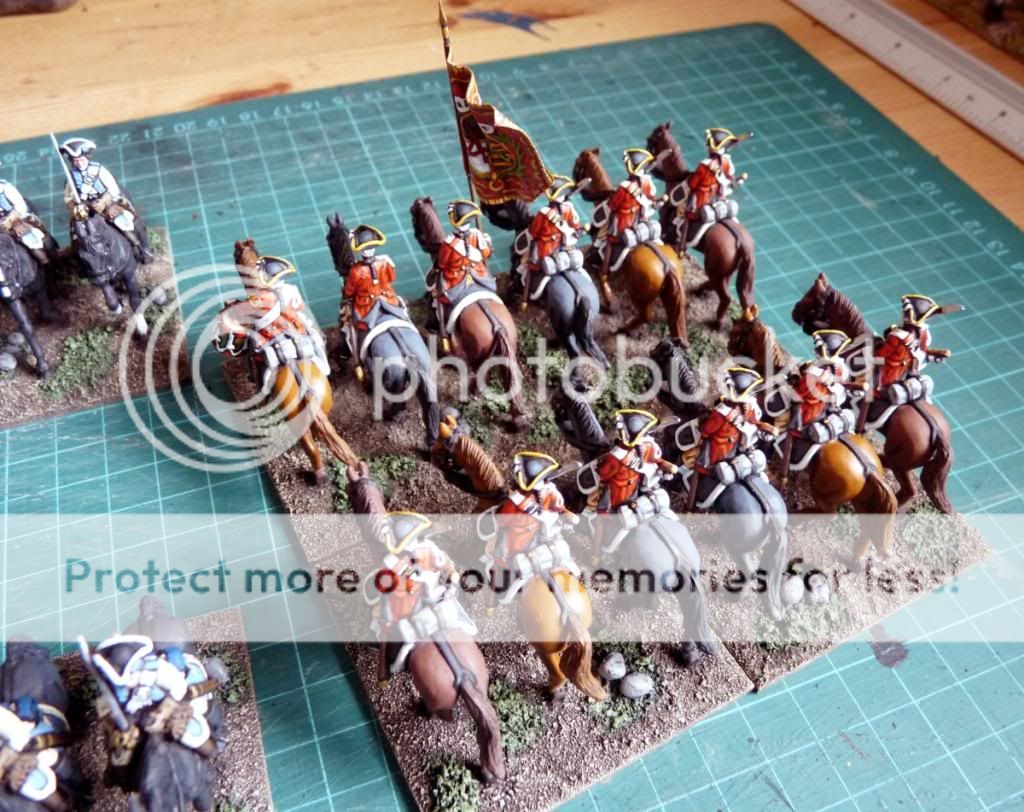
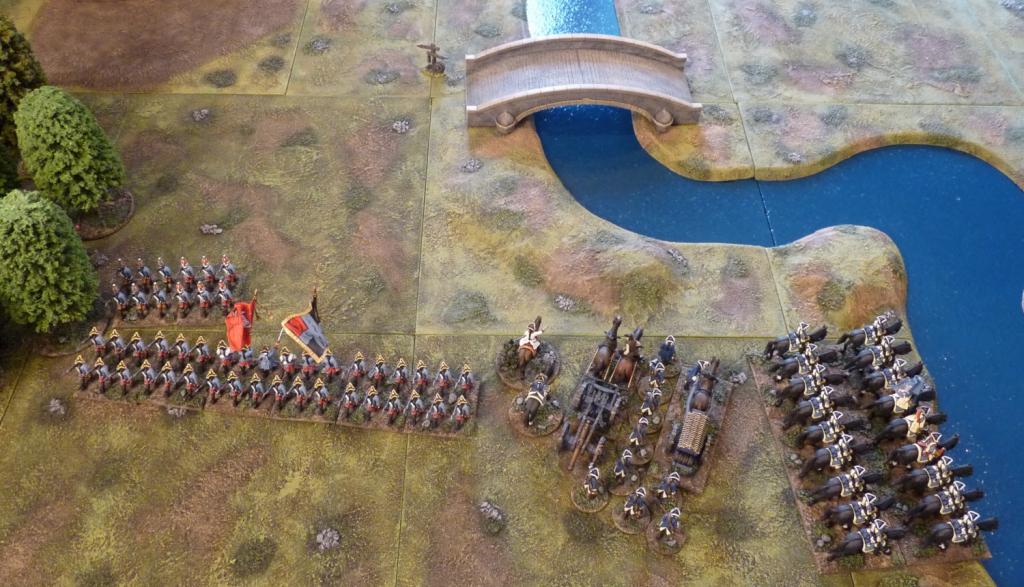
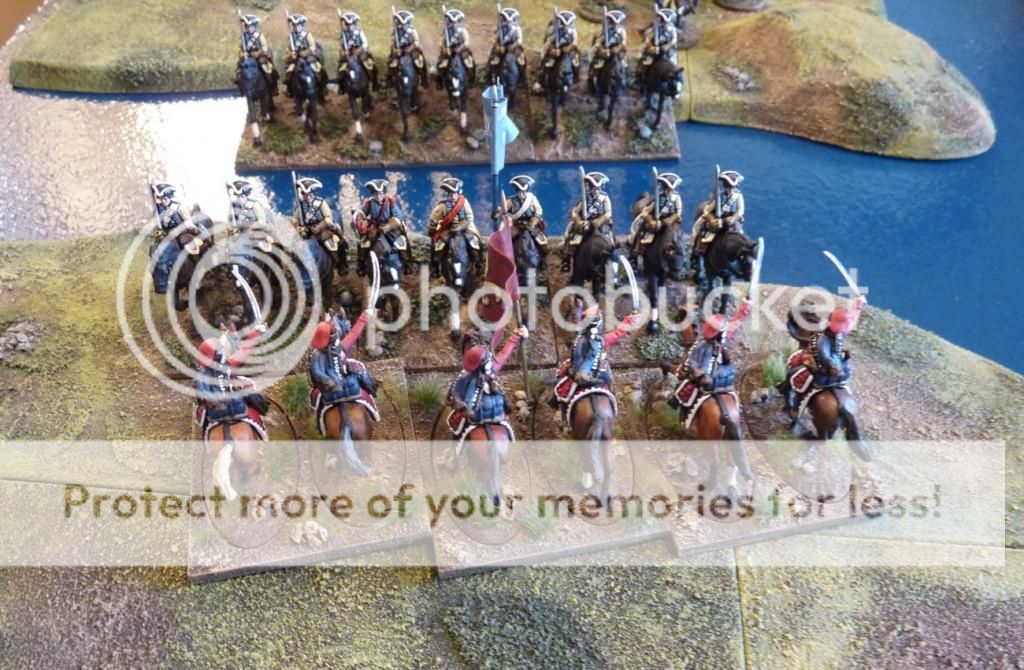
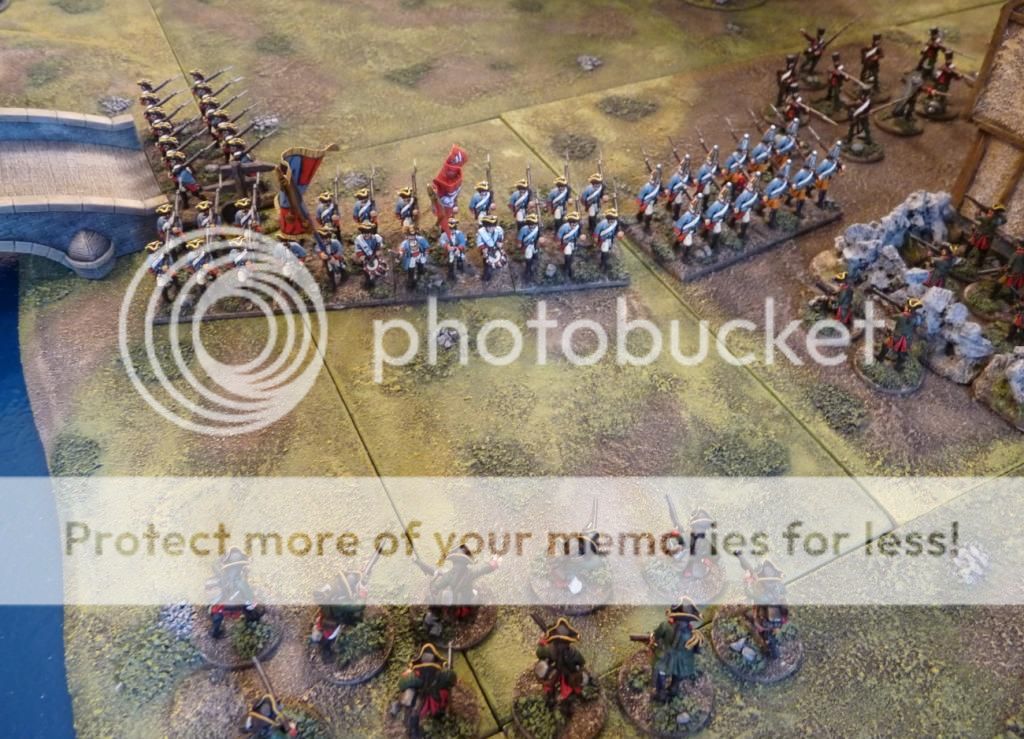
The Medetians advanced, while their Cuirassiers swung right to cross the river.


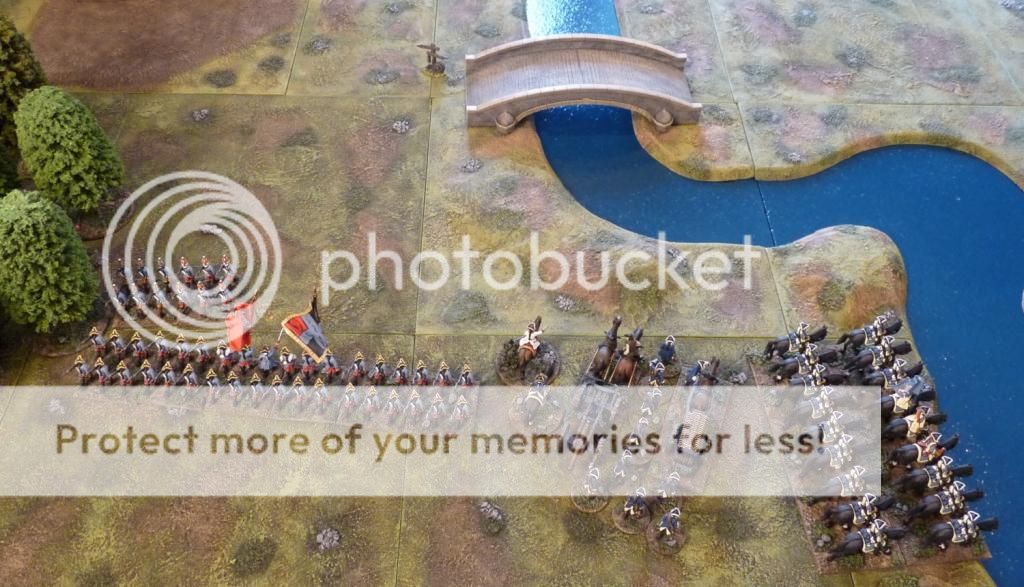
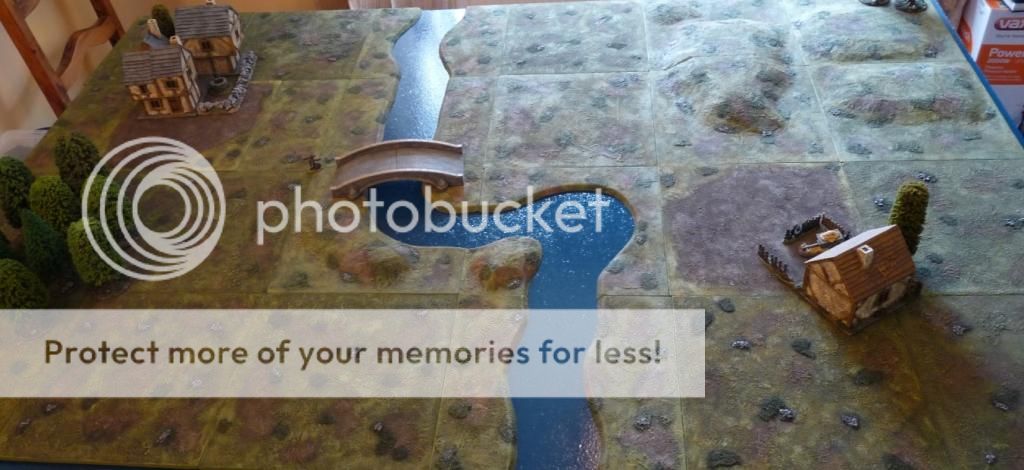
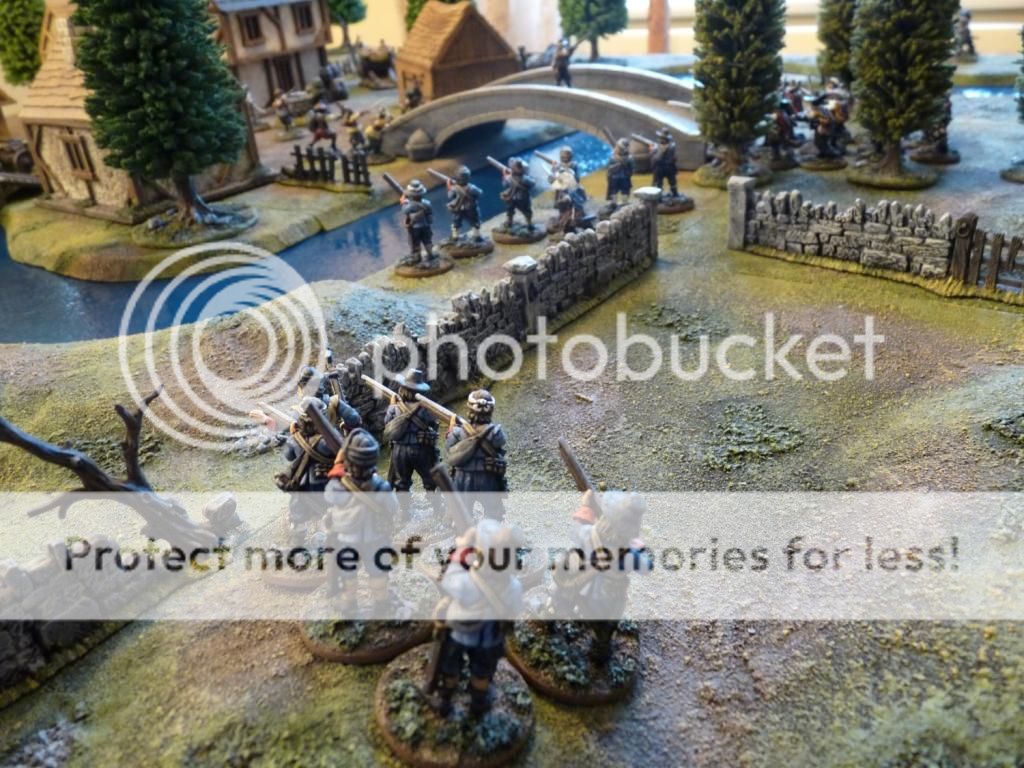
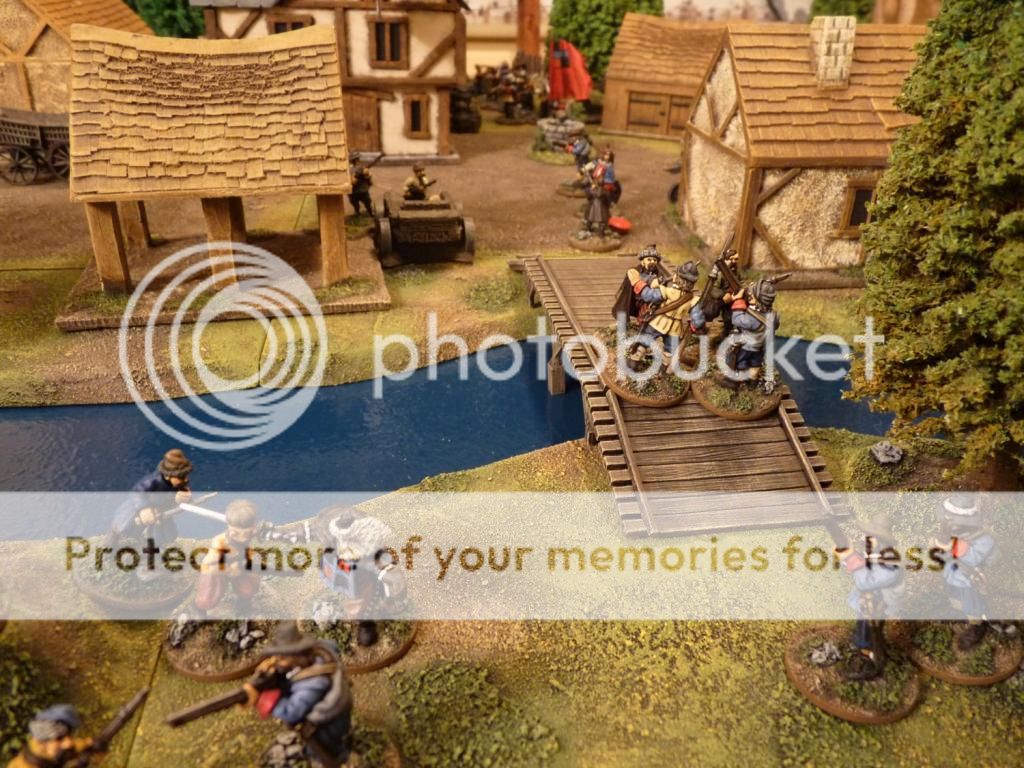
The Fleurians, being a nation with a long memory, remembered what had happened to their French allies at Blenheim and decided that the best time to attack was while the enemy’s cavalry was disordered after crossing water. With that, the Legion Hussars galloped forward and prepared to charge the first line of Medetian heavy cavalry as it emerged from the river Asta.


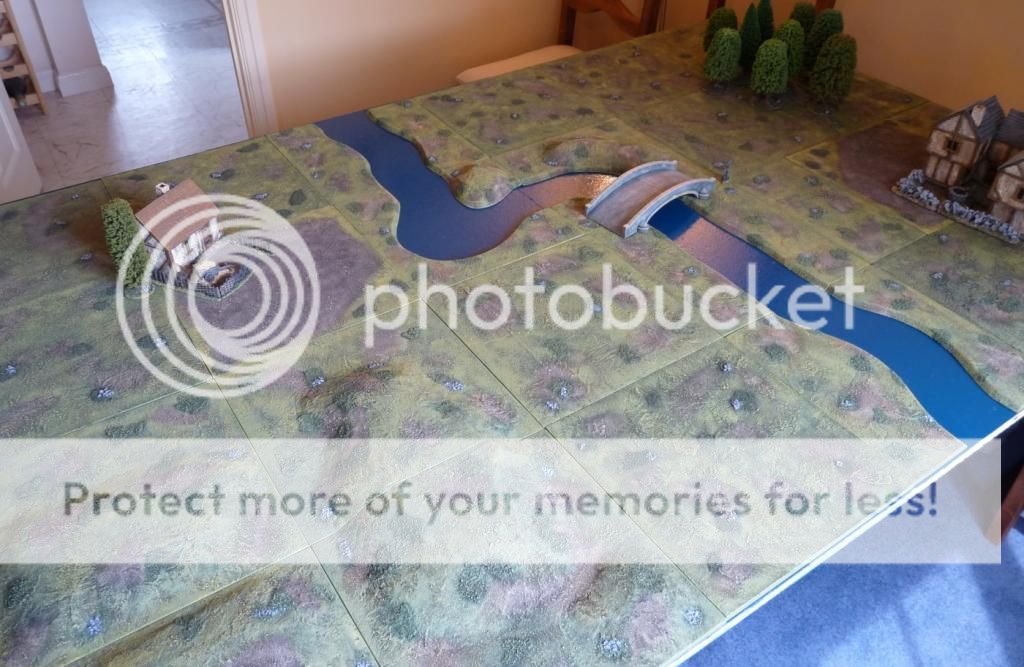
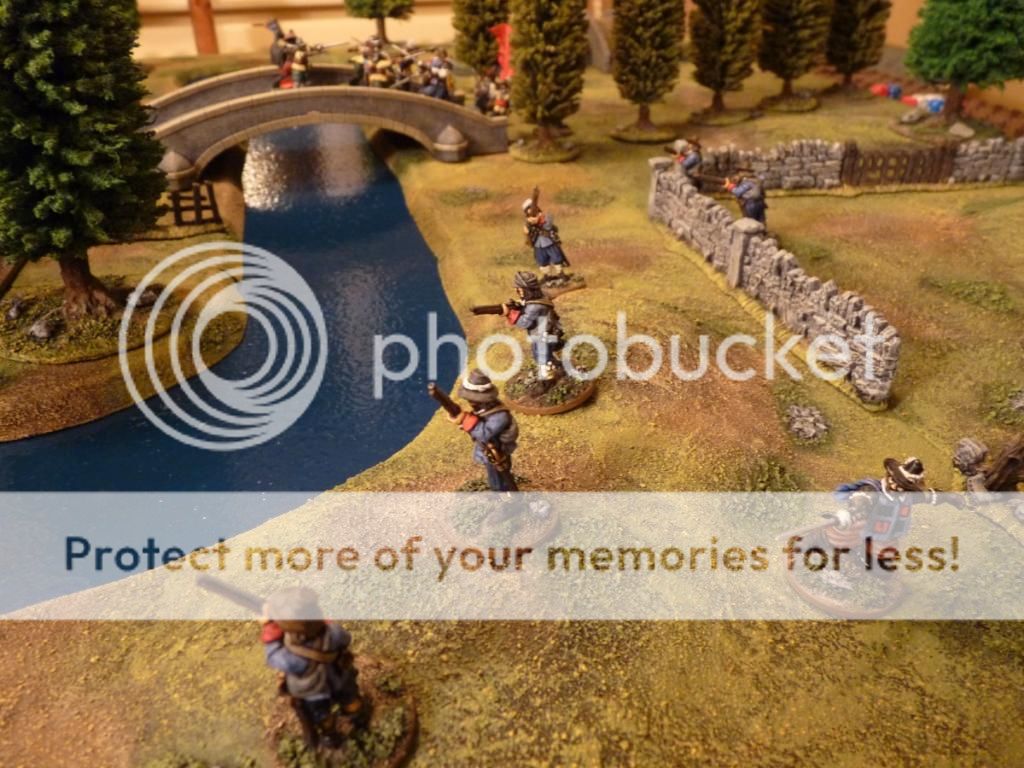
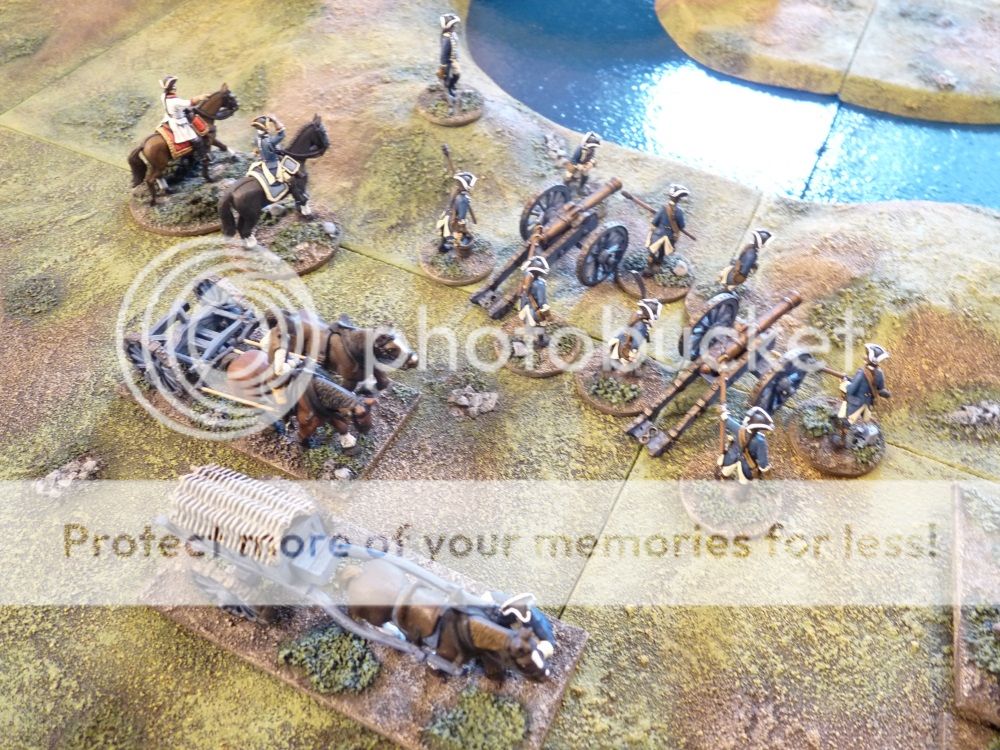
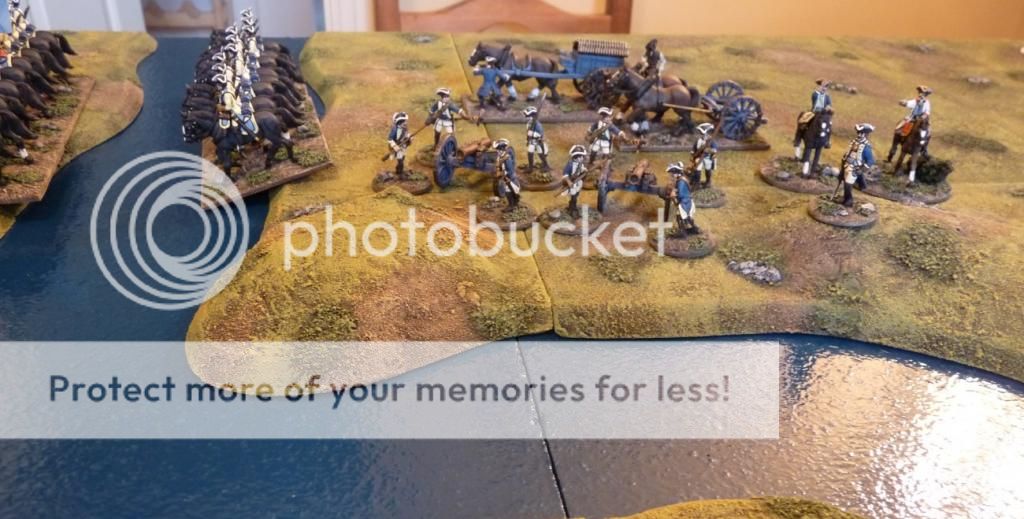
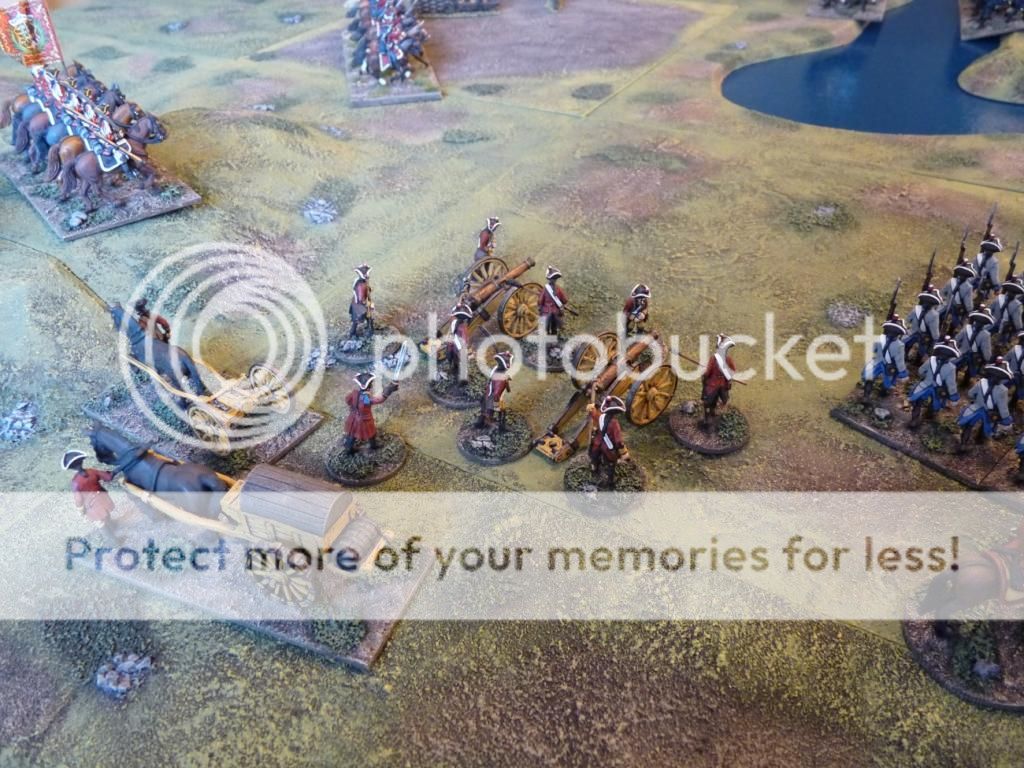
Pagani’s battery got into position overlooking the bridge and unlimbered swiftly, its commander seeking out the first target for its guns.


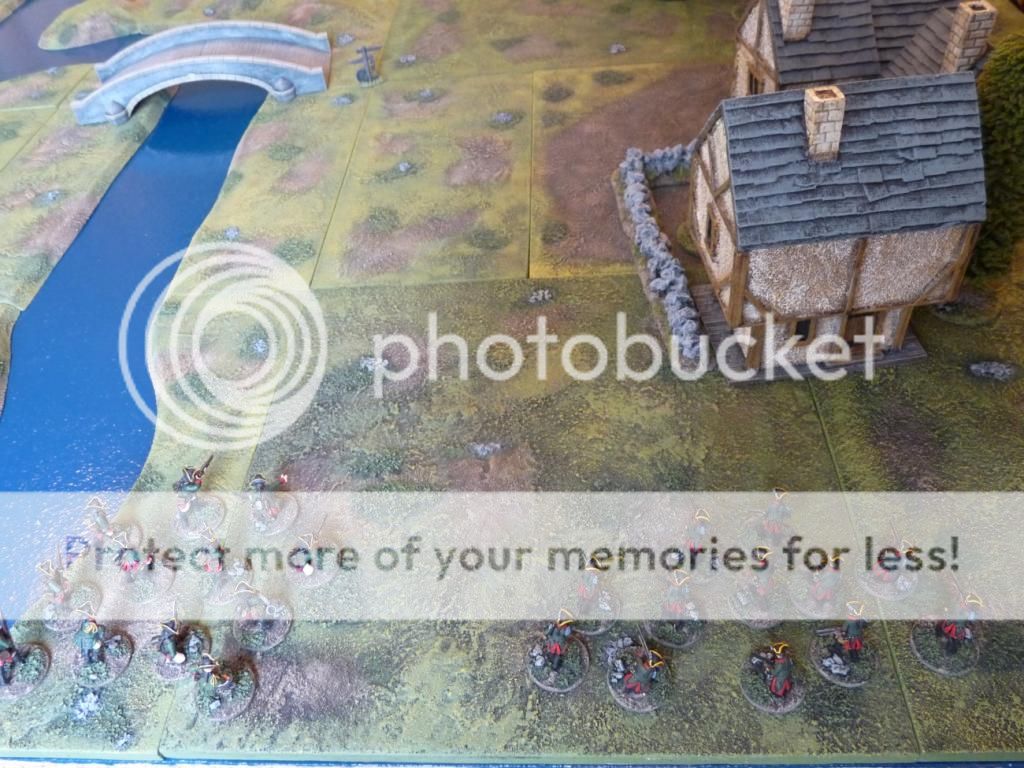
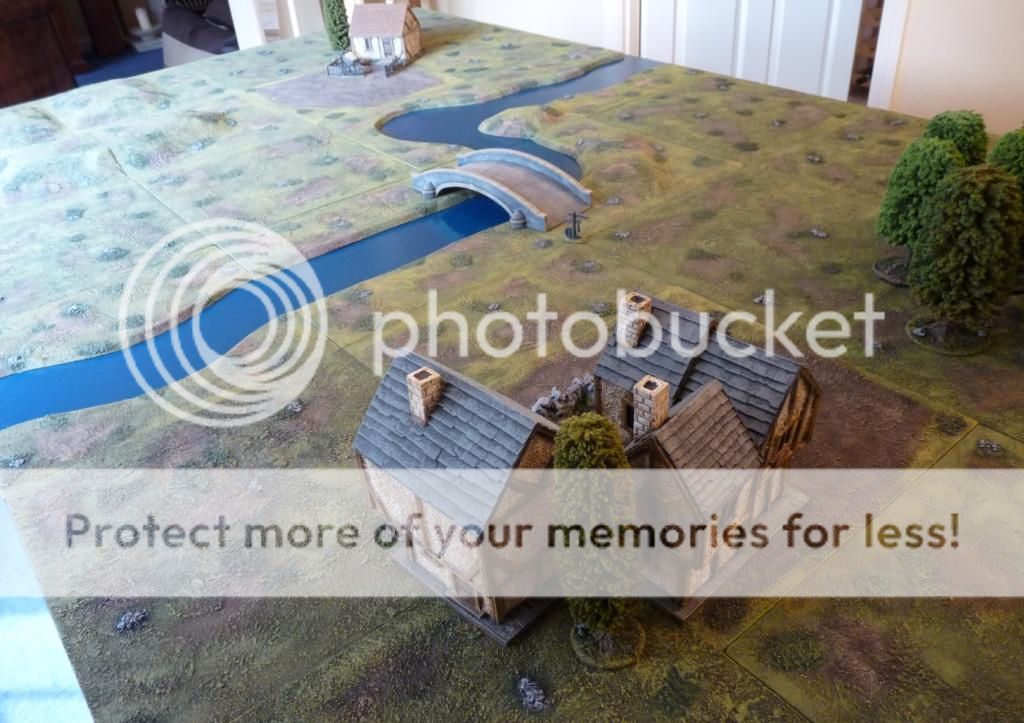
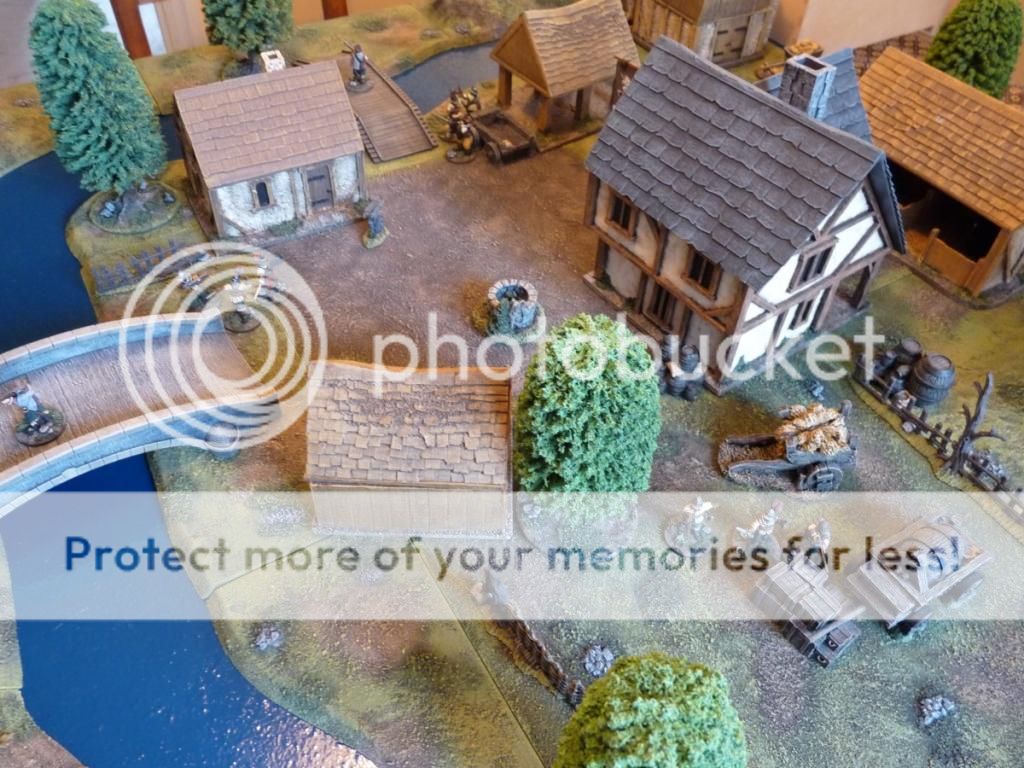
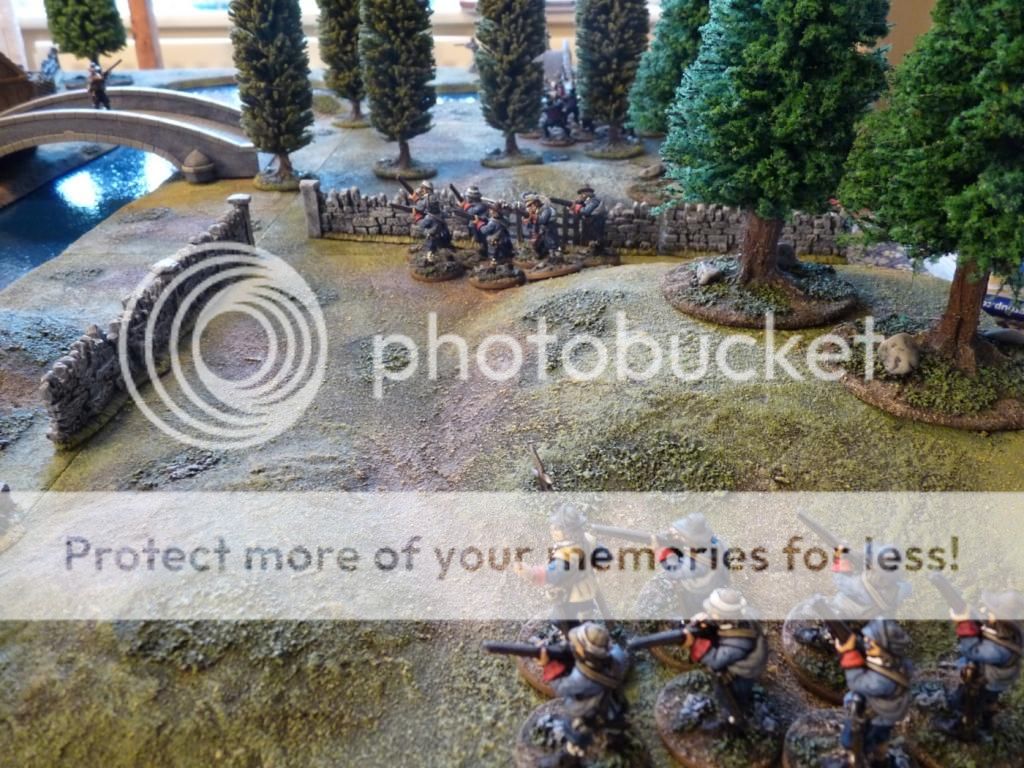
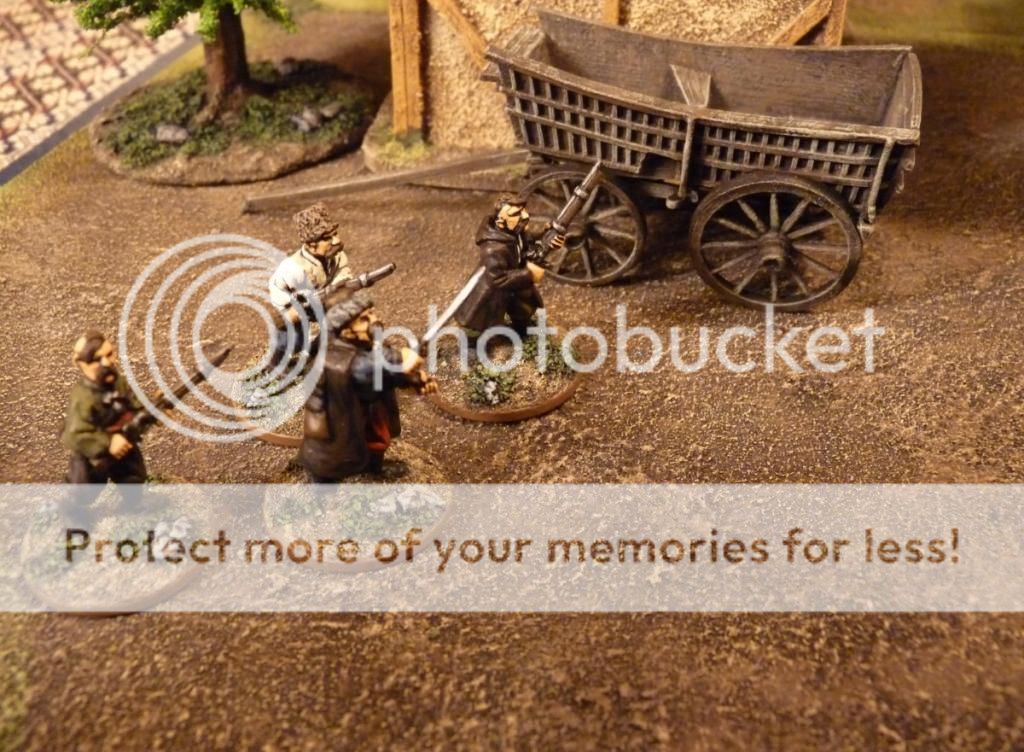
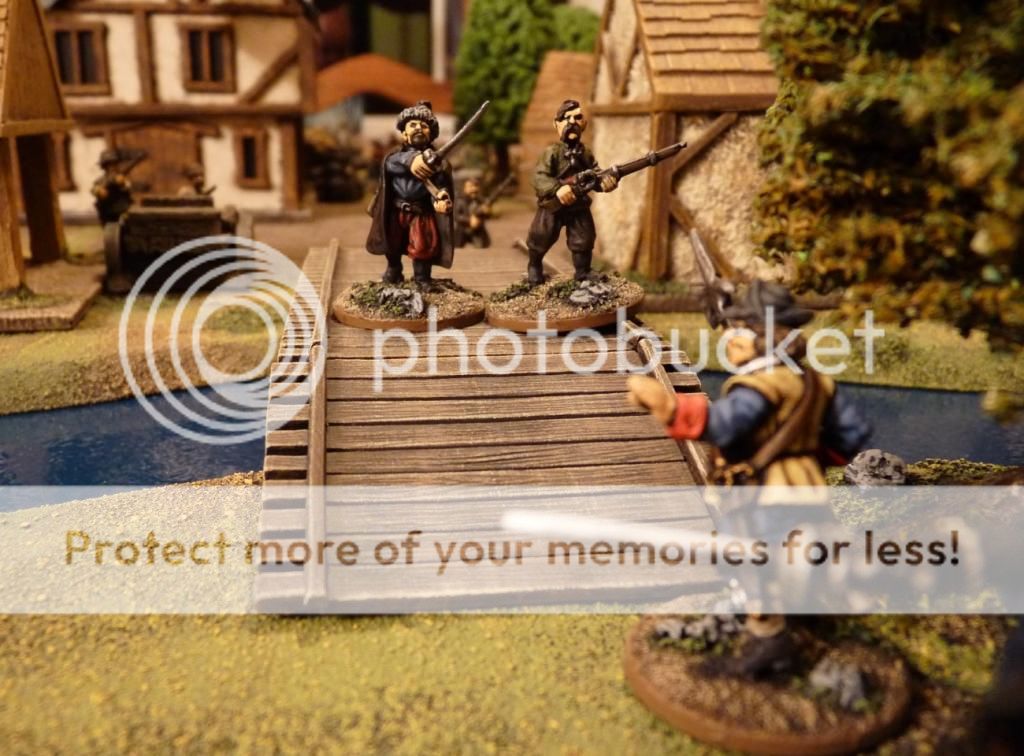
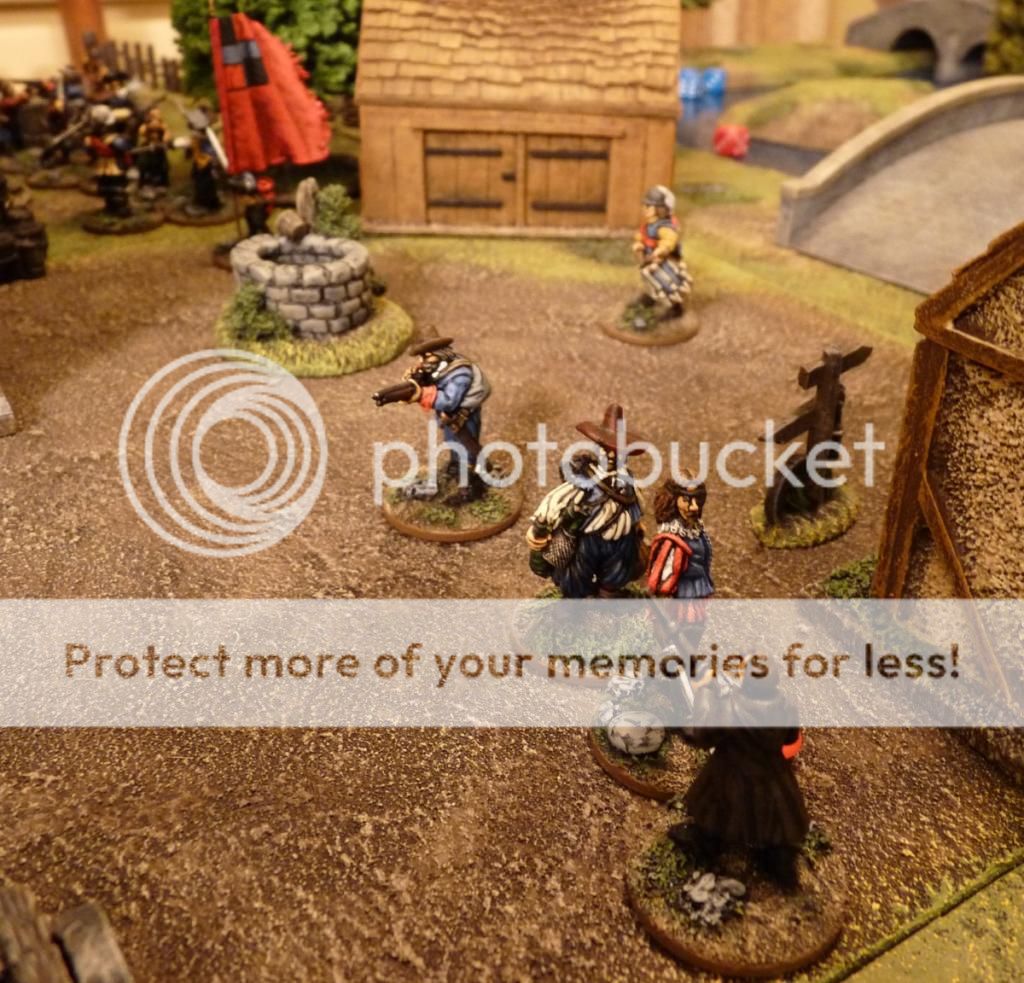
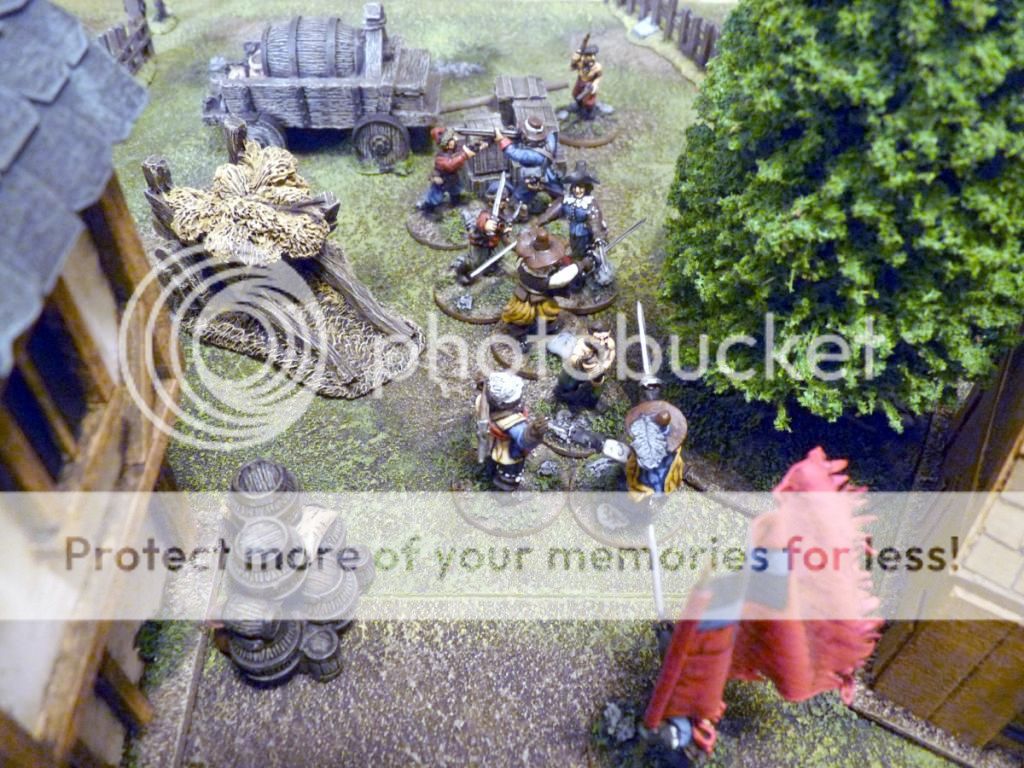
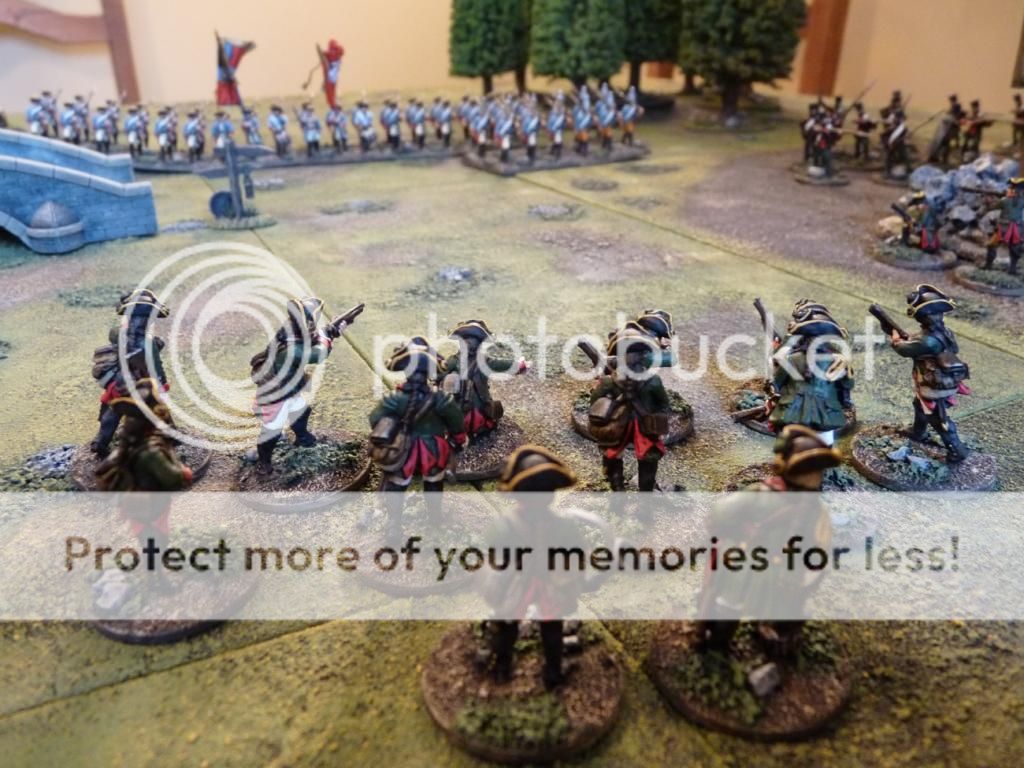
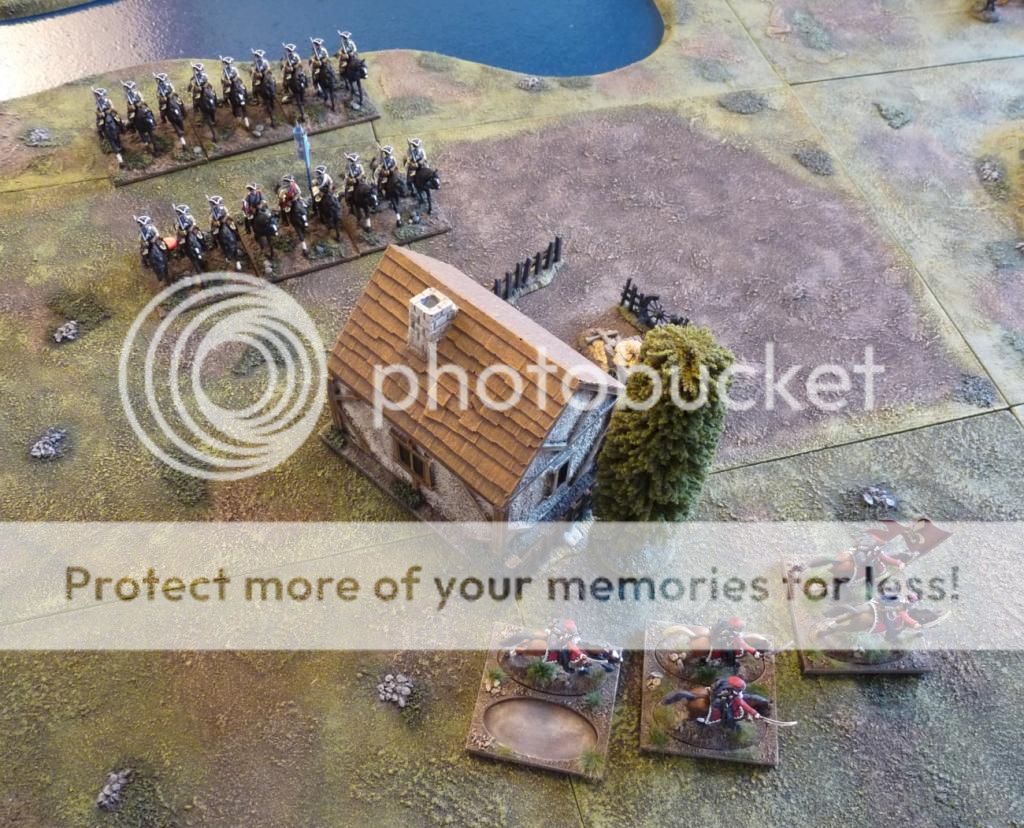
Meanwhile on the eastern flank, with lots of lighter troops involved, things were moving more quickly. Friant’s Jager company occupied Spurlacco and immediately took up defensive positions to repel the inevitable Medetian onslaught. It was certainly coming; TheWeissach Grenz soon emerge from the woods, supported by Sebastiani’s grenadier company – the perfect assault troops.


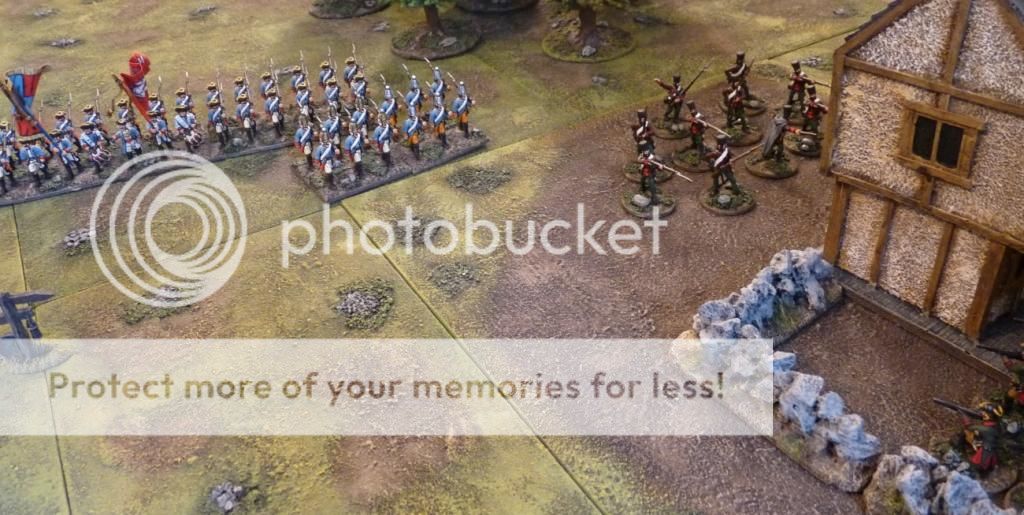
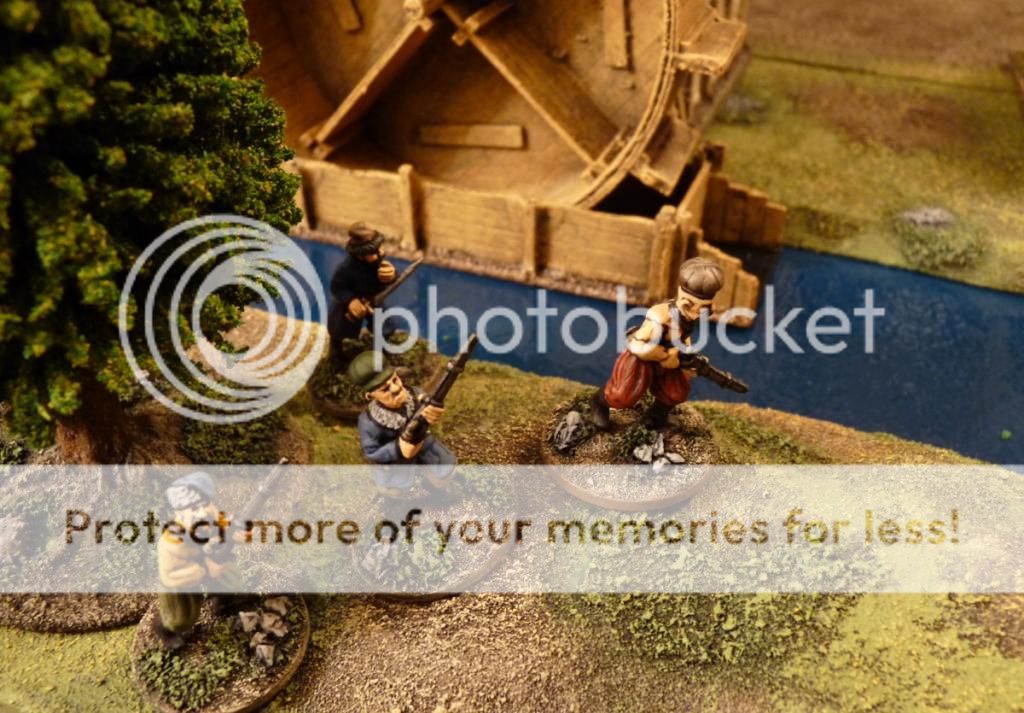
The Wurttemberg Jager moved up alongside the village, to provide its defenders with flanking support. With the enemy’s Braganza Regiment coming coming on inexorably it would be require careful decision making from the Jager commander on how long to stay and fight, and when to pull back. Shooting commenced at long range in an attempt to disrupt or at least slow the attack.

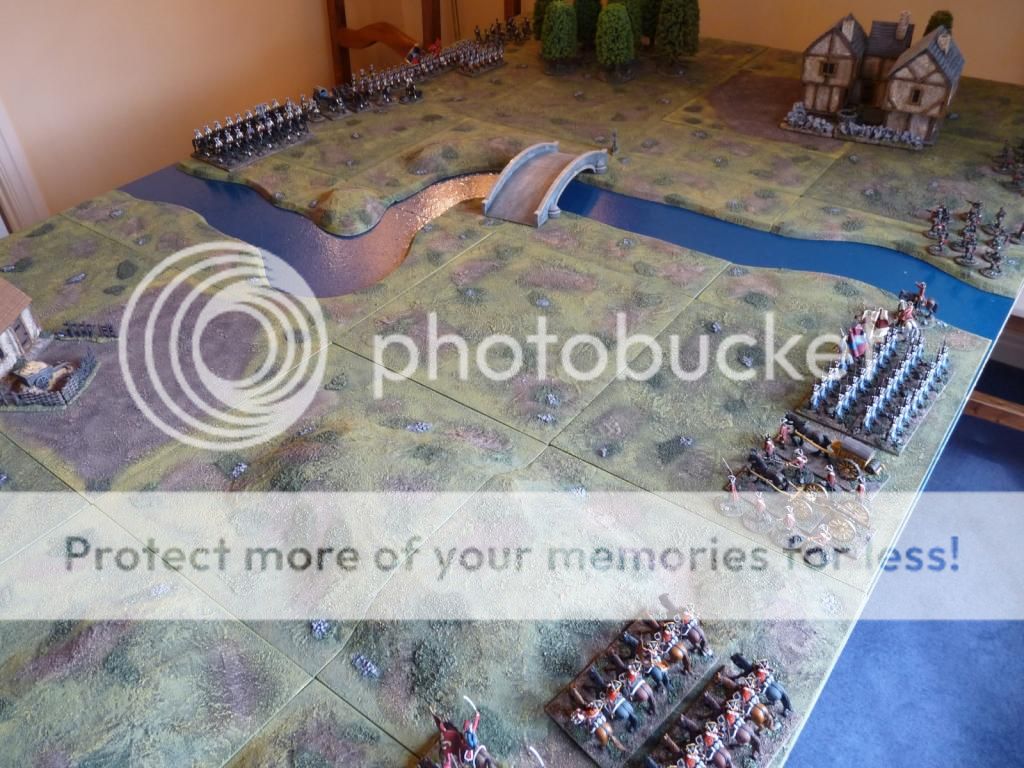
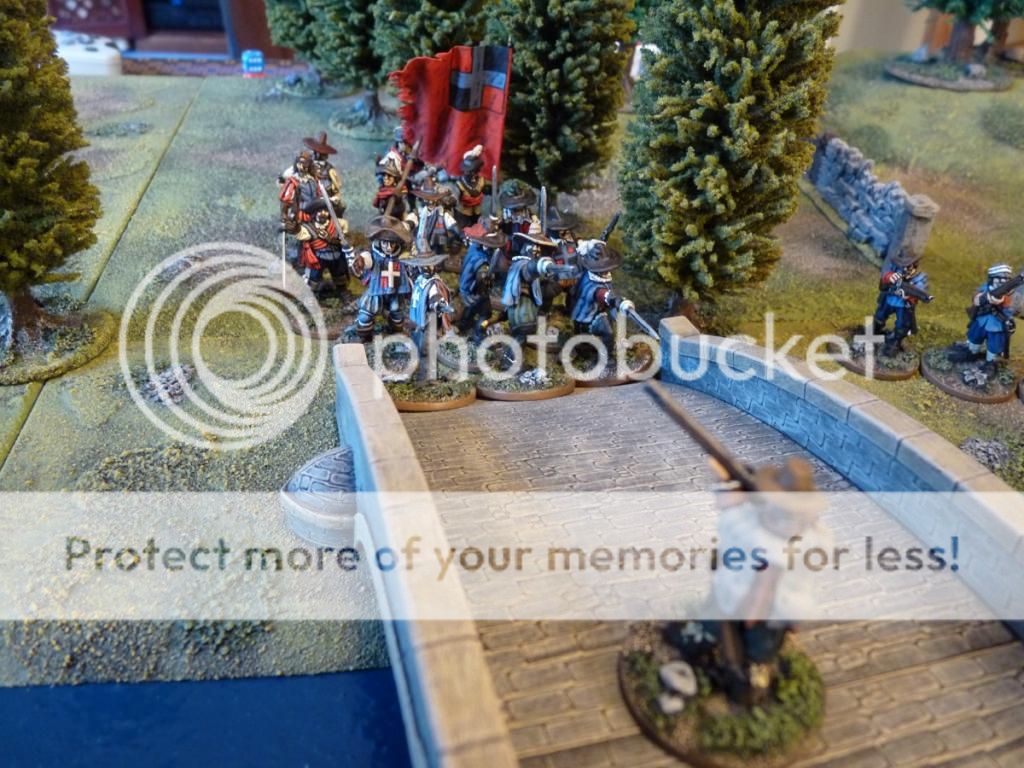
Across the River Asta, Rasalle’s battery had deployed in its central position. Although the respective batteries were within each other’s line of sight throughout the battle there was only to be a single attempt at counter-battery fire (when no other target was viable), which had no success. No, the artillery was to ply its deadly trade against horse and foot, as it was trained to do.

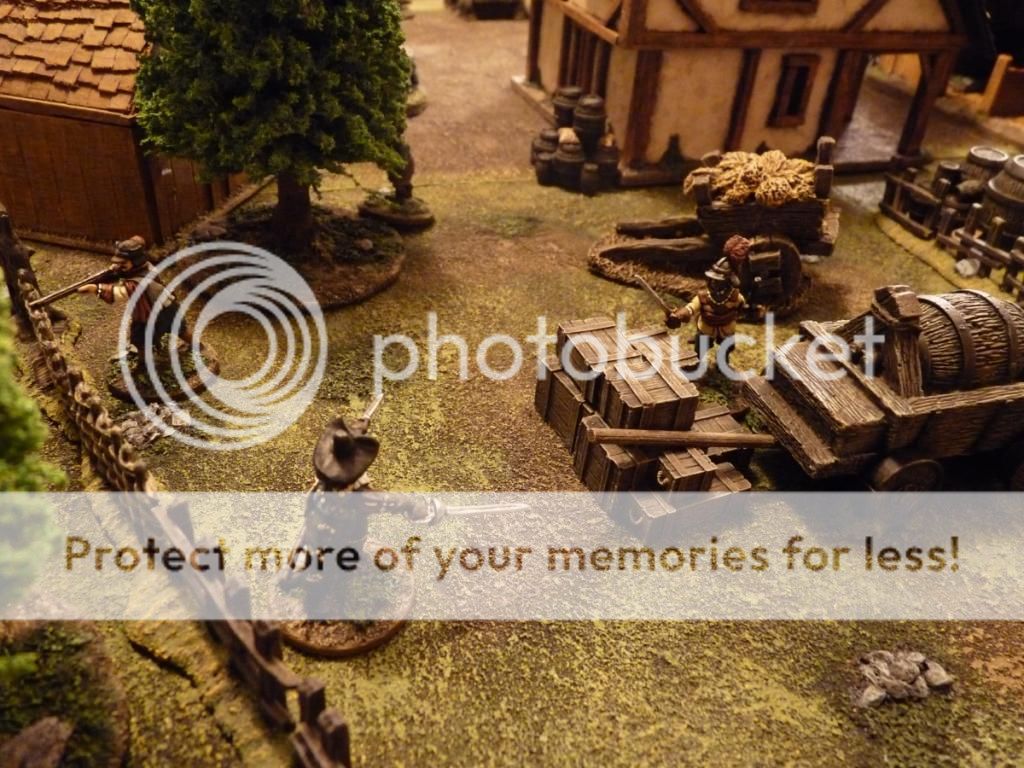
Skirmishing began on the edge of the village, with the safely ensconced Fleurians getting the better of their enemies in the initial exchange.

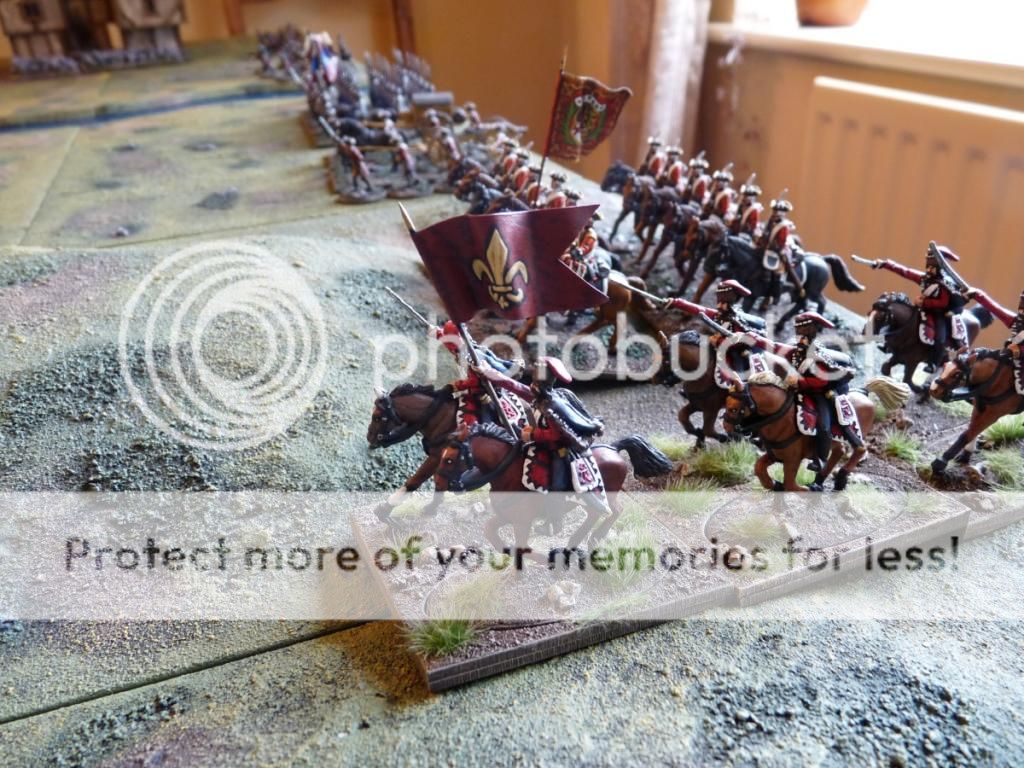
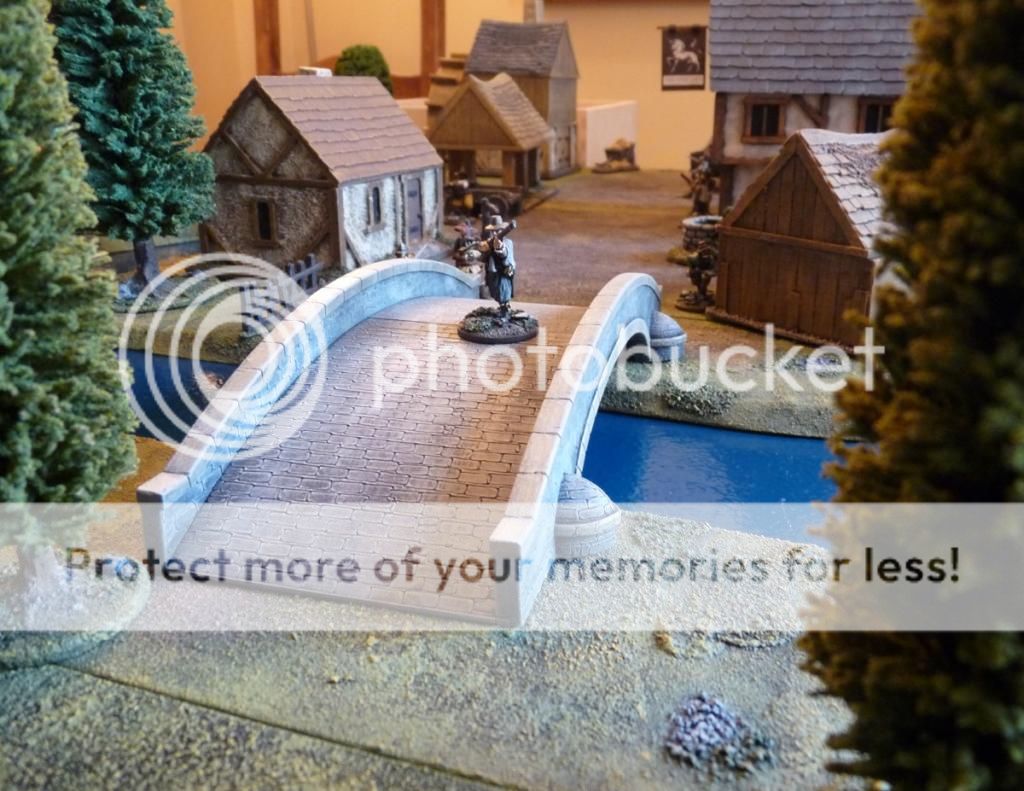
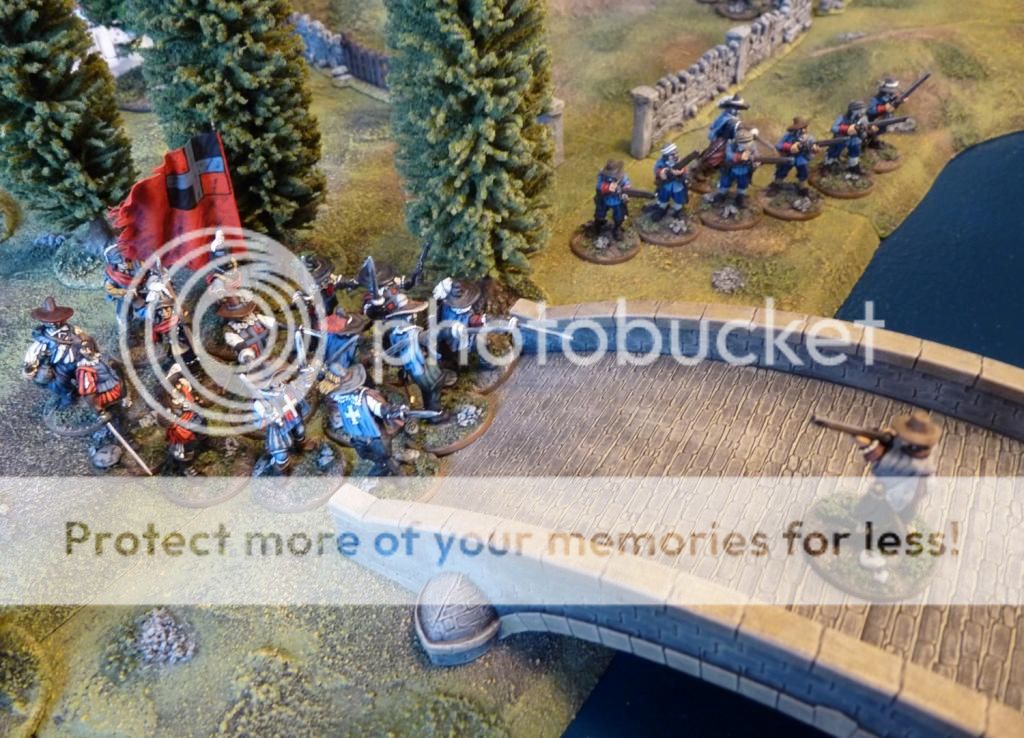
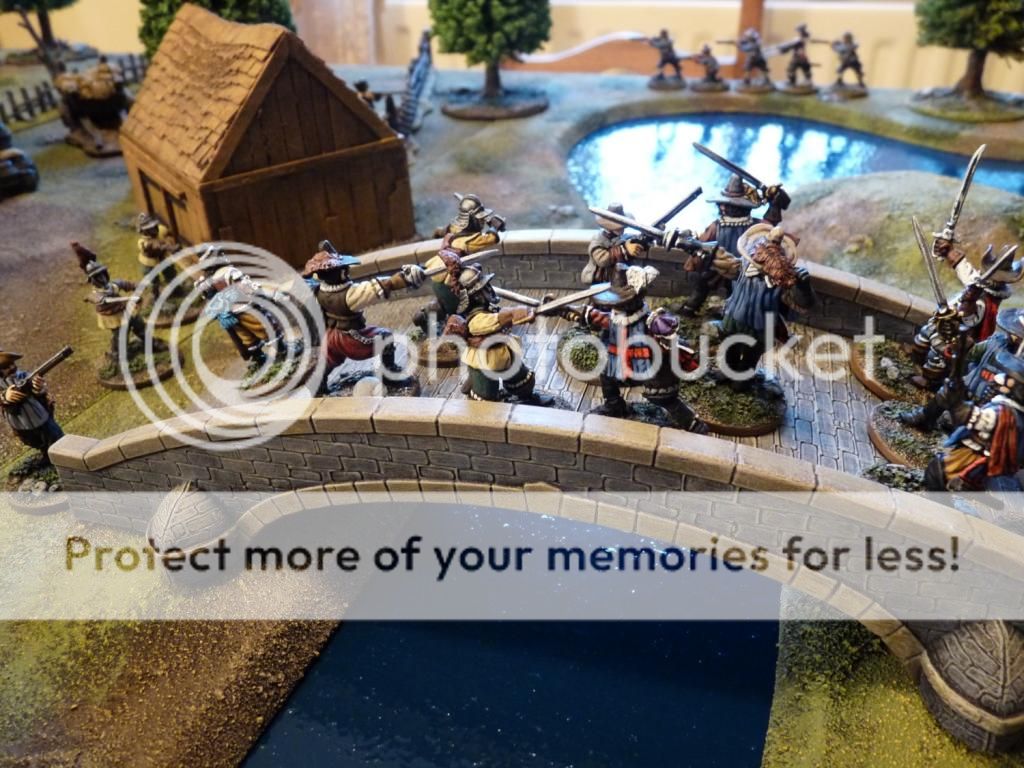
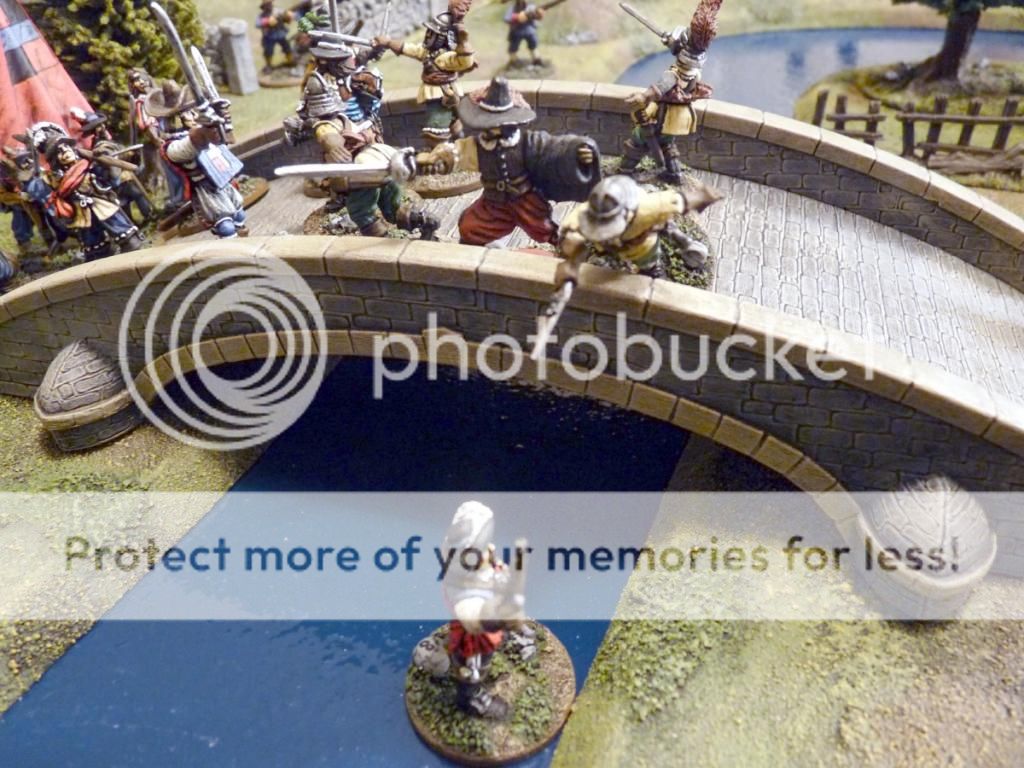
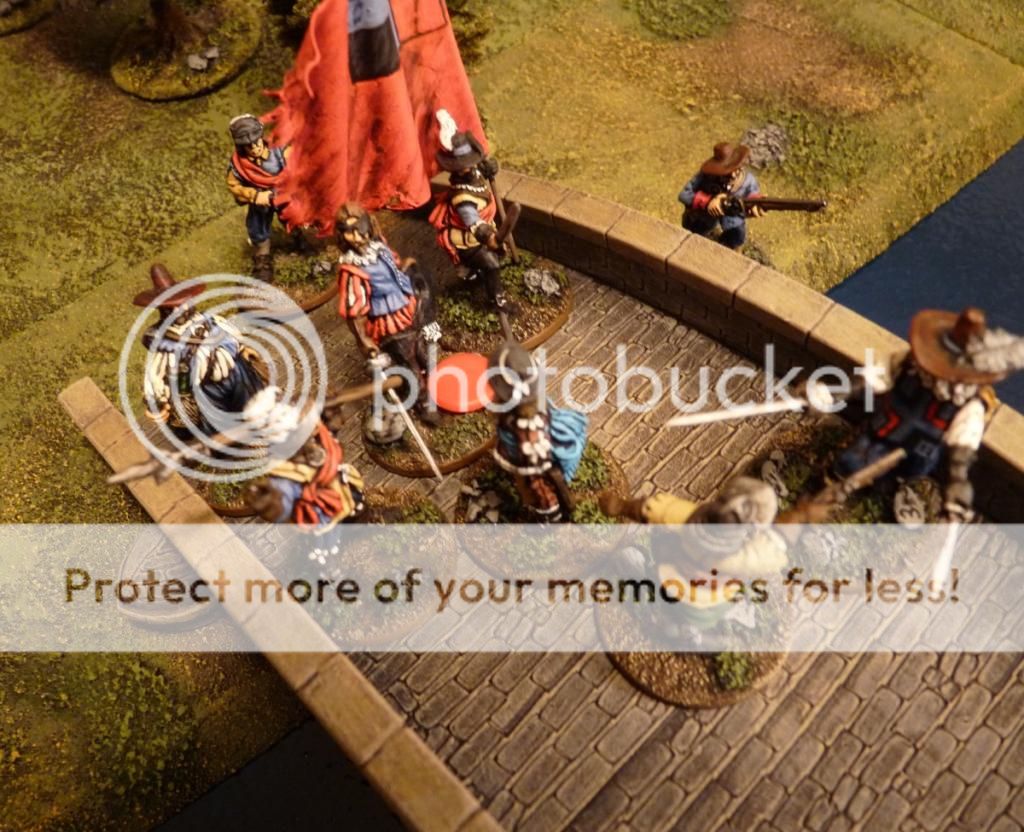
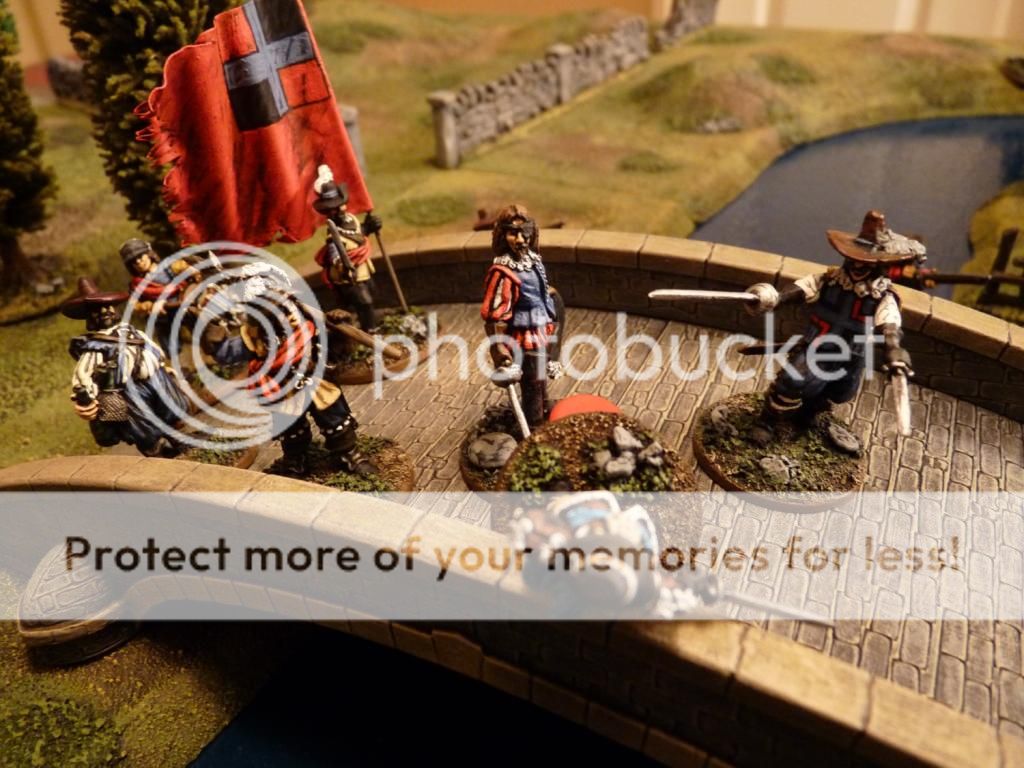
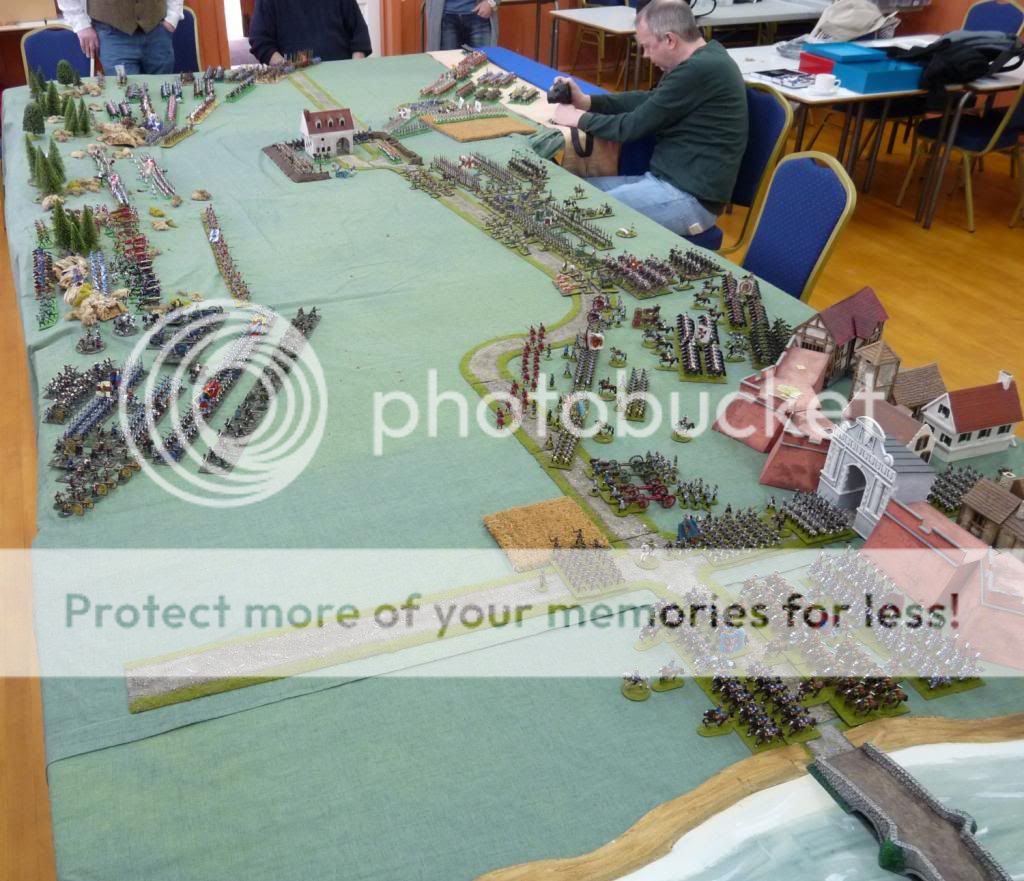
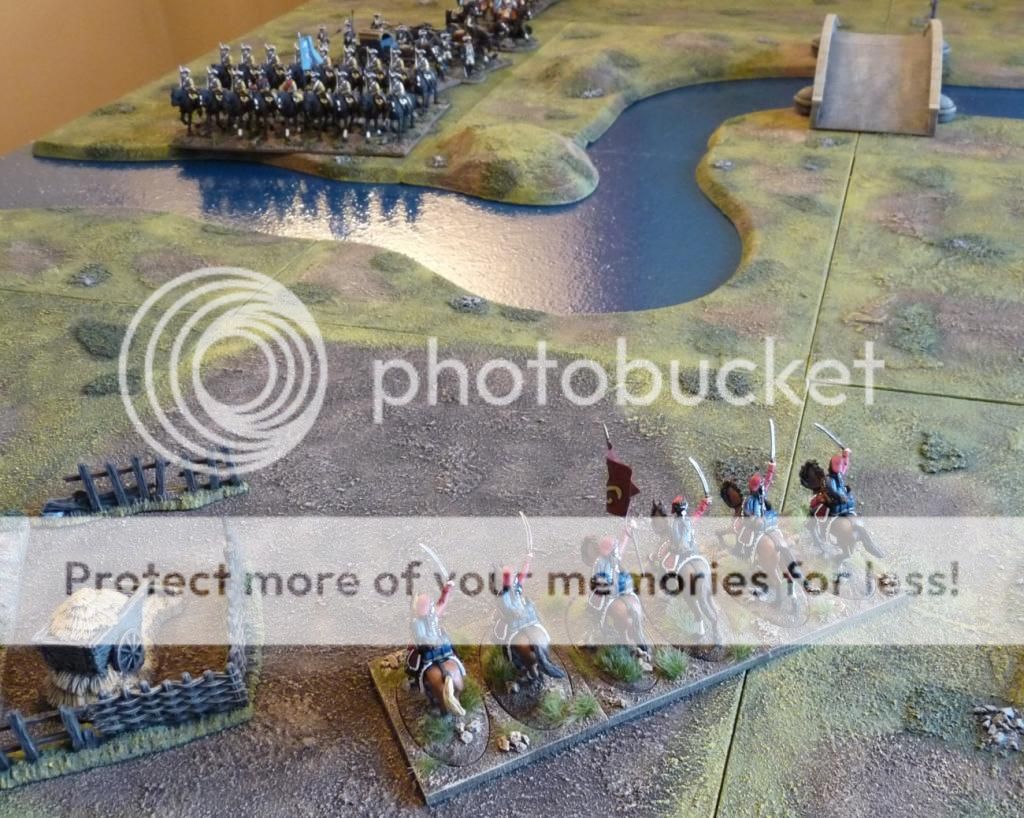
On the other side of the battlefield the lone squadron of Legion Hussars charged home into Sebastiani’s Cuirassiers as they pulled themselves up the river bank. Although outnumbered and outmatched they had momentum and elan on their side.


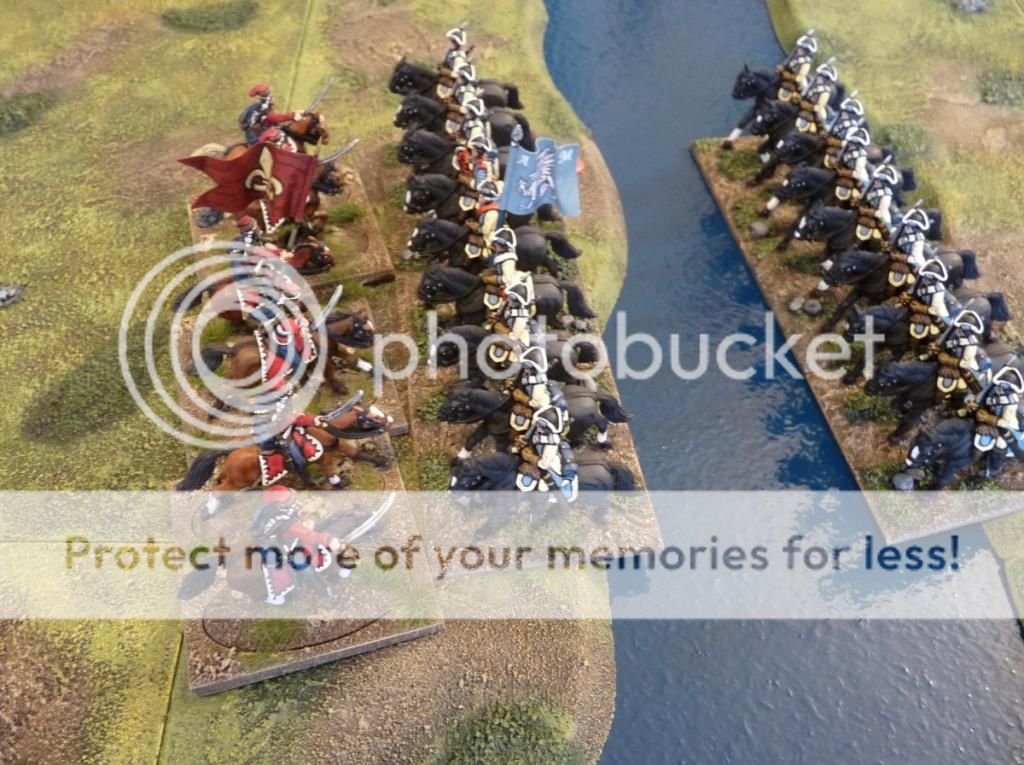
The clash lacked weight however, and the hussars effectively bounced off their heavier opponents, losing the fight by one.

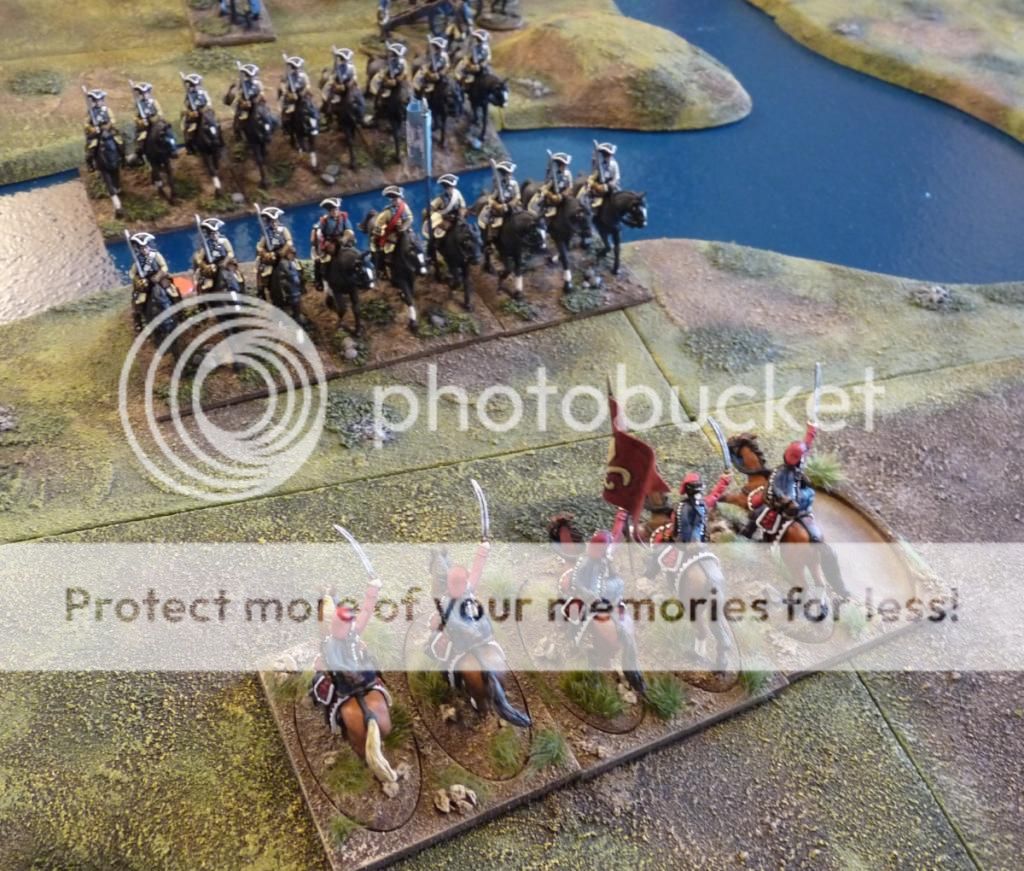
What had been a daring move of dash and courage soon turned to disaster as the hussars, lacking support and having failed to make a dent in the Medetian regiment, suffered a moment of doubt and made for the rear!

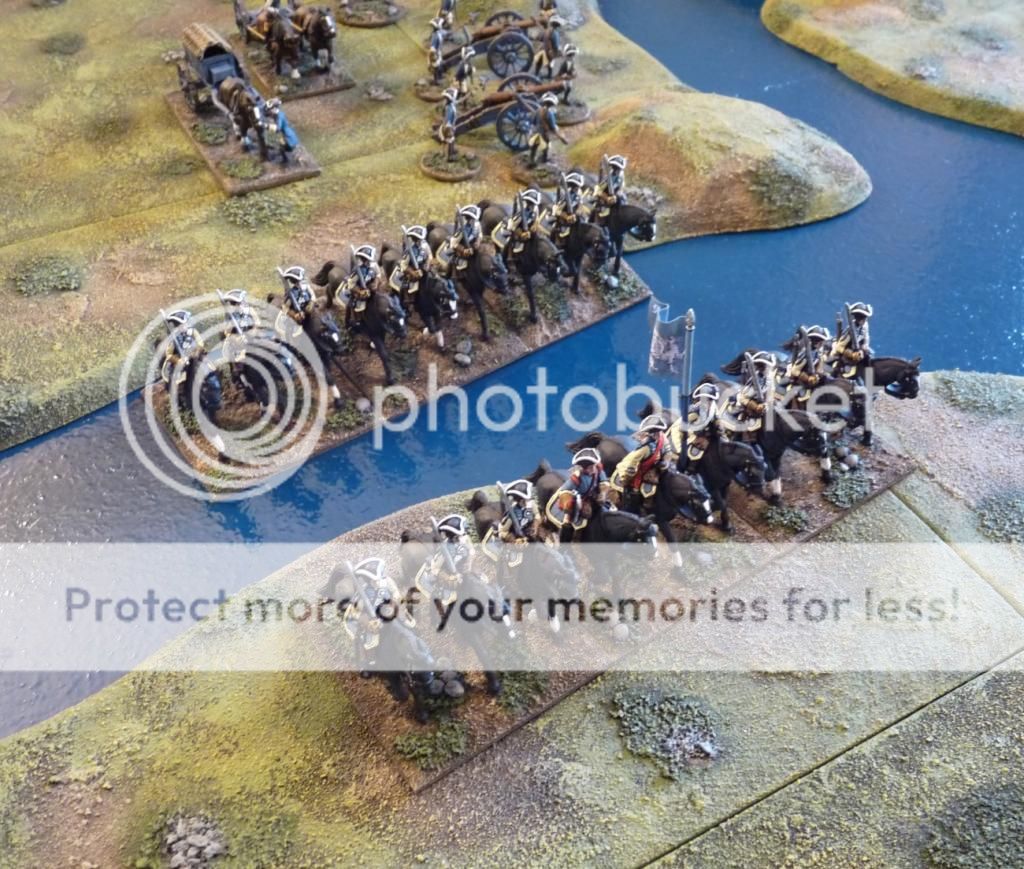
General Amore waved his hat and shouted ‘bravo!’ as his victorious cavalry brushed themselves down and dried themselves off. Although they showed restraint and didn’t take off after the retreating enemy, the Medetians had won a foothold on the enemy side of the river, just as their infantry on the other flank was pushing forward decisively between the village and the all-important bridge…

..and that’s where we need to leave things until the next installment. Will General Amore’s bold plan continue to succeed after such a good start, or would the slow but steady (and often tipsy) General de Bevue be able to turn the tables and provide Fleurie with an early victory in this campaign?

Ponti di Spurlacco Part 2 – Deployment

Generals Amore and Bevue both looked at the ground they would fight over, and in particular the bridge which was the key. The way the land followed the river on either side of the border meant that each advanced guard would be able to easily push forward on its left, while having to cross the river to engage on their right.

General de Bevue, Fleurian aristocrat that he was, despatched the last of his chilled Sancerre and, via his ADC, ordered his forces as follows:

The Bravence infantry regiment was to march swiftly in column towards the bridge and engage any enemy it found there or on the way.
Both Jager companies were to cross the river before arriving in the area and make an immediate beeline for the village of Spurlacco, to hold it against the expected Medetian assault.
The artillery was to deploy in the centre and support everything else, while denying the opposite bank to the enemy.
The cavalry was to operate on the left flank, to prevent the enemy from crossing and threatening the army from that direction.

General Amore sent off a final love letter to his most local mistress and, from the saddle, gave orders to his Medetian units:

All the infantry was to push forward on the left, capture the village and swing right to take the bridge. The Weissach Grenz would operate on the extreme flank, using the spinney (boschetto) for cover.
The artillery would dominate the centre, while the cavalry would cross the river at the start of the action and drive the enemy’s lighter cavalry from the area around the farm, before pushing onto the high ground and making the Fleurian position untenable.

Sensible plans all round then, with more boldness from the Medetians and a bit more ‘wait and see’ from the Fleurians.

Here are some shots of the forces moving onto the battlefield.

From behind the Medetian line:

Fleurian Hussars move ahead of the rest of the army:


Medetian Cuirassiers on the right flank, with orders to wheel right and cross the river:

The Bravence Regiment massed to rush towards the bridge:

Fleurian light infantry ready to make an early descent on the Medetian border village of Spurlacco:

General view from behind the Fleurian left flank, morning sun on the water:

Everything’s set up for the battle then, so I just need to find some dice and try to remember how the rules work! Battle report next.

Ponte di Spurlacco – A Classic Wargame Scenario Re-fought in the Medetian Wars

Having recently enjoyed a re-read Phil Olley’s short-lived but excellent Classic Wargamer’s Journal, I decided to fight a solo game based on the Spurlash Down scenario devised by Phil ( link ), which was in turn based on the famous Blasthof Bridge action from the book ‘Charge!’


Background
The Grand Duke and the King were at war… A good start, and a typical one for this sun-drenched corner of southern Europe in the 1750s.

Spurlacco is a small innocuous village in the borderlands between Medetia and Fleurie, with one interesting feature – its bridge over the River Asta, the border between our two frequent combatants. On the morning of the day in question armies from both sides are approaching the scene, with their advanced guards out in front. Both are tasked with seizing the strategically important bridge so as to allow the following main force to cross into enemy territory. The high ground to the west and the village to the east are also important for covering the advance, so need to be captured too.

Phil states that “I would go as far as to say it is a perfect scenario to aim for if you are starting out building two balanced Classic armies of Horse, Foot and Guns.”

Inspired, and now with just about enough troops to give it a go, I’m hoping to prove this assertion!


The Battlefield
The table is 6’x4’, dominated by a central river with some key terrain features on either side. Due to the style of my river bank sections, I had to square off the river with two 90 degree turns rather than replicate Phil’s diagonal river line. Even so, it retains the effect of dividing the battlefield into 2 halves at an angle. The river itself is fordable to infantry and cavalry along its length (at half speed), except for an area stretching about 9” either side of the bridge.

The hill (the original Spurlash Down) is now the Collina di Spurlacco, and reduces movement by half. The Spinney becomes the Boschetto di Spurlacco, and reduces speed to half, visibility by 6”, counts as light cover and disorders all but light infantry.

Vale Farm becomes Il Fattoria Valle and the village is of course Spurlacco. Both count as hard cover for occupants, which can be up to a full company of infantry (12 figures). As I wanted the village to be on the Medetian side of the river, (primarily so I could indulge in some Italian name changes!) I have inverted the map, so south is up and north is down.

Table plan, created while having a coffee, using my set of small card tiles that replicate my 1 foot square terrain boards. Some extra details added via Paint.net

The table set up and ready for our protagonists


The Armies
 
The Army of the Grand Duchy of Medetia
Advanced Guard under the command of General Amore (a veteran
of the campaigns in Byzarbia and Granprix).
Borganza Regiment                                              (Line
infantry, 36 figures)
Sebastiani’s Converged Grenadier Company       (Elite infantry, 12 figures)
Weissach Grenz Company                                   (Light
infantry, 12 figures)
Montanelli Cuirassier Regiment                            (Heavy cavalry, 3 squadrons,
                                                                              18
figures)
Pagani’s Field Battery                                   (Medium artillery, 2 guns, 8
crew)
The Army of the Kingdom of Fleurie
Advanced Guard under the command of the Baron de Bevue.
Bravence Regiment                                              (Line
infantry, 36 figures)
Friant’s Jager Company*                                      (Light
infantry, 12 figures)
Wurttemberg Jager Company                               (Light
infantry, 12 figures)
Rutowsky Dragoon Regiment                               (Heavy
cavalry, 2 squadrons,
                                                                               12 figures)
Legion de Fleurie Hussar Squadron                      (Light cavalry, 6 figures)
Rasalle’s Field Battery                                  (Medium
artillery, 2 guns, 8 crew)
*this unit is standing in for the recently painted, but
regrettably not yet fully based, Legion
skirmishers I posted about last month.
 
Rules
The rules I’m using for this battle are Henry Hyde’s ‘Shot,
Steel and Stone’ as used at the big multi-player games at Ayton. They should
certainly suffice for this little encounter.


This is the first solo game I’ve ever played with this
collection, and the first time I’ve used a 6’x4’ table at home, so it’s all
new!  Deployment next, and then the battle report to
follow..

A Raid Over the River Asta

I had an opportunity for a game yesterday, so while Brazil were struggling to overcome Chile I set up a small table in sight of the TV, opened a beer and played through a very enjoyable skirmish.

It was an excuse to use the new river sections and bridges for the first time, so I created a rustic setting with a winding river, crossed by no less than 3 bridges, leading to a small settlement based around an inn and a watermill. This would be a section of the border between Medetia and Fleurie, ripe for a raid by a Medetian force while it was only lightly garrisoned. Strengths were around 30 figures per side, although the Fleurians would start with their irregular allies (a dozen Cossacks) off table, with random arrival times and locations.


The garrison are alert, but don’t yet know where the attack will come from

A lone sentry on the main bridge.

He didn’t need a roll to spot the main Medetian force when it appeared moments later!

Meanwhile groups of musketmen were dashing forward on the left.

One at a time or all together! That’s one brave Fleurian. He was determined to get at least one shot off (he missed) and didn’t last much longer, as might be expected.


Flanking support was coming into position as the main force stormed the bridge.

Although they’d been caught out by the speed of the enemy’s initial approach, the Fleurians had managed to re-order themselves enough to be able to contest the main bridge while bringing musket fire to bear on the Medetian flanking groups. Both sides charged into the fray and it was a bloody affair on the bridge, with the Fleurians getting the better of the first clash. Lieutenant Valoran distinguished himself by killing no less than 3 enemy swordsmen in hand to hand fighting as well as a 4th by a superb pistol shot when an intrepid Medetian tried to wade the river below the bridge.

While the main action on the main bridge was attracting most of the defenders’ attention, the Medetians were pushing round on both flanks too.

The fighting was getting fierce everywhere, and the Fleurians were driving forward on the bridge despite the odds against them. Medetian swordsmen were falling in droves under the flashing blades of the Fleurian officers.
Attempts to cross the wooden bridge near the mill were met with deadly force, and the Fleurian’s irregular allies were just about to arrive to shore up the right flank.


The Medetians hurried to send more men that way too, and the action was by now spread over much of the table as the Medetians closed in from 3 directions.


Things were coming to a head on the bridge though, and the two leaders finally met amidst the swirling melee.
After a couple of rounds Captain Corleone vanquished Lieutenant St Denis and the game was up for Fleurie.


After that there was still some tough fighting as the Cossacks entered the fray, but it was pretty much a mopping-up exercise for the Medetians. A few final pics:
v
Game over, with the Medetian flag planted in the middle of the settlement:


Lots of fun, and good to use the new terrain and scenery. I’d like to start developing a bit more of a storyline campaign with these games, possibly with some mild ‘character’ development, but I haven’t decided on anything yet. Stand-alone skirmishes are good in the meantime, however, so no hurry.

A Mighty Tussle in Central Europe

Well I had an excellent Sunday (actually the previous Sunday but I had trouble getting this post to publish and have been away for a few days). Although it was a pleasant drive, and lunch outside was very nice, the superb weather was incidental. That’s because I had the great pleasure of a visit to John Ray’s where I played the part of the Duke of Wurttemberg in the next instalment of John’s continent-spanning campaign.

The game was titled The Battle of Schwabisch Hall, a town (despite its name) that the Duke and his army of Wurttembergers and assorted allies from the Empire were attempting to defend. John had prepared a very interesting and challenging scenario, with the Prussians under Frederick himself launching a typical Alt Fritzian flanking attack on my outnumbered forces. A big treat for me was the invitation to contribute a brigade of Medetians who served as Bavarians in their pale blue. Accompanied by 2 small units of my heavy cavalry and a company of Jäger, 3 ‘Bavarian’ battalions formed up alongside John’s lovely troops as the Prussians marched into view.

I won’t describe the battle itself as that’s John’s area, but I will say that it was very enjoyable, hugely entertaining, and it contained a few surprises! My Cuirassiers in particular had a tremendous time, and honour was served pretty much all round (although a couple of Prussian Dragoon colonels might be in for an ear bashing..)

As with my previous visit, the rules played out very smoothly and provided believable results throughout, along with a fair amount of tension.

John was a very gracious host and I’m grateful to him for the effort he put into the game. A well thought out 14×7 (in places) foot table with lovely scenery and 1,200 figures didn’t put itself together!  And everything fitted neatly into the campaign narrative which explained why the armies were where they were, and what the strategic situation was; very important for deciding on battle plans and potential lines of retreat should things go awry.

Altogether, with the battle and the excellent company, I had a great day and came away freshly inspired to face the rigours of my own painting schedule. I’m already looking forward to the next (big) game later in the year.

Legion de Fleurie – Light Infantry

Further to my previous post on the development of this imagi-nation formation, since the Ayton weekend I have made some progress. I have continued to put off doing the main battalion (through laziness), so it was the light infantry next. The tremendous Minden Legion d’Hainault grenadiers chose themselves for this and I have kept the uniform blue and red in line with my plans for the Legion as a whole. Basing comes next of course, but I’ve run out of pre-mixed plaster so have posted anyway. I intend to add a complementary unit of Crann Tara Royal Ecossais advancing figures (purchased at Triples) as the uniform is very similar and I think they’ll work well together.

Eventually the Legion de Fleurie will muster the following:

Commanding Officer
1 Infantry battalion (30 figures)
2 Light infantry companies (12 figures each)
2 Hussar squadrons (6 figures each)
1 Light gun (3 crew plus limber)

I’ve thought about also having a battalion gun with the main infantry unit but for now I think the light field piece will do.

The first picture suffers for light a bit, but hopefully you get the gist.


A Bit of Structure

With the Ayton painting deadline behind me I have been enjoying the freedom to dabble with various mini projects. Some scenery items have included finally (the receipt says September 2010!) constructing the GW Fortified Manor kit I’ve been intending to do. Say what you like about them, but this is a superb model and decent value – at least at 2010 prices! I’ve left most of the building components separate so I can use just part of it or change the configuration as I want for specific games. I’ve also added 2 floors in the tower so that figures can be placed within on the various levels. Although it’s a fantasy model, I left off many of the more ‘Warhammer’ options to keep it as generic as possible and it will see use in 17th century skirmishes and no doubt 18th and 19th century battles and games of Sharpe Practice. Painting it will be a bit of work however..

I also spent a few minutes (literally) painting this guard hut from Warbases that I’d bought and assembled a while ago. It’s nice and simple and will be a nice scenery piece to add to the table on occasion.

I’m also currently working on some pack animals and a bit of livestock – just for variety!

Triples

It must be 10 years or more since my only previous visit to the Triples show, but yesterday the weather was fantastic enough to demand a drive in the countryside to Sheffield, only 45 minutes away for me.

As a show, it was OK, much as any other I guess. I arrived in the afternoon and it was fairly quiet although there did still seem to be quite a few people around. The lighting was better than that at Salute (not saying much) but not great. Still, I was able to see what I wanted to see and the lack of crowds made it that bit easier.

Two priorities for me to see were Bruce Weigle’s St Quentin FPW game in 6mm and The Ilkely Lads’ Zorndorf. Both were superb and worth the trip alone. The scenery and sense of accuracy/reality of the St Quentin table were among the best I’ve seen, and it was nice to see some Heroics & Ros figures in use rather than the inevitable Baccus you tend to see these days. The battle had been played through earlier in the day so all was quiet by the time I was there. There was to be a re-play on Sunday.

I specifically sought out James Roach (Olicanalad) at the Zorndorf game as he’d recently painted a commission for me (the Saxon Rutowski Dragoons posted previously) and I hadn’t met him before to say hello. James was very welcoming and we chatted for a few minutes before confirming some further commissions that he’s going to fit into his busy schedule. The game itself was very impressive and it was great to see close up the large table covered in James’ work. The cavalry especially, and the hussars in particular, were awesome, as were all the hand-painted flags. Definitely eye candy!

Shopping wise I did pretty well. Some bargain old Ospreys (The Black Watch, Sudan armies and Ottoman armies), a handful of paints and some brushes, as well as a few figures – not something I generally buy at shows actually. I picked up a couple of packs of Perry’s from Dave Thomas, and a pack of Copplestone 15mm fantasy (bears and shape changers) for something completely different. Best of all was a good chat with Graham at Crann Tara (and Bob who was there at the same time), who in between discussion on future release plans, future games and flag commissions, did me a very generous deal on some superb Royal Ecossais who will be accompanying my Legion de Fleurie when they are done. Graham is a real enthusiast for the hobby and always a pleasure to spend time with. His corner of one of the halls was fairly warm, so he would definitely have earned the beer he was promising himself when he got back to his hotel!

A good trip out then, a bit of spending, and some familiar faces.

A couple of pics of the St Quentin game (I forgot to take any of Zorndorf, but James will have better on his blog anyway):


Ayton 2014

Ayton 2014 – What a way to fight a war!

What can I say? Once you’ve spent 12 months anticipating an Ayton wargaming weekend; planning, collecting and painting your forces, and looking forward to meeting up with good friends again, expectations are pretty high. Fortunately this year’s event, as with all the previous ones, hugely exceeded those expectations.

Although I’d promised myself there wouldn’t be a frantic rush at the end this year I was still finishing off the last of my new hussar unit, St Angelo’s Ghosts, on the Friday morning – just as I knew deep down I would be. Those Perry plastic French hussars do take some painting..! Fortunately I’d packed all the rest of the army a day or so before, so once the paint on the bases was dry I was ready to set off.

My journeys there and back were very easy, considering the first one was on a Friday afternoon before a bank holiday. I stayed at the Lodge which was very comfortable, and for some reason I had a suite including a full kitchen and four poster bed. Not bad for the standard room rate! Most people gathered at the hall from about 5pm onwards, which allowed time for the tables and scenery to be set up for the 2 opening battles that would be fought on the Saturday. It was also a great opportunity to say hi to everyone again, catch up generally and of course admire each other’s newly painted figures. To say there were some stunning units present would be an understatement – the photos of the event will do them better justice.

Everyone took pictures during the weekend and many have been posted on the LAW forum. They’re well worth a look. Mine are here for day 1 and here for day 2
Henry’s YouTube videos are excellent too, giving an overview of the final battle and capturing the atmosphere very well.

Here are a couple of tasters from the final battle just to add some colour to this post:


In brief then, our team of Simon, Paul, Ken and Dave M (and Peter on day 1 as the Duke) were invading Granprix to recover it for Duke Zigor. We even had a plan, worked up over the preceeding weeks under Henry’s umpireship. Opposing us were Mark, Iain, Richie, Mike, Andy (and Peter on day 2 as the King of Grenouisse). Due to the way the campaign progressed, we pretty much achieved our aim of approaching the capital, Pescadrix, from east and west simultaneously and this resulted in the 2 battles on day 1. There were also naval actions taking place off the coast and these has some impact on the success and timing of our amphibious landings. A final show-down between the 2 main fleets is to be played out by Henry who will hopefully let us know how things panned out. Hopefully we will be victorious!

On day 1 we clearly outnumbered our enemies in the east (things appeared more even in the west) but that didn’t prevent Iain and Andy fighting a tough defensive battle for the coastal village, inland hills and the plain between them. We prevailed however and pushed them back on the capital, following up for the big denouement before the city walls on day 2 (actually set 2 days later after some R&R and a brief march). Here, after a much harder battle, we were again victorious and captured the King to round off the liberation of Granprix in glorious style. I’ve written up an account of the campaign from the Medetian perspective for Henry and am happy to see what use he makes of it before posting anything in more detail here.

Despite winning the war however, the true highlight of the event was the social side with its cameraderie, fun and wargaming in the best possible spirit. Everyone was clearly there to ensure that their opponents got as much enjoyment from the games as they did themselves. I played against Andy and Iain on the 2 days and more pleasant, good natured, company you could not hope for. My allies, Paul and Simon, were equally enthusiastic and fun to play alongside.

There were also a few other games staged by members of the group who wanted to attend, but had plans of their own that they’d been working towards. Tim and Tim have got seriously into the world of proper toy soliders (54mm etc) and put on a couple of stunning games over the 2 days. Albions vs Europans in the age of empire was superb, as was Aussies vs Japanese in the Pacific. The scenery on both ocassions was excellent, fittingly so for the sumptious armies on display. Bob and Heather played a couple of good looking VBCW games too, with the usual interesting forces being deployed (it appeared to be police vs ladies). They were clearly enjoying themselves and everyone was welcome for a natter.

Of course no Ayton weekend would be complete without copious food (courtesy of the Dennison Arms) and copious beer (the social club next door to the hall this time), which was all consumed against the backdrop of very enjoyable wargaming conversation. Naturally next year’s game was a hot topic and I’m pleased to say that we’re returning to the 19th century for this one, and in rather hotter climes..

Thanks again to everyone for attending and putting in the effort and creativity, in particular Peeler for organising things again, and Henry for his fantastic umpiring and background work. All in all a superb weekend with a great bunch of guys. Roll on 2015!

To Horse!

More cavalry for the Medetian expedition to the battlefields of Granprix at this weekend’s Ayton event.

First off, some older cavalry which I’ve finally gotten around to equipping with lance pennons. This is the El Z’teeth regiment (RSM Ottomans) who fought in the sands of Byzarbia a couple of years ago. I contacted GMB Designs to ensure I got some pennons in red and blue (turned out the Silesian Landwehr Uhlans were what I was after). I touched up the white paper edges with appropriate daubs of Vallejo. They enhance the unit nicely and give them a little bit more uniformity – important now they’re off to war in Europe and everyone else is in serried ranks of splendour!

Then we come to a brand new regiment, the Saxon Rutowski Dragoons, who are in the pay of the Kingdom of Fleurie and who will be fighting alongside the Medetians in Granprix. These are Minden Miniatures Austrian dragoons, and lovely figures they are too. After talking with John Ray I came round to the idea of having some historical units among those of my imagi-nations, and this unit appealled both due to its interesting (but not necessarily glorious) history and its attractive colour scheme.

I have had these painted by the very talented James Roach of ‘Olicanalad’ fame, whose painting on his blog has always impressed and inspired me. James kindly fitted these in among other larger commissions he’s working on and has produced a fantastic looking unit. All I’ve done is base them. Little is known about the flag this regiment would have carried, so James created one based on his research and understanding of the Saxon army of the period. I’m delighted with it and hope the first picture does it justice. More unpainted cavalry will certainly be winging its way to Ilkley soon!


Obviously with all of these recent additions, I am going to be at serious risk of ‘shiny new unit syndrome’ at Ayton, but at least pretty much everyone else is too!